Drop the Straps in Phases: Warm-Ups First, Top Sets Last

Straps let you hold more than your hands can hold on their own.

Straps let you hold more than your hands can hold on their own. Used on every set, they also remove most of the work your grip would otherwise do, so it stays where it was while your back and legs keep getting stronger. The answer to when to stop using lifting straps depends on which sets and which lifts you mean, so this plan removes them one set type at a time, in a fixed order, with a pass/fail check before each move.

Why “just go raw” costs you reps and “strap forever” costs you grip

Dropping straps on every set in one week usually makes grip the limit on every pull. A deadlift set that should end because your back is tired ends because the bar rolls out of your fingers. Your working weight drops, your reps drop, and the muscles you are training for get less work than they did the week before.

Strapping every set has the opposite cost. The pulls feel strong because the straps hold the bar, and your forearms and fingers get little stimulus. When you finally pick up a bar without them, the gap between what your back can pull and what your hands can hold is wider than you expected.

Phasing the change keeps both problems small. Your grip gets work on the sets where it is least likely to ruin the session, and the sets that decide your training quality stay strapped until your hands can carry them.

The order is based on grip demand and fatigue:

  • Warm-ups are light and early in the session, so your grip is fresh and the load is low.
  • Lighter sets come next. Anything clearly below your working weight is a safe place to go raw.
  • Working sets are your main sets at the planned weight and reps.
  • Top sets come last because they are the heaviest sets, and a missed rep there costs the most.

Three signs your grip is ready for phase one

Most lifters on straps can start phase one sooner than they think, because warm-up weights are far below what their hands can hold. Check these three before you begin:

  1. Your hands recover between sessions. Your palms are not torn or raw, and your forearms are not so sore that they affect the next pull.
  2. Your warm-up weights stay in your hands. Pull your usual warm-up sets without straps. If the bar does not slip or force a regrip, this sign passes.
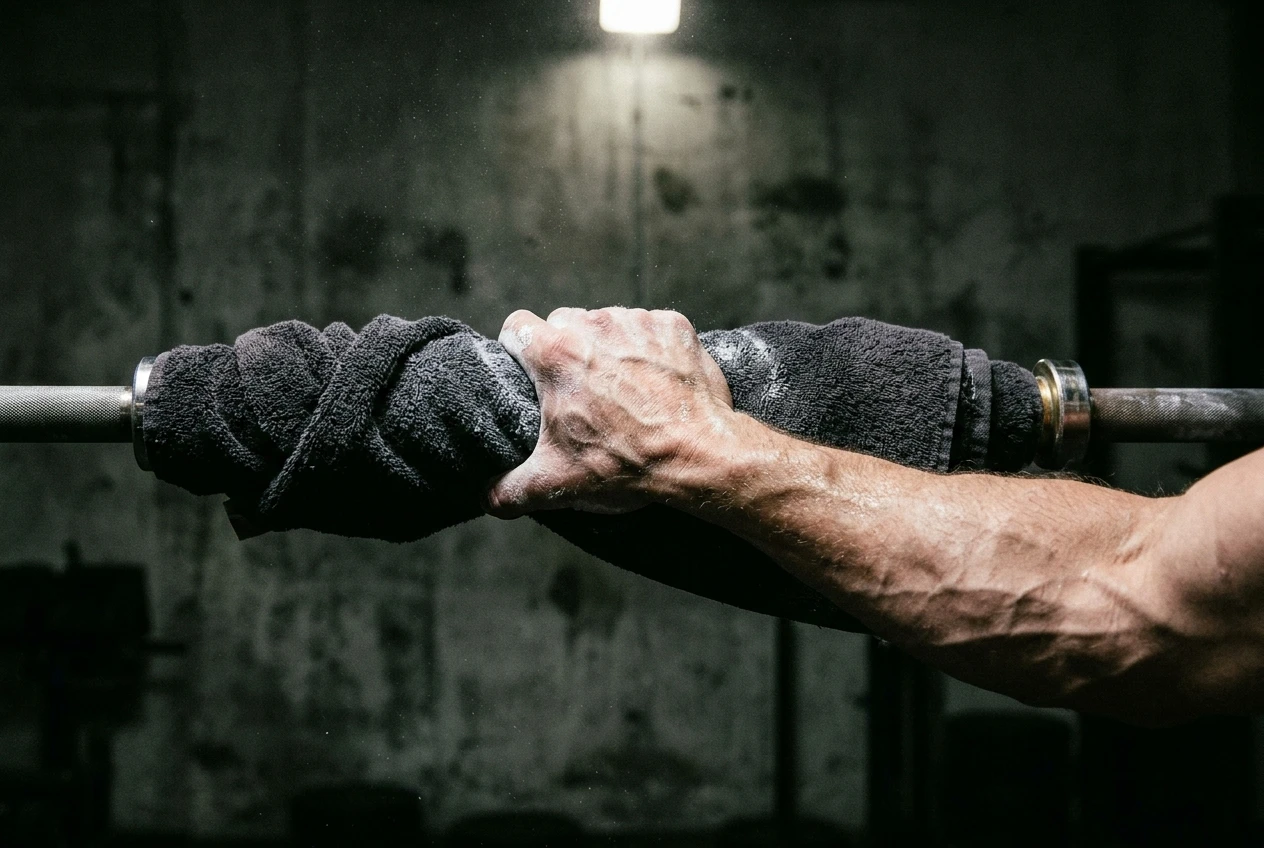
  3. You can pick a raw grip and keep it. Choose between double overhand, mixed grip and hook grip. Hook grip, with the thumb pinned under the fingers, is uncomfortable for the first few sessions but holds more than double overhand. Mixed grip is common on heavy deadlifts. You need one style you can set up the same way every time.

If one of the three fails, fix that first. Chalk, a few weeks of hook grip practice on warm-ups, or a rest from skin damage is enough in most cases. Phase one costs you almost nothing in training quality, so the bar to start is low.
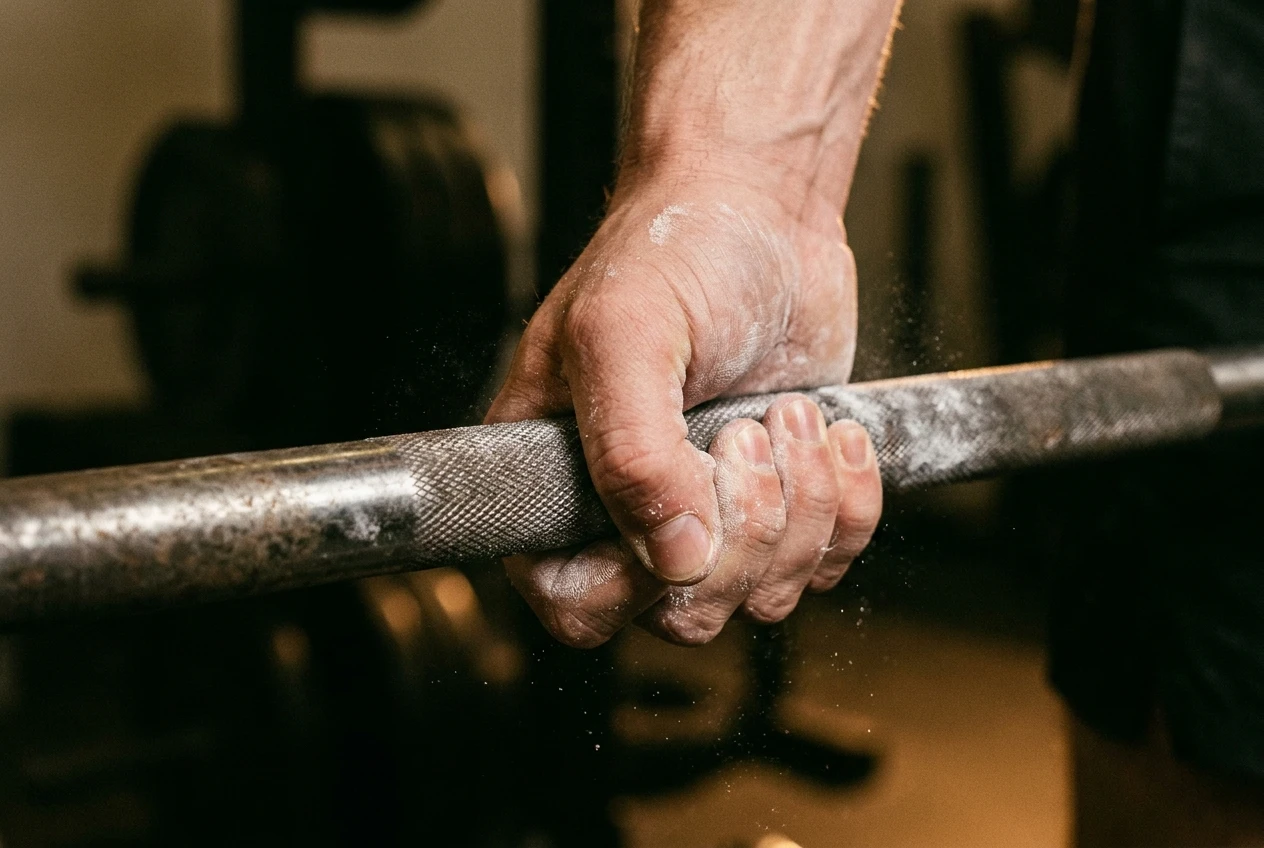
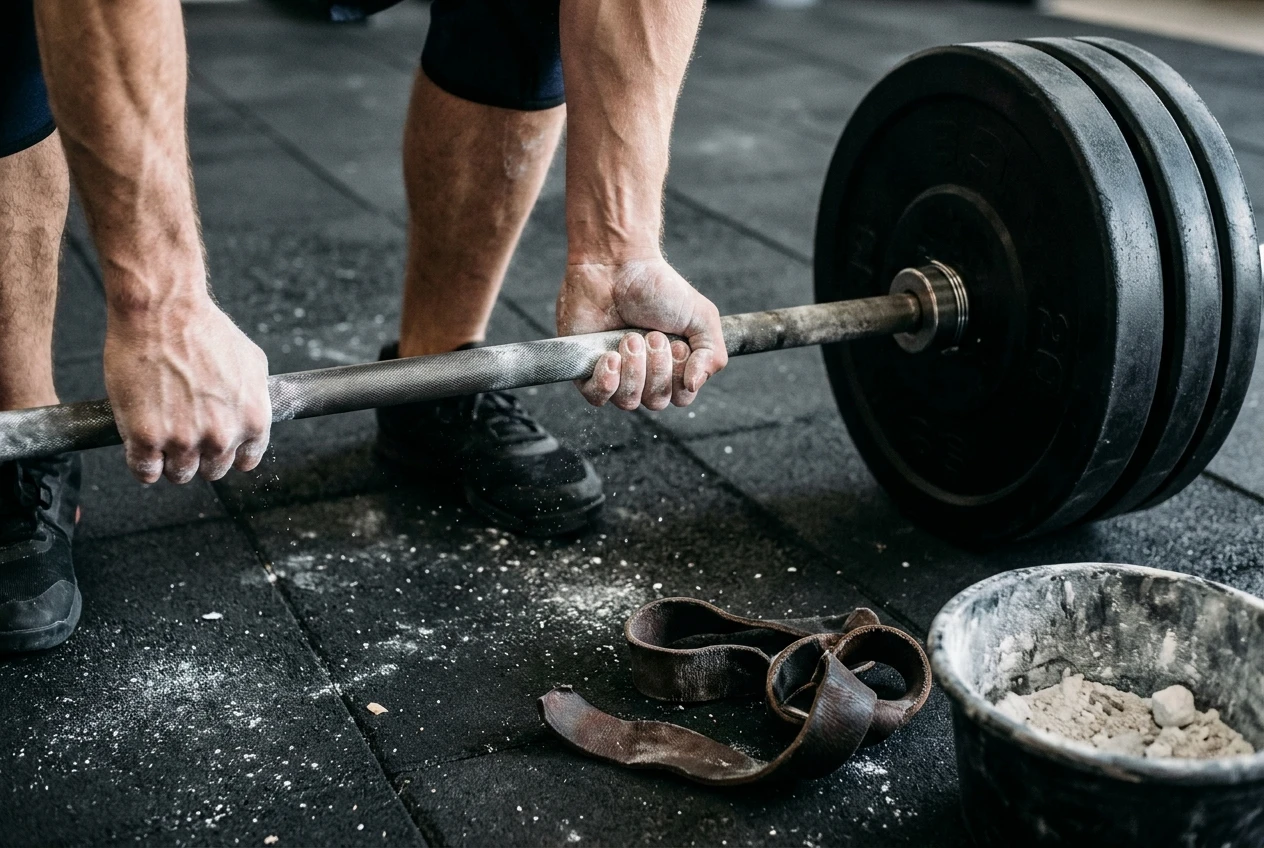
Close-up of a lifter's hand gripping a knurled barbell with hook grip, thumb pinned under the first two fingers, chalk dust on the palm and bar, in a dim gym with warm side light.
Drop the Straps in Phases: Warm-Ups First, Top Sets Last 6

Phase one: raw warm-ups and lighter sets, straps on the heavy work

In phase one, every warm-up set and every set clearly lighter than your working weight is raw. Straps go on for working sets and top sets, exactly as before. Your heavy work is unchanged, so your numbers should not move.
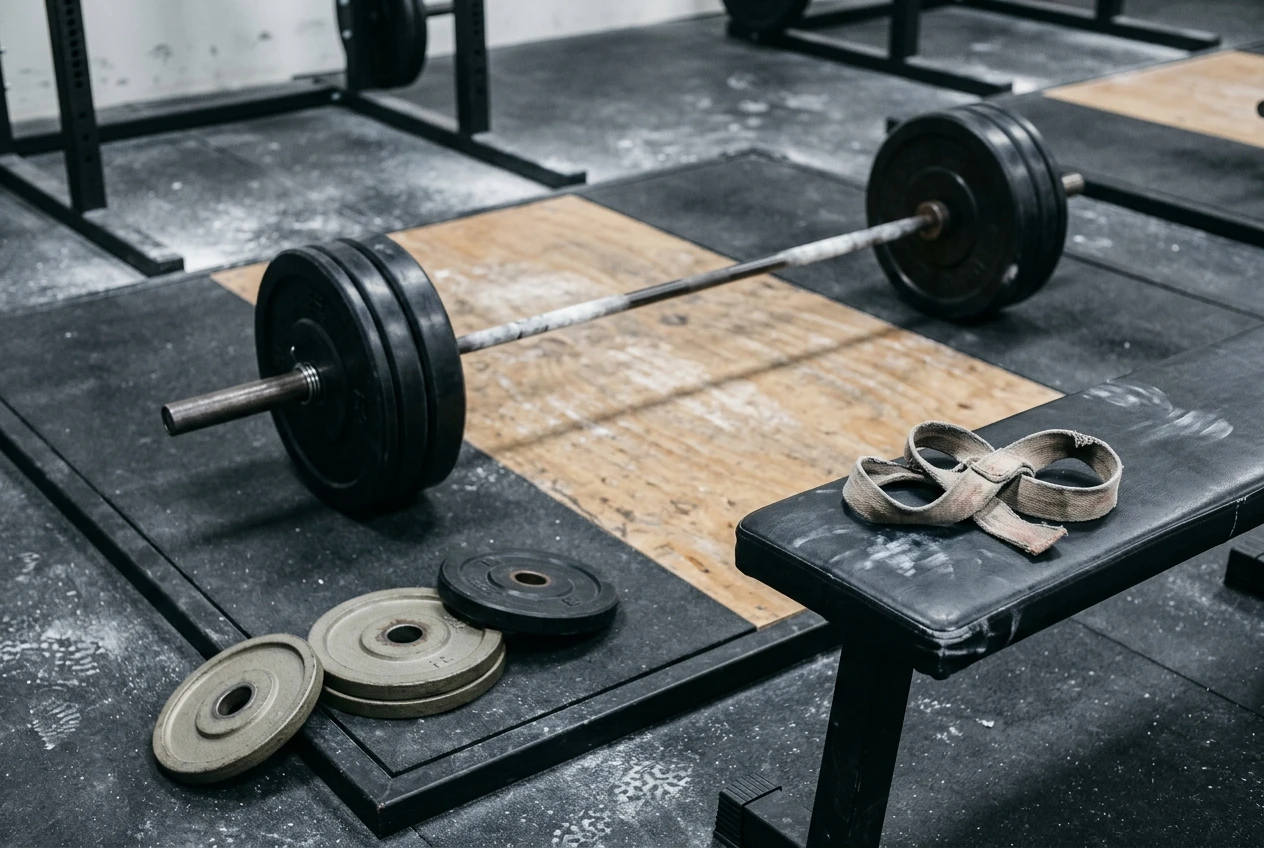
A loaded barbell on a platform with light warm-up plates up front, and a pair of worn canvas lifting straps lying coiled on a bench beside it, untouched. Chalk-dusted floor, soft overhead gym light, grey and black tones.
Drop the Straps in Phases: Warm-Ups First, Top Sets Last 7

On a deadlift day, that means your first several ramp-up sets are raw, and you put straps on when you reach the weight you plan to train with. On a row day, the lighter rows are raw and the heavy sets are strapped.

Keep the raw sets honest. Use the same grip you intend to use later, set it the same way each time, and do not let the bar roll to the fingertips. If you do the warm-ups with a sloppy grip, you are practicing a grip you will not use.

Pass check to move to phase two: for two consecutive weeks, every raw set is completed without a regrip or a slip, and your strapped working sets are not worse than before. If your working-set reps drop because your hands are tired from the raw warm-ups, you did too many raw sets. Cut the raw sets back to the first few and try again.

Phase two: raw working sets, straps only on top sets and back-offs

Phase two is where grip gets a real stimulus. Your working sets, the main sets at your planned weight, are now raw. Straps stay on for the top set and for any back-off sets that follow it.

Back-offs stay strapped here because they come after your hands have already been loaded by the top set. If you did the top set strapped, they are the sets where fatigue in your grip is highest. Going raw on them is a phase-three task.

Expect your working weight to feel heavier at first. If your plan calls for five sets of five and your hands give out on set four, the plan was too ambitious for this phase. Reduce the number of raw sets and strap the last ones. Add raw sets back as your hands catch up.

Two rules keep this phase from costing you reps:

  • A set is raw only if you expect to finish it raw. Do not start a set raw and strap up mid-set.
  • If grip ends a raw set before your back or legs do, strap the next set and note it.

Pass check to move to phase three: across two consecutive weeks, your raw working sets match the reps you got strapped at the same weight, with no regrips, and the last rep of each set is limited by your back or legs rather than your hands.

Phase three: raw top sets, and the check for when to stop

Phase three removes straps from the top set, which is the hardest part of the process. Start by going raw on the top set at a weight slightly below your usual top weight, then work up over several weeks to the full weight. Back-offs stay strapped until the top set is stable.

Once your top sets are consistently raw, take straps off the back-offs. Those sets are now the last place you use them, and they should come off last because they are done in the most fatigued state.

Here is the check for whether you can stop using straps on a given lift:

  • You complete your top set raw for the planned reps in two consecutive sessions.
  • The bar does not slip or force a regrip.
  • Bar speed on the last rep is no slower than it was strapped at the same weight.
  • Your grip does not leave you unable to do your next accessory exercise.

If all four pass, straps are no longer needed on that lift for those sets. That does not mean straps are retired everywhere, which the next section covers.

Lifts where straps still belong: high-rep pulls, heavy rows and volume days

Passing phase three on the deadlift does not mean every pull should be raw. Straps still have a place when grip is not the quality you are trying to train:
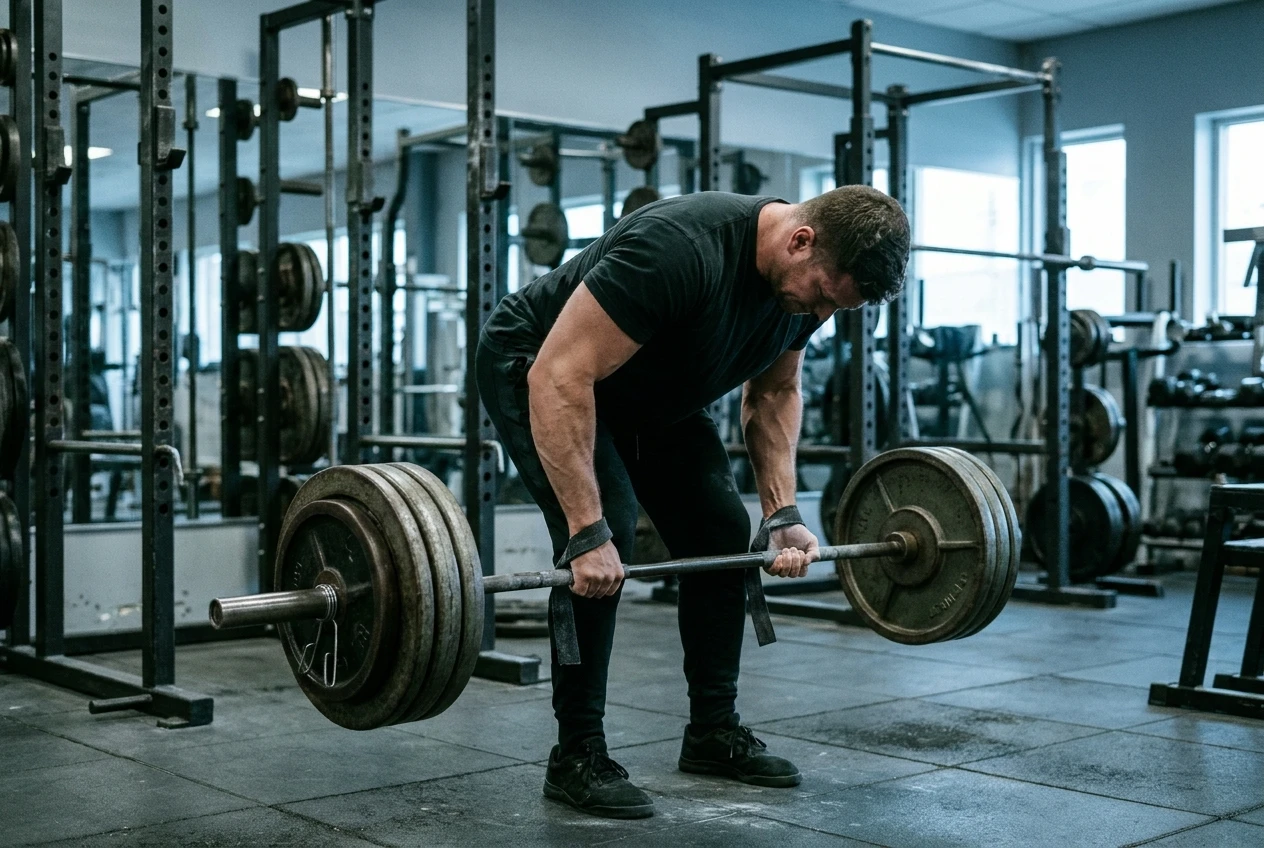
A lifter bent over in a heavy barbell row, hands wrapped with straps looped around the bar, back flat and lats flexed, in a rack-lined gym with cool light.
Drop the Straps in Phases: Warm-Ups First, Top Sets Last 8
  • High-rep pulls. On sets of ten or more, your grip will fail well before your back does. Straps let the target muscles finish the set.
  • Heavy rows. If the aim is to load your lats and upper back, strapping stops your hands from capping the weight.
  • Volume days. When several pulling exercises stack up in one session, grip fatigue builds across all of them. Strap the later exercises so the session is limited by back training, not by hands that were already used up.

A reasonable rule: if the purpose of a set is grip, go raw. If the purpose is to train your back or hamstrings, strap whenever grip would cut it short. If you compete in a sport that tests a raw deadlift, keep your top sets raw so the competition lift is the one you have practiced. Material matters too, and leather and synthetic straps suit different lifts.

What to train alongside the phases: holds, carries and kettlebell grip work

The phases only change how often your hands are loaded in your main lifts. Extra grip work speeds up how fast you pass each check. Keep it small enough that it does not cut into your pulling:
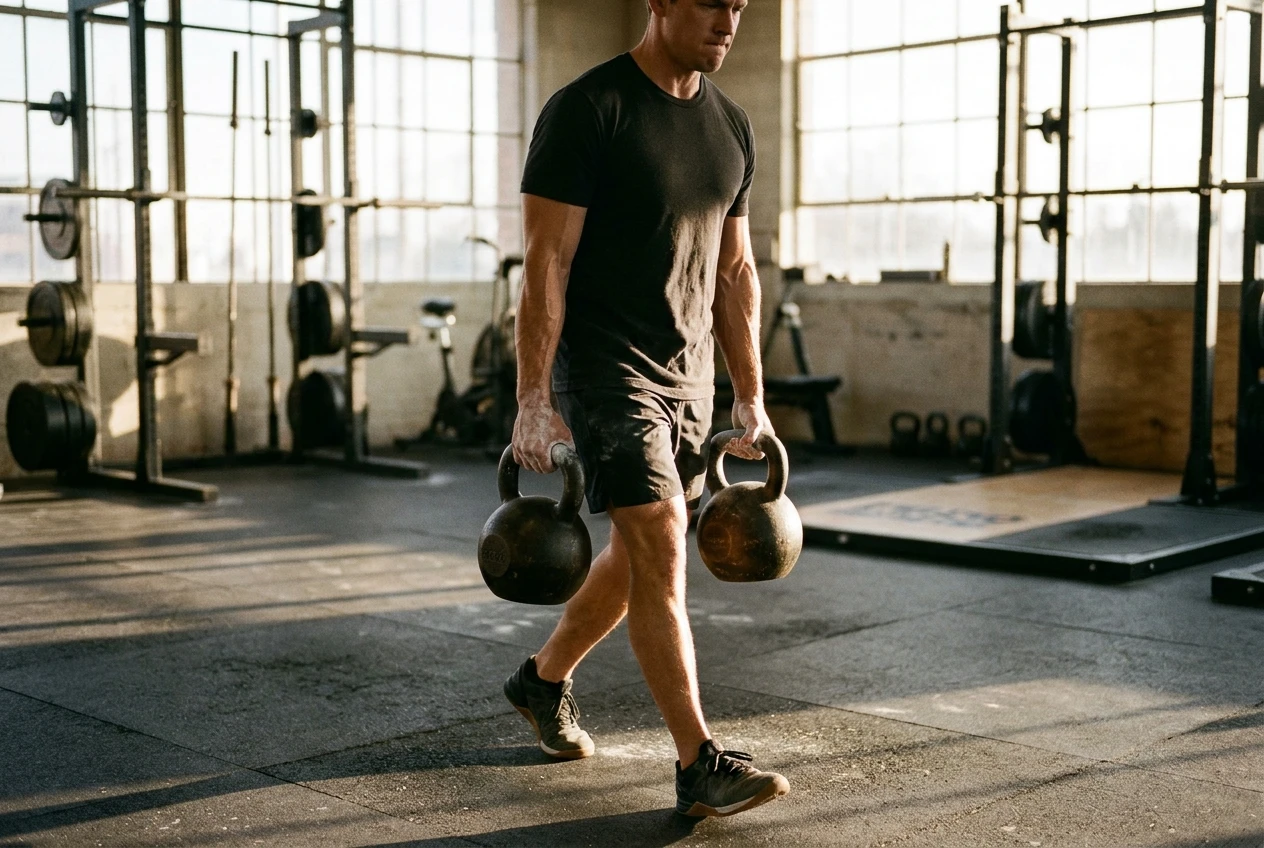
A lifter walking a farmer carry with a heavy kettlebell in each hand across a rubber gym floor, forearms taut, knuckles whitening around the handles, late-afternoon light through a large window.
Drop the Straps in Phases: Warm-Ups First, Top Sets Last 9
  • Dead hangs from a pull-up bar build the closing strength of your fingers. Use sets you can finish with clean form and stop before your grip fails completely.
  • Farmer carries with heavy dumbbells, trap bar handles or kettlebells train holding a load while moving. They suit the end of a session.
  • Suitcase carries use a single weight at one side, which adds trunk work to the grip demand.
  • Kettlebell holds and swings load your grip dynamically, because the bell tries to pull out of your hand at the top of every swing.

Put these after your main lifts, not before. If you do holds before deadlifts, you will bring tired hands to the barbell and fail the phase check for the wrong reason. Two short grip sessions a week is enough to start with.

What to do when a phase stalls: stay put, step back or change the dose

A phase will not always pass in two weeks. Use the result of your raw sets to choose between three responses:

Stay put if you are close. If you missed the check by one rep, or by one regrip, repeat the phase for another week or two with the same loading. Hands adapt more slowly than muscles, and a short repeat is often all it takes.

Step back if reps drop or your body complains. If raw sets cost you two or more reps against your strapped numbers, if your skin tears, or if your forearms stay sore into the next session, go back to the previous phase. Moving back is not a failure. It protects the training that matters most.

Change the dose if the phase is right but the volume is wrong. Reduce the number of raw sets rather than abandoning them. Do raw work on one pulling day a week instead of two, or add one more grip session if recovery allows. Often a smaller dose repeated for longer is what gets you through a phase.

Whichever you pick, change one thing at a time and give it two weeks before you decide it did not work.

Run the grip work alongside the phases

The kettlebell grip work above is easier to follow if it is laid out as a block. The article on giving your kettlebell grip its own block covers how to program that work so it runs next to your pulling without taking over your week.

If you would rather follow guided sessions for carries and swings than write them yourself, kettlebell.monster offers guided kettlebell workouts you can follow on screen. Affiliate disclosure: this is an affiliate link, so I may earn a commission if you sign up or buy through it.
What an Advanced Lifter Actually Gets From the Kettlebell Monster Samsung TV App, and What They Won’t

If you already swing, clean and press well, most kettlebell content is aimed at someone else.

If you already swing, clean and press well, most kettlebell content is aimed at someone else. The question for a kettlebell workout app for advanced lifters is narrower than whether it is good: will a coach on a Samsung TV give you anything your own programming and your own eye don’t already supply? Earlier posts on this site covered whether to switch from your phone to the TV and which lift each screen suits. This one uses a stricter checklist.

The app in question is the Samsung Tizen TV app from kettlebell.monster (affiliate link; I earn a commission if you buy).

One note on scope. This article does not quote session contents or claim specifics about the app’s programming that I can’t back. Where the answer depends on something you can only see by watching a session, I say so and tell you what to look for. A review that invented findings would be worse than useless to someone who trains seriously.

The test: what an advanced lifter needs from a coach on a screen

A beginner needs a coach to show them the movement. An experienced lifter already has the movement and needs a coach for different reasons. Four things decide whether a screen-based coach earns its place:

  • Cueing depth: corrections that go past “hinge, don’t squat” and address the faults that survive into intermediate training.
  • Load and progression: a way to keep making sessions harder over months, not just repeat them.
  • Pacing: work and rest that suit heavy, demanding sets rather than only quick circuits.
  • Fit: a place in a week that already contains barbell work, without costing you recovery.

Each section below takes one of these in turn and says what the format can and cannot do. Treat them as pass/fail questions you can answer in your first few sessions.

Cueing: does it correct anything beyond the basics?

A coach on a TV cannot see you. That is a limit of the format, not a flaw in one product. Every cue is delivered to an average lifter at the moment that average lifter tends to go wrong, which means the cueing is useful to you only if it lands on faults you still have.

Advanced lifters rarely fail at the basics. They fail in smaller ways:

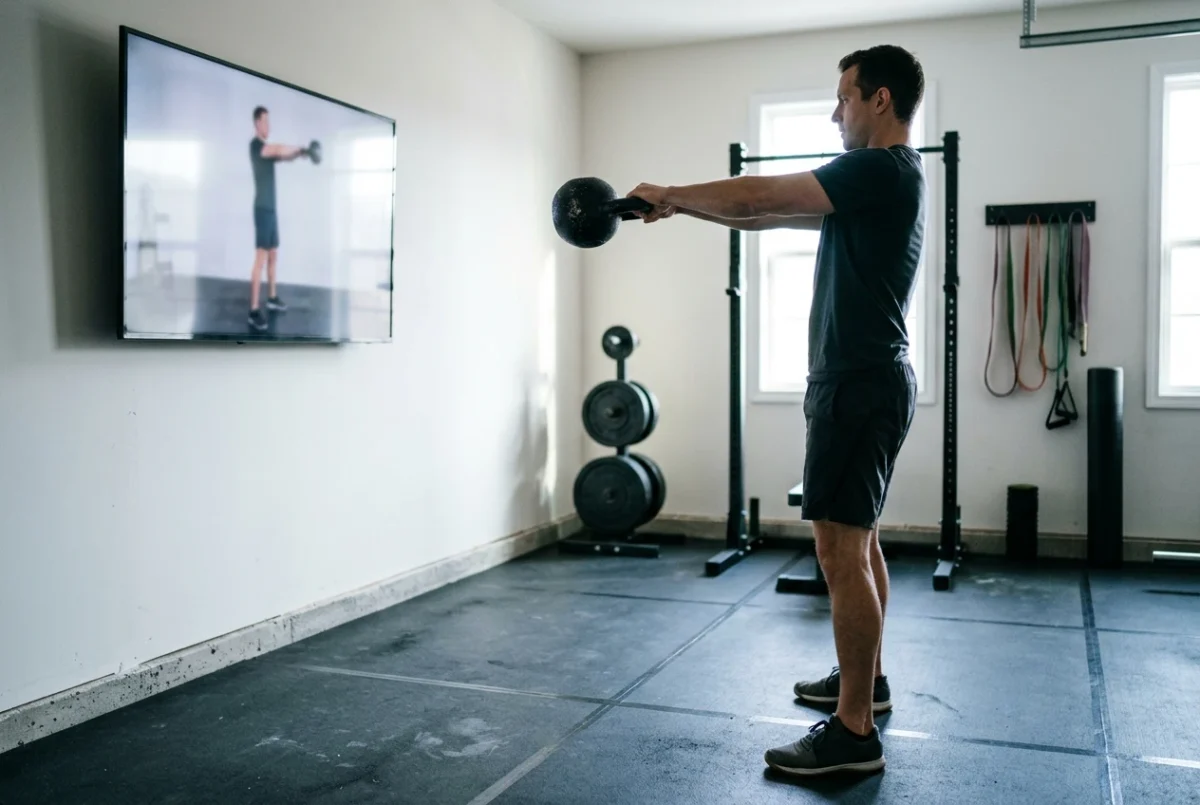
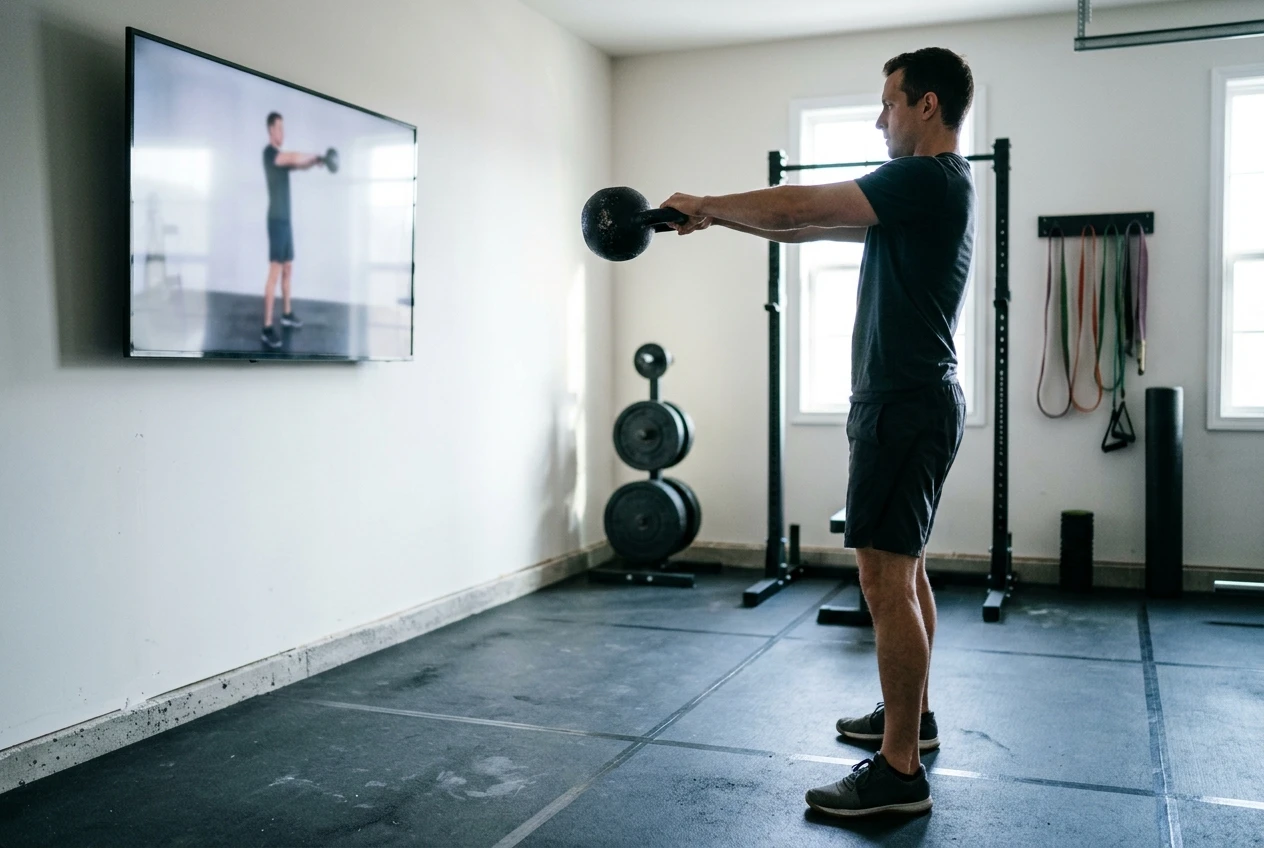
A kettlebell lifter seen side-on at the top of a swing in a home gym, the bell at chest height with arms straight and hips fully locked out, a large wall-mounted TV on the left showing a blurred coach in the same position. Cool morning light from a side window, dark rubber flooring, a black kettlebe
What an Advanced Lifter Actually Gets From the Kettlebell Monster Samsung TV App, and What They Won't 15
  • Pulling the swing up with the arms once the bell gets heavy, instead of letting the hips drive it.
  • Leaning back at swing lockout and finishing with the lower back instead of the glutes.
  • Letting the bell crash onto the forearm in the clean because the elbow drifts away from the ribs.
  • Pressing with a lumbar lean to cover for a weak lockout.
  • Losing the rack position by the fifth rep of a long set.

When you watch a session, listen for whether the coach names any of these before they happen, and whether the cue gives a reason (“keep the elbow close so the bell lands on the forearm softly”) or only an instruction. A cue with a reason is one you can apply to a lift the app never mentions. If the cueing stays at the level you would give a friend on their first day, the app is teaching you nothing new, and you can write that down as a fail on this item.

The screen does have one real advantage here. Standing in front of a TV at roughly body height, you can compare your own setup and rack position to the coach’s at full size. That works for lifts where side-on positioning matters. Whether it matters to you depends on which lift you are checking, and the phone versus TV post breaks that down lift by lift.

A related point: if your swing fault is back discomfort afterward, a screen coach will not diagnose it. That needs a look at your swing from outside, ideally filmed from the side, and the right accessory work, which this guide on swing-related lower back pain covers.

Load and progression: can you keep overloading with it?

The app does not know which bell you own, so load is always your decision. What you need to find out is whether the sessions give you a structure that lets you progress without a heavier bell.

Kettlebells come in large jumps. Moving from one bell to the next is a big percentage increase on a press, even if it feels small on a swing. For an advanced lifter, overload on kettlebells usually comes from some mix of:

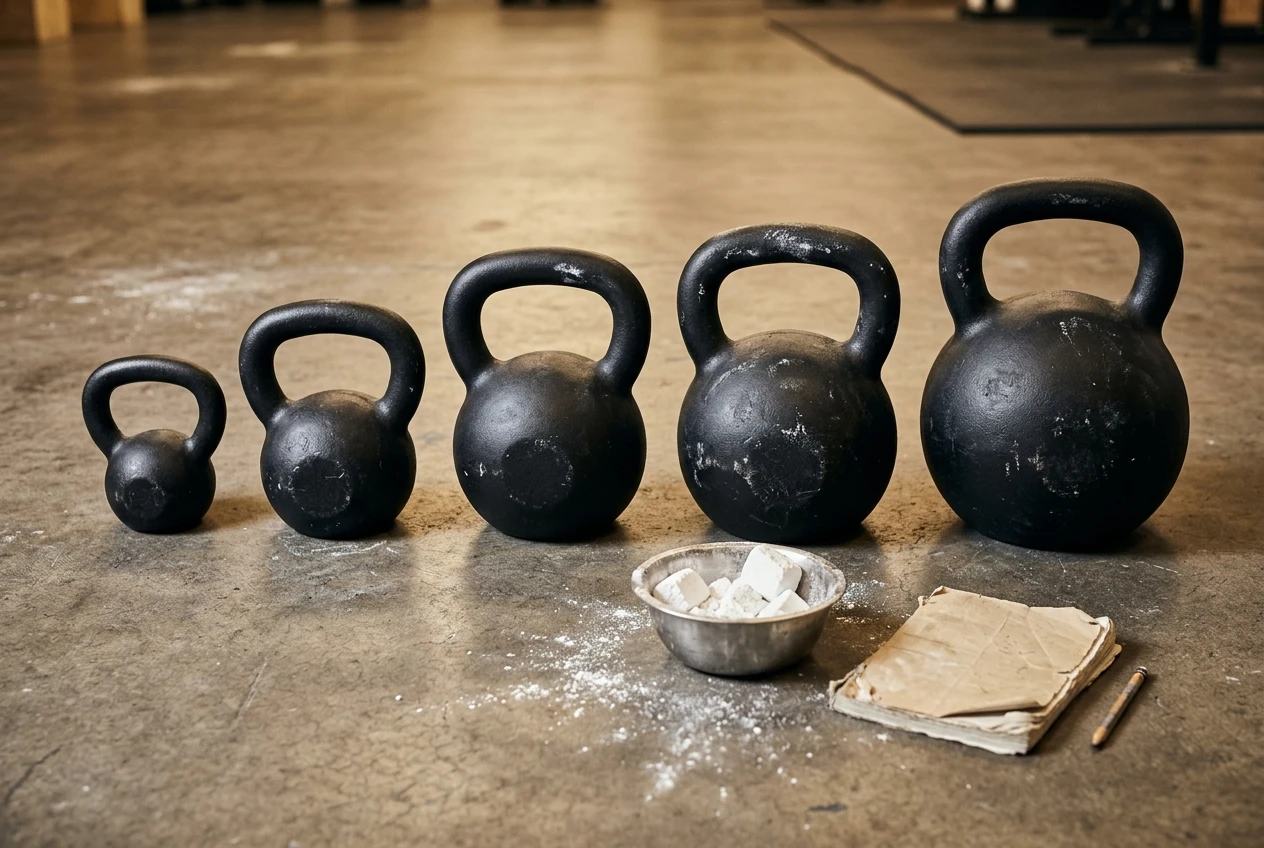
A row of cast-iron kettlebells on a gym floor in ascending sizes, with a visible big gap in size between neighbouring bells, a small chalk bowl and a worn notebook beside them. Warm overhead light on matte black iron against a concrete floor.
What an Advanced Lifter Actually Gets From the Kettlebell Monster Samsung TV App, and What They Won't 16
  1. More reps with the same bell.
  2. Less rest between sets.
  3. Slower or paused tempo on presses and squats.
  4. More complex combinations, such as clean to squat to press.
  5. A heavier bell, when the first four are exhausted.

Check whether the sessions let you move along any of those axes. Do the same workouts return with different rep targets or different density? Is there a clear way to repeat a session and beat it? If every session is a one-off with no thread connecting it to the next, you can still use it, but you will be doing the progression bookkeeping yourself.

If you want a method for deciding when you actually need the next bell, the reps-first test is a good filter. And if you are weighing whether to track progression in an app at all, this comparison of a spreadsheet and an app lays out what each does well.

I can’t tell you from observation how the app structures progression across weeks. Look at the product page and the first few sessions with this question in mind, and decide whether the answer is good enough before you add it to your week.

Pacing and rest on the TV: where the session helps or gets in the way

A coach-led session paces you, and that cuts both ways.

The helpful side: if you tend to skip rest on conditioning days or drift through sets with sloppy timing, an external clock and a voice on screen keep the work honest. Many experienced lifters do their best conditioning when someone else is counting.

The unhelpful side: heavy sets need rest set by how you feel, not by a timer. If you are doing low-rep heavy presses or a heavy clean-and-press ladder, a session that moves on at a fixed pace can push you into the next set before your grip and breathing recover. Advanced lifters know the difference between rest that is too short for the intent of the set and rest that is simply uncomfortable.

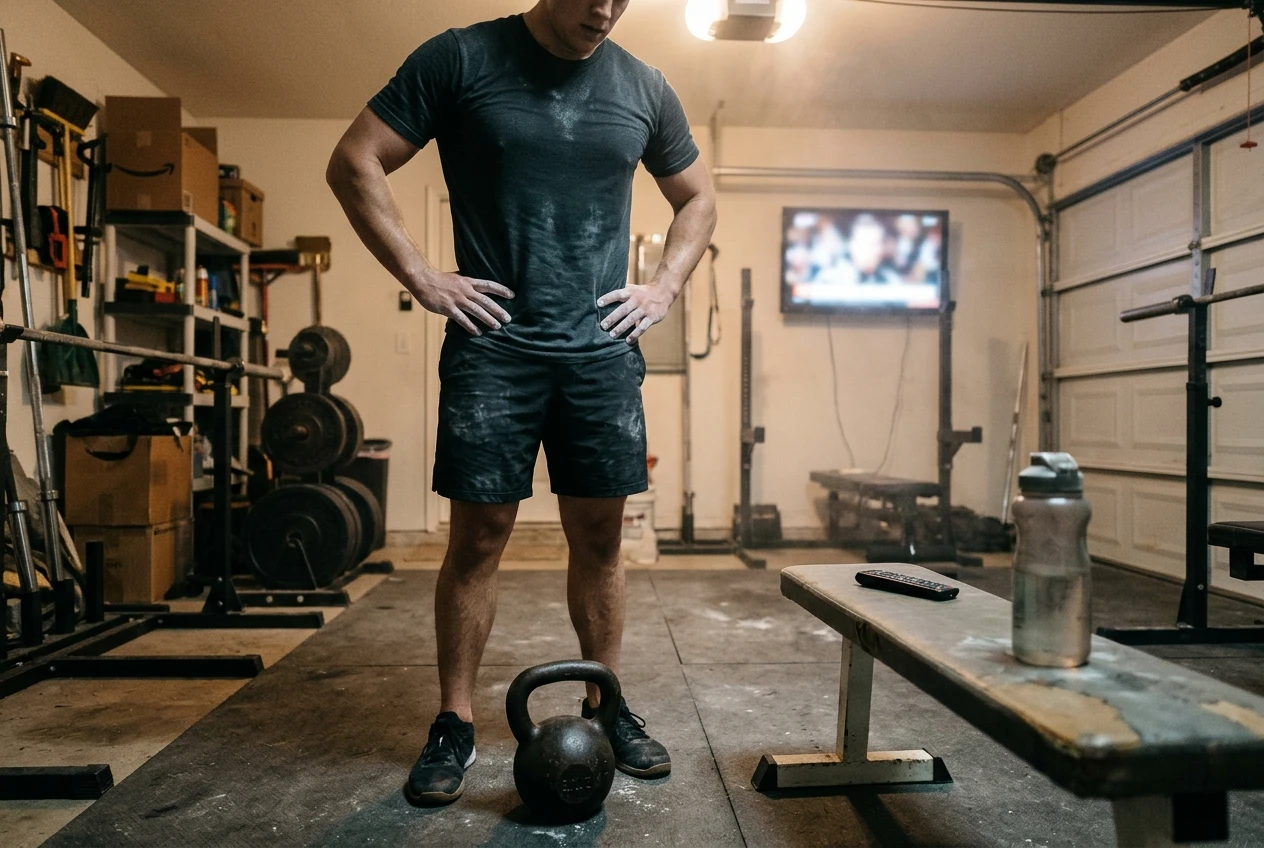
A lifter pausing between heavy sets in a garage gym, hands on hips, chalk on palms, a single heavy kettlebell at their feet, a Samsung TV remote on a bench beside a water bottle, the TV glowing softly in the background. Late evening, warm lamp light.
What an Advanced Lifter Actually Gets From the Kettlebell Monster Samsung TV App, and What They Won't 17

Before you commit, find out two things:

  • Can you pause the session from the Samsung remote without losing your place?
  • Does the coach prescribe work in a way you can slow down, such as by taking an extra set of rest, without breaking the session?

If you can pause freely, heavy days become workable. If not, the app suits lighter, density-focused sessions better than strength-focused ones. That is a reasonable place for it to sit, as long as you know going in.

Where you put the screen also affects pacing, because if you have to turn your head or step toward the remote between sets, the rest period quietly changes. The screen placement guide covers the setup.

Fitting it around heavy barbell days

For a lifter who also squats, deadlifts and presses with a barbell, the main question is recovery. Kettlebell work is not free: high-volume swings load the hamstrings, glutes and lower back, and grip work stacks on top of deadlift pulling.

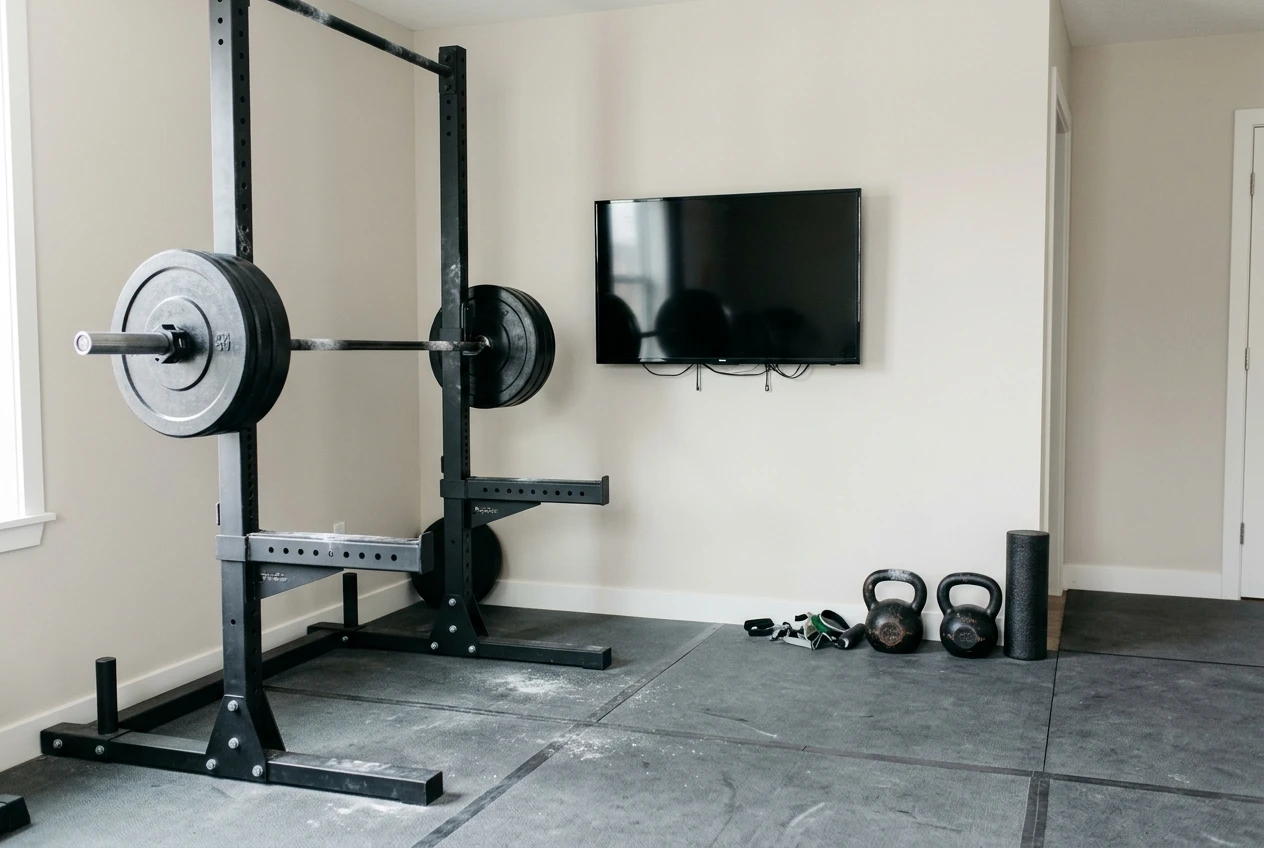
A home gym corner with a loaded barbell resting in a squat rack on one side and a pair of kettlebells on the floor on the other, chalk dust on the bar and a TV on the wall between them. Neutral daylight, grey rubber mats, steel and black iron tones.
What an Advanced Lifter Actually Gets From the Kettlebell Monster Samsung TV App, and What They Won't 18

A sensible way to place a TV-guided session:

  • Keep it away from your heaviest lower-body day. A session heavy on swings the day before a heavy deadlift or squat will usually cost you on the barbell.
  • Put the conditioning-style or technique-style sessions on lighter days, or on days after a rest day when you have capacity to spare.
  • Treat it as a supplement, not a replacement, unless your barbell training is already in a deload.
  • Watch your grip. If your pulls are limited by grip, a long session of cleans and swings will make that worse on your next pull day.

Where these sessions go in a strength-focused week is a placement problem, and this piece on kettlebell sessions in a powerlifting week walks through it. If grip is your weak point, giving it its own block usually works better than letting every session eat into it.

Where it falls short for advanced training

Some limits come from the format itself, and they hold for any TV-based coach:

  • No view of you. Nothing on screen can correct a fault it cannot see. You supply the feedback, by filming yourself or training with a partner.
  • No autoregulation. A fixed session cannot adjust to a day when your sleep was bad or your back is tight. You have to make that call and scale the work yourself.
  • No link to your barbell numbers. The app cannot program around your squat or deadlift cycle, so you have to fit it in.
  • A ceiling set by your bells. Strength work with kettlebells stops where your heaviest bell stops. A barbell can keep going up in small increments, and a kettlebell cannot.
  • A single platform. This is a Samsung Tizen app, so it only matters if you have a compatible Samsung TV in or near your training space.

Some things I can’t speak to, because I have no observations to base them on: how the app’s coaching evolves over a long run, how its programming compares with a coach who knows your history, or whether its cues change as sessions get more advanced. If those matter to your decision, they are the things to find out on the product page before you buy.

If you are still deciding whether to run a purchased program or build your own, how to pick for the next two years is the better frame than any single feature.

Who should switch, who should stay with their own programming

A TV-based coach suits you if:

  • You train alone and want an external voice setting the pace of conditioning work.
  • Your barbell programming is already set, and you want kettlebell sessions you do not have to write.
  • You like a large screen for checking rack position and setup against a coach.
  • You have a compatible Samsung TV near where you train.

Stay with your own programming if:

  • Your kettlebell work is tied closely to a barbell block and needs to flex week by week.
  • You want to run heavy, low-rep strength sets with rest you control completely.
  • Your main need is form correction from someone who can see you, which a screen cannot provide.
  • You already have a progression system that works and see no gap for a coach to fill.

A middle path is also reasonable: keep your own strength programming and use a guided session for the days when you want conditioning without planning it. That uses the format for what it does best and leaves the decisions that depend on how you feel with you.

Check it against your own list

Write down your four answers on cueing, progression, pacing and fit before spending anything. If they line up with what this review covered, look at the Kettlebell Monster Samsung TV app here (affiliate link; I earn a commission if you buy).

Back Aches After Kettlebell Swings? Match Your Swing Fault to the Accessory Movement That Trains It

If you are dealing with kettlebell swing lower back pain, the cause is often one of four recurring technique faults, and each has a specific accessory…

If you are dealing with kettlebell swing lower back pain, the cause is often one of four recurring technique faults, and each has a specific accessory movement that trains the part of the swing that is missing. The swing is meant to be a hip movement: the glutes and hamstrings produce the force, and the back holds a stiff, neutral position while they do. When the hips contribute too little, the lower back does more of the work, and you feel it the next morning.

This article covers the four faults that most often shift load to the back, how to check for each one, and which single movement to add for each. Learning the basic pattern is a separate job, covered in what a written guide can’t teach you about a kettlebell swing. This piece is for the stage after that, when the swing is already in your routine and something about it is off.

Is it a form fault or a reason to stop? What to check before you reach for any accessory work

Technique work only helps if the problem is technique. Before you change anything, sort what you feel into one of two groups.

A muscular, dull, tired feeling across the lower back that shows up during or after swings, fades within a day or two, and does not change how you walk or sit is the pattern form fixes tend to address. Soreness like that usually means the muscles are being asked to do a job the hips should share.

Stop swinging and get a professional’s opinion if you notice any of these:

  • Sharp or stabbing pain, or pain that catches when you move.
  • Pain that travels into the buttock or down a leg, or any numbness or tingling.
  • Pain that wakes you at night or does not ease with rest.
  • Pain that began after a fall, a collision, or a single awkward rep.
  • Pain that is getting worse from one week to the next despite lighter training.

Accessory exercises and filming yourself cannot diagnose any of those. A physiotherapist or doctor can examine you, and a video of your swing cannot. Form work and a professional’s opinion also coexist well: once you have been cleared to train, the checks below tell you what to practice.

Also check the basics. Use a bell you can swing for your whole set with the same shape on the last rep as the first. If the bell is too heavy, none of the faults below can be fixed with a drill alone.

Fault one: the swing turns into a squat, so the back picks up the slack

In a squatty swing, the knees bend deeply, the hips drop straight down, and the torso stays upright. The bell is then lifted by the quads and shoulders instead of being launched by a hip snap. The back picks up the slack because the hamstrings and glutes are never loaded at the bottom, so nothing is storing and returning the force.

Self-check: Film one set from the side, or have someone watch. At the bottom of the swing, your shins should be close to vertical and your hips should be well behind your heels, with your torso tipped forward. If your knees travel far forward and your chest stays tall, you are squatting the swing.

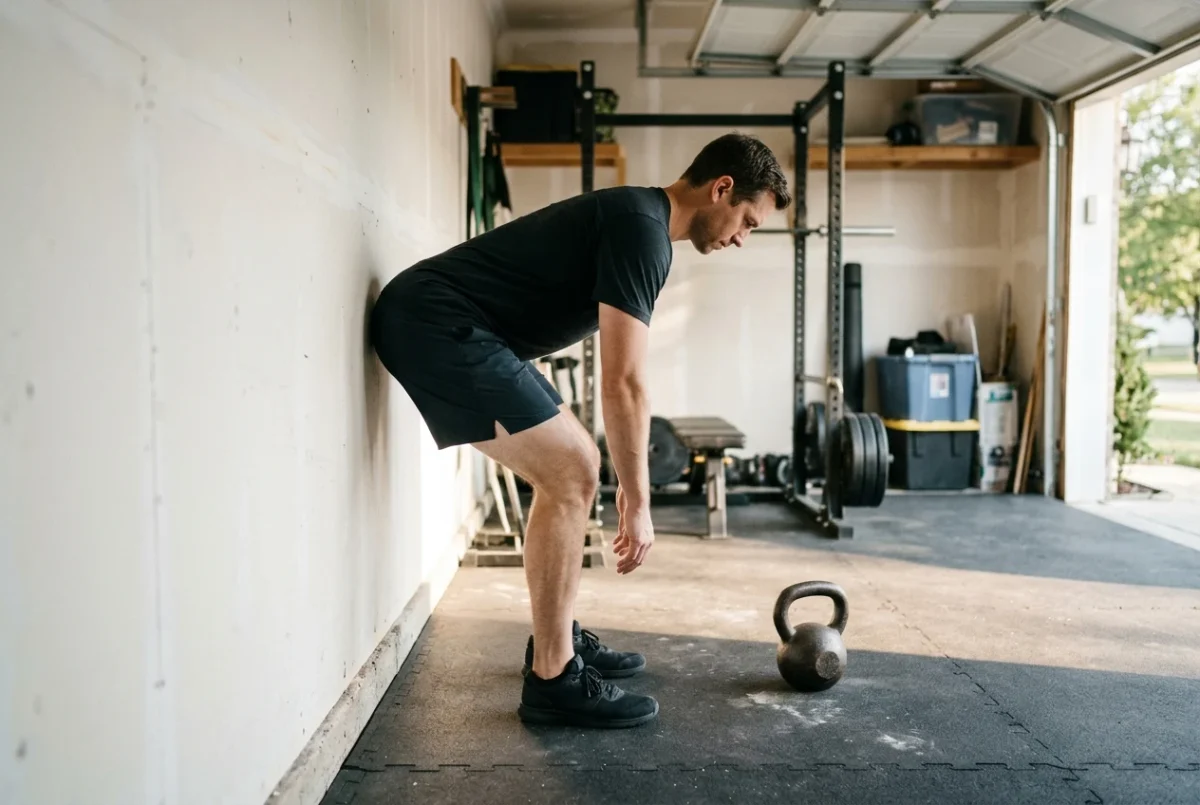
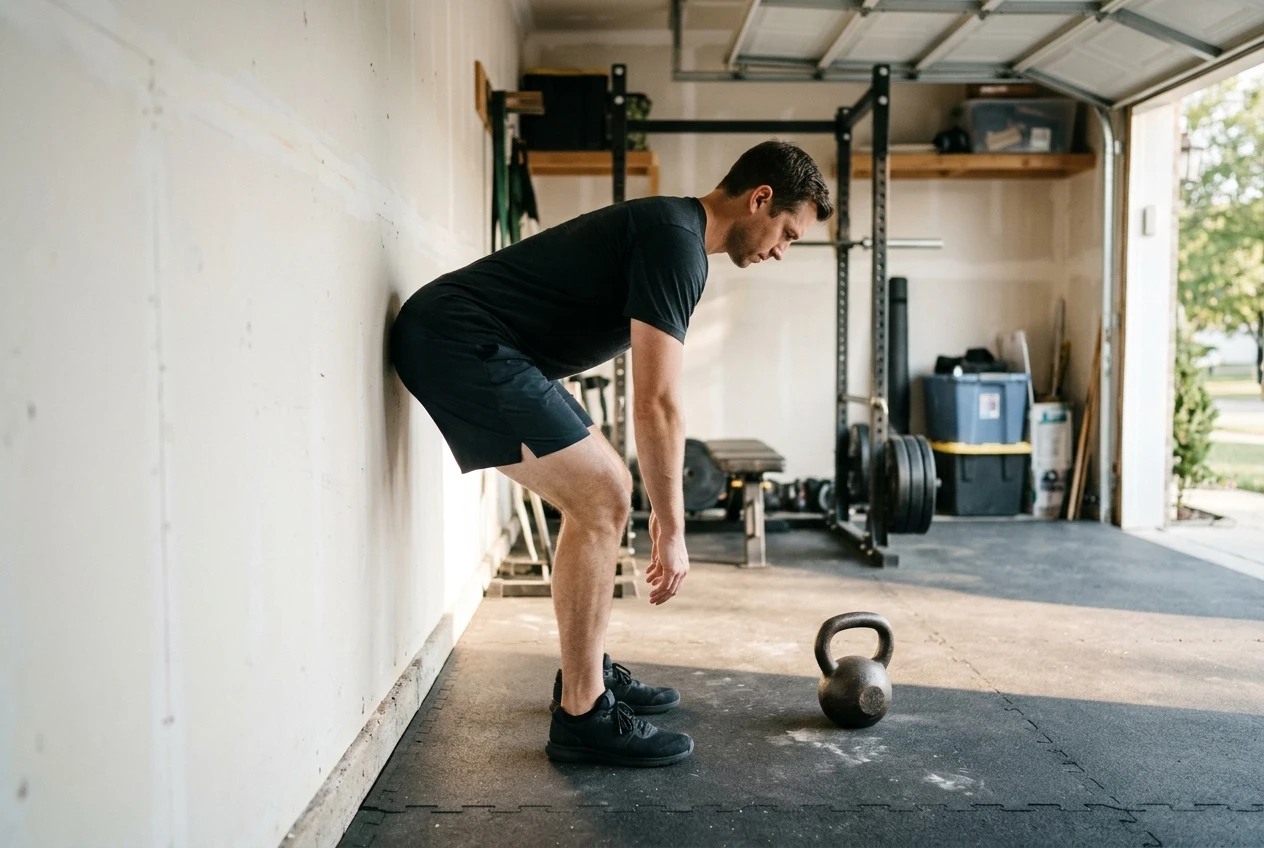
The accessory movement: the wall hinge. Stand with your back to a wall, about a foot in front of it. Push your hips straight back until your glutes touch the wall, keeping your knees only softly bent and your back flat. Stand up by driving your hips forward, not by pulling your chest up. Do 2 or 3 sets of 6 to 8 slow reps, and move slightly farther from the wall as it gets easy.

Side view of a lifter in a garage home gym performing the wall hinge: back to a plain white wall, hips pushed back until the glutes touch it, knees softly bent, flat back, torso tipped forward, soft morning light on rubber flooring with a kettlebell resting nearby.
Back Aches After Kettlebell Swings? Match Your Swing Fault to the Accessory Movement That Trains It 25

The drill works because the wall gives you a target that a squat cannot reach. If you bend your knees too much, you sit down before you touch it. Once the wall hinge is easy, a kettlebell deadlift with the same hip-back pattern is the loaded version.

Fault two: leaning back at the top of the swing

At the top, the hips should be fully extended, the glutes squeezed, and your body stacked in a straight line from ankles to ears. Some lifters lean back, tilt the pelvis forward, and let the ribs flare to make the bell float higher. That puts the lower back into an arched position under the momentum of the bell, and it is a common source of that pinched feeling at the top.

Self-check: Film from the side and pause on the top frame. Draw a mental line from your ankle through your hip and shoulder to your ear. If your shoulders sit behind your hips, or your ribs poke forward while your belly drops, you are overextending. You can also test it without video. Stand against a wall with your heels a few inches away, tuck your ribs down, and see whether you can keep your lower back close to the wall while squeezing your glutes. Needing to arch away from the wall to feel your glutes working is the same fault.

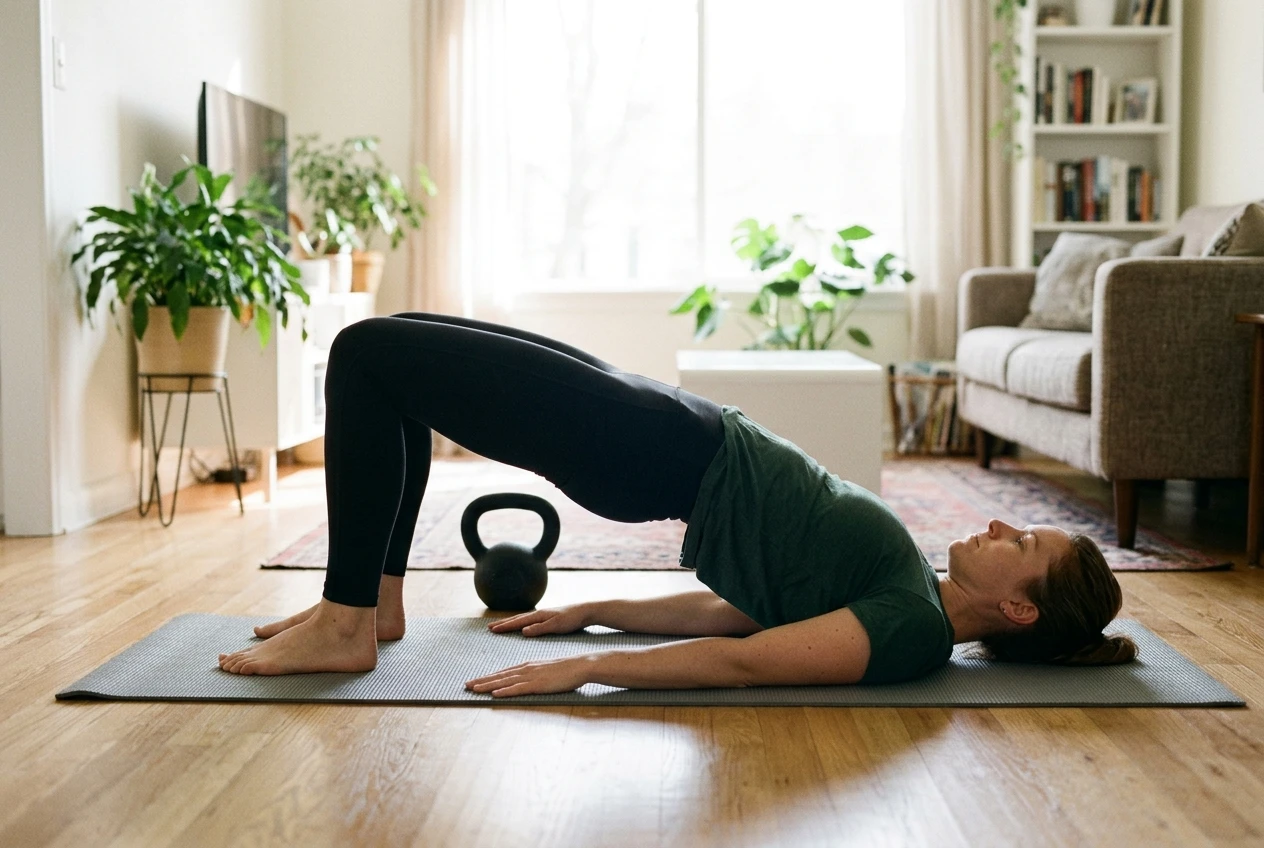
The accessory movement: the paused glute bridge. Lie on your back with knees bent and feet flat. Brace as if someone were about to tap your stomach, lower your ribs toward your hips, and drive your hips up until your body forms a straight line from knee to shoulder. Hold the top for 2 to 3 seconds while squeezing your glutes, and make sure the effort is in your glutes and not your lower back. Do 2 or 3 sets of 8 to 10.

A person lying on a grey exercise mat at the top of a paused glute bridge, knees bent, feet flat, body in a straight line from knee to shoulder, ribs down, in a bright living room with a kettlebell on the floor beside the mat.
Back Aches After Kettlebell Swings? Match Your Swing Fault to the Accessory Movement That Trains It 26

This trains the position you want at the top of a swing: hips fully extended with the ribs down. If your lower back cramps during bridges, the arch is the problem, so shorten the range and tuck the ribs before lifting higher.

Fault three: the arms lift the bell because the hips are late

When the hips snap late or too weakly, the bell has no speed by the time it reaches the front, so the shoulders and arms raise it. The lower back suffers because the hinge drops into a sloppy rounded or hanging position while the arms do work that should have come from the legs. The bell often rises on a curve, and it can drag you forward at the top.

Self-check: Watch your arms. They should stay mostly straight and behave like ropes, and the bell should float to about chest height by itself. If your elbows bend, your shoulders shrug upward, or the bell reaches its height before your hips have finished extending, the arms are doing the lifting. A second check is sound and feel: a good swing has a crisp snap of the hips at the top, while a late one feels like a gradual lift.

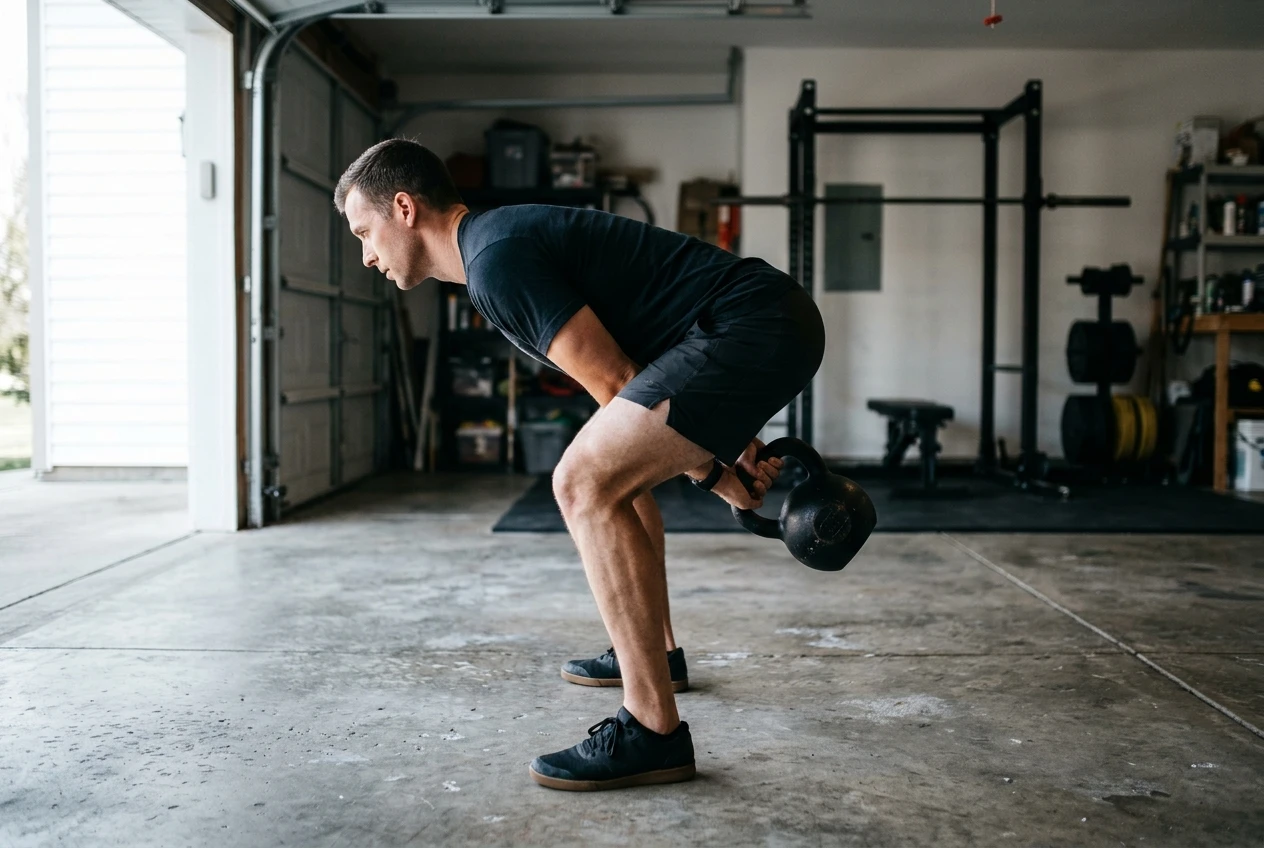
The accessory movement: the hike-and-stand drill. Set the bell about a foot in front of your feet. Hinge back, grip the handle, tilt it toward you, and hike it back between your legs, with your forearms landing against your inner thighs. Then stand up fast by snapping your hips forward, and let the bell travel forward without lifting it with your arms. At first it may only reach hip or belly height, and that is acceptable. Do 3 sets of 5 reps, resetting between reps.

Side-on view of a lifter at the start of a hike-and-stand drill: hinged back with a black kettlebell hiked between the legs, forearms against the inner thighs, bell tilted toward the body, concrete garage floor, cool daylight from an open door.
Back Aches After Kettlebell Swings? Match Your Swing Fault to the Accessory Movement That Trains It 27

Because every rep starts from a stop and ends with the snap, you can feel the hike and the hip drive separately before putting them back into a flowing swing. Raise the height of the bell only by snapping harder, never by pulling.

Fault four: the brace fades as the set gets long

A swing that looks fine for the first ten reps and then changes is a bracing problem, not a hinge problem. As the torso muscles tire, the ribs flare, the lower back sags into extension at the top or rounds at the bottom, and the spine ends up taking load that the trunk was supposed to resist. If your back only hurts after long sets, this is the likeliest fault.

Self-check: Compare the first three reps and the last three reps of the same set on video. Look at the back’s shape at the bottom of the swing and your ribs at the top. If the last reps show a rounded back, a bigger arch, or a head poking forward, the brace is fading. The practical fix is shorter sets, but training the brace directly helps you hold form longer.

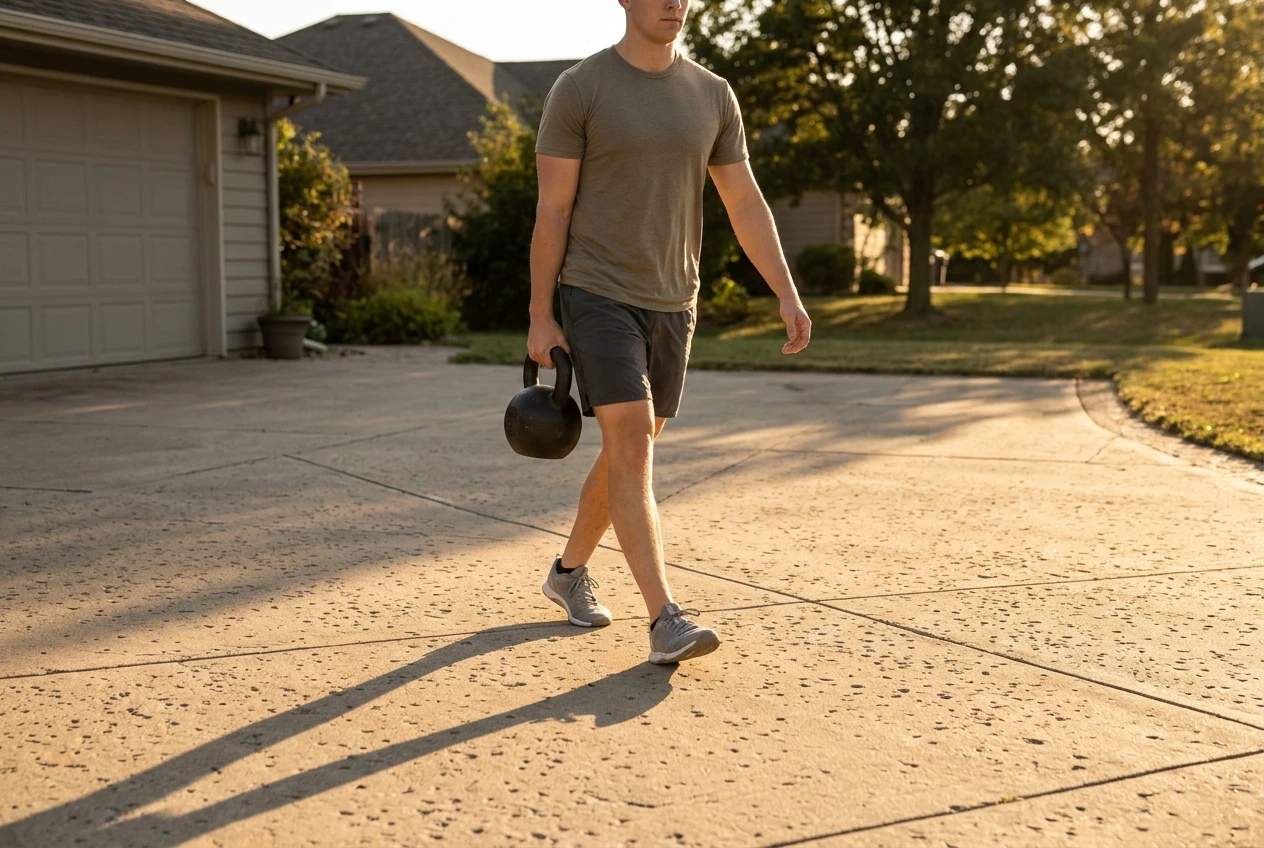
The accessory movement: the suitcase carry. Hold a single kettlebell in one hand at your side, with no leaning toward the weight. Stand tall, ribs down, shoulders level, and walk slowly for 20 to 30 steps. Switch hands and repeat. Do 2 or 3 rounds per side. The weight pulls your trunk sideways, and your abdominal muscles and the muscles around your spine must keep you upright. That is the same job they do in a swing, only done for time under tension.

A lifter walking tall on a driveway carrying a single kettlebell in one hand at their side, shoulders level and ribs down, trunk upright without leaning toward the weight, late afternoon golden light, long shadow on the pavement.
Back Aches After Kettlebell Swings? Match Your Swing Fault to the Accessory Movement That Trains It 28

If you want a heavier option, use a bell you can carry with a tall posture for the full distance. Losing posture on the last steps means the weight is too heavy. Grip may limit you before your trunk does, and a separate grip block can deal with that, as covered in this grip strength article.

How to slot two accessory movements into your week without adding a new training day

Pick the two faults that your video check showed most clearly, and add only those two movements. Trying to fix all four at once spreads your attention thin and makes it hard to tell what worked.

Here is a simple way to place them:

  • On a swing day, before swings: Do the movement that trains the position, such as the wall hinge or the paused glute bridge, as 2 sets in your warm-up. It primes the pattern right before you use it.
  • On a swing day, after swings: Put the carry at the end, once the swing work is done, so tired trunk muscles do not make your swings worse.
  • On a non-swing day: If you lift weights on another day, add the second movement at the end of that session in place of one of your regular accessory exercises.

Keep the effort moderate. Accessory work that leaves your back more sore than the swings did has defeated its purpose. Two to three sets per movement, once or twice a week, is enough to start with, and you can adjust from there.

How to film a set from the side and judge whether the fix is working before you add swings back

Cut your swing volume while you work on the fault, for example by doing fewer sets or shorter sets, and keep the weight where you can swing it cleanly. Then use video to decide when to add volume back.

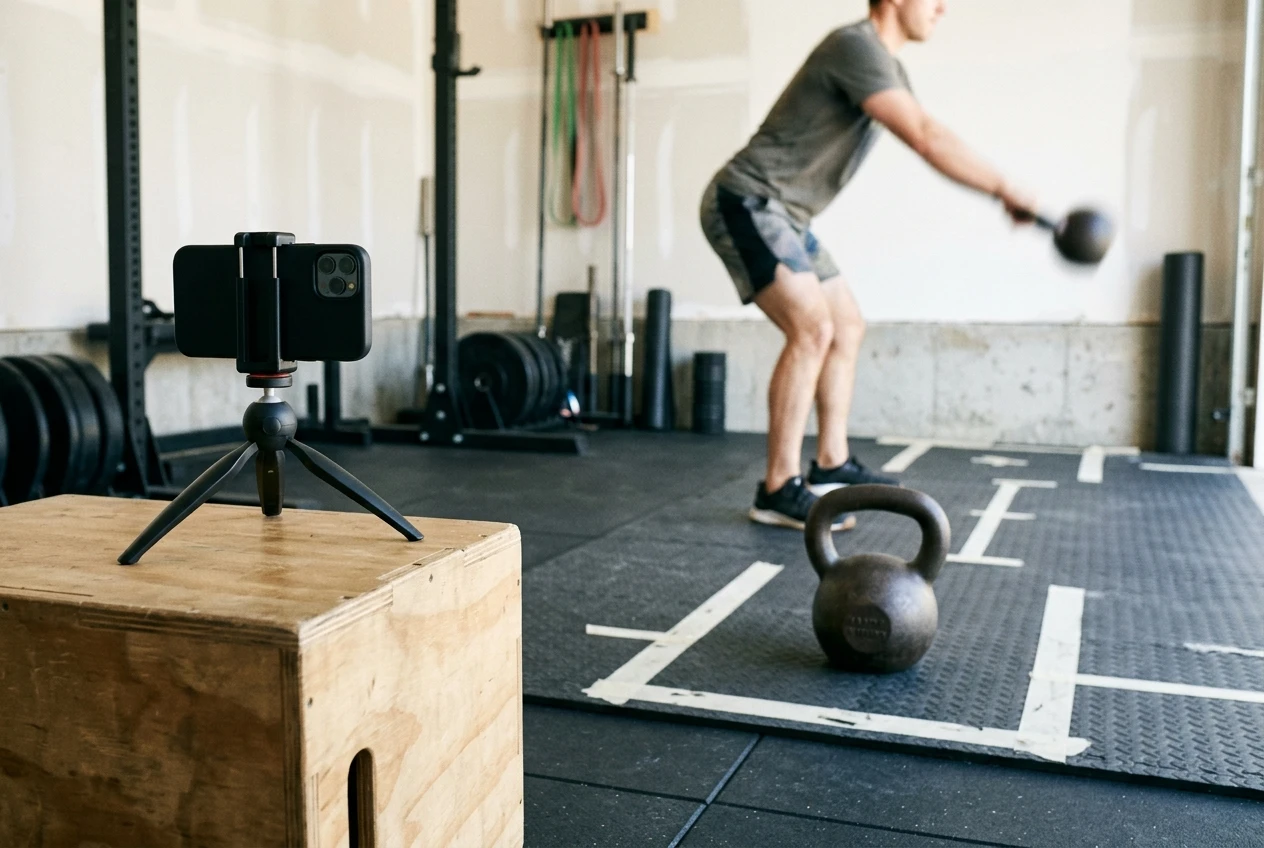
A smartphone propped on a small tripod at hip height in a home gym, pointed side-on at a kettlebell resting on the floor and a mat marked out for a swing, bright even light, with the lifter blurred mid-swing in the background.
Back Aches After Kettlebell Swings? Match Your Swing Fault to the Accessory Movement That Trains It 29

Set up the camera. Place your phone at about hip height, side-on, far enough away to capture your whole body and the bell’s full path. Film in decent light so you can see your hips and ribs. If a screen setup helps you watch playback and demos without twisting your neck, this home gym screen placement guide covers where to put it.

Film a short set. Record 8 to 10 swings, because a handful of reps will not show how your form changes over a set. Then watch the clip once at normal speed and once slowed down.

Check four things, one for each fault:

  1. Bottom of the swing: shins near vertical, hips behind heels.
  2. Top of the swing: ankles, hips, shoulders, and ears stacked, ribs down.
  3. Arms: straight, with the bell floating after the snap.
  4. Last three reps: same back shape as the first three.

Decide what to do next. If the fault is visibly smaller and your back feels better the next day, add a few swings back, then watch again. If the fault is unchanged after a few weeks of consistent accessory work, or your back pain is getting worse, that is the point to bring in a coach or a physiotherapist rather than keep experimenting alone.

Get a coach on screen while you rebuild your swing

Many lifters find it easier to correct a swing when they can watch a demonstration and match it rep for rep. If you want a coach on screen while you rebuild the pattern, kettlebell.monster offers kettlebell workouts you can follow along with. For a side view at full size, the Kettlebell Monster Samsung Tizen TV app puts the demo on your television so you can compare your own side-on video against it.

Affiliate disclosure: these are affiliate links, so I earn a commission if you buy through them.

The Best Lifting Belt for Kettlebell Complexes Is Decided by Width and Closure, Not Material

Most belt advice is written for a barbell squat or deadlift, where the weight never touches the belt. A kettlebell complex works differently.

Most belt advice is written for a barbell squat or deadlift, where the weight never touches the belt. A kettlebell complex works differently. The bell travels past your hips, lands on your forearm and chest, and rests against your ribs before it goes overhead or back down. A belt that suits a barbell can sit exactly where the bell wants to land.

That changes what to look for. For the best lifting belt for kettlebell complexes, width, taper and closure matter most, and material comes well behind them. The sections below give you a way to choose based on where the bell touches you and how quickly you change positions.

Do kettlebell complexes need a belt at all, or only some of them?

Some complexes do not need one. A belt gives your abs something to press outward against when you brace, which is useful when the load is heavy relative to what you can control. If the bell is light enough that bracing feels easy and your lower back feels fine at the end of a round, a belt adds a piece of gear to manage and little else.

The case for a belt gets stronger as the bell gets heavier, the rounds get longer, or the complex includes moves where you hold the weight in front of you while bracing: the racked press and the racked or goblet squat. These positions load your trunk for several seconds at a time. A swing loads it for a fraction of a second, over and over.

A useful way to decide is to look at each move in your complex and ask how long your trunk is under load and whether the bell touches your midsection. Swings and cleans pass quickly through the hips. Presses and squats hold the bell against your torso. If your complex is mostly the first kind, a belt has less to do. If it is mostly the second kind, a belt has more to do and more ways to get in the way.

Where the bell meets the belt: rack, clean and swing contact points

A belt sits across the same part of your body that a kettlebell touches, so each move in the complex needs checking separately.

Swing. At the bottom of the swing, the bell passes between your thighs and your forearms brush your inner thighs. At the top, the bell is out in front of you and touches nothing. The belt matters in two ways here. A belt that is wide at the front can catch on your thighs when you hinge deep. And a closure that sticks out at the front can be hit by your wrists or the handle as they pass.

Clean. The bell travels up close to your body and ends in the rack position, with the handle in your hand, the bell resting on the back of your forearm, and your elbow near your ribs or hip. This is the move most likely to run into a belt. A thick or stiff belt edge can catch the bell on its way up, and a tall belt can leave the bell landing on the belt instead of on your forearm and chest.

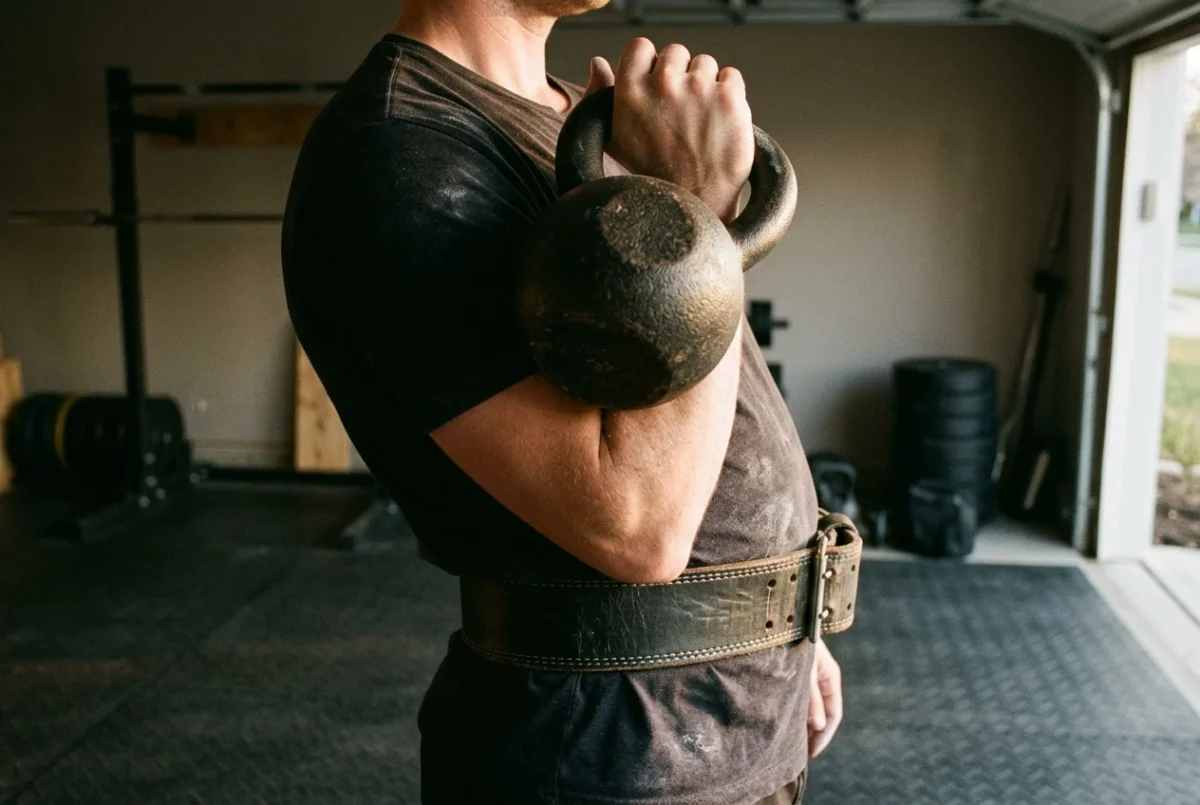
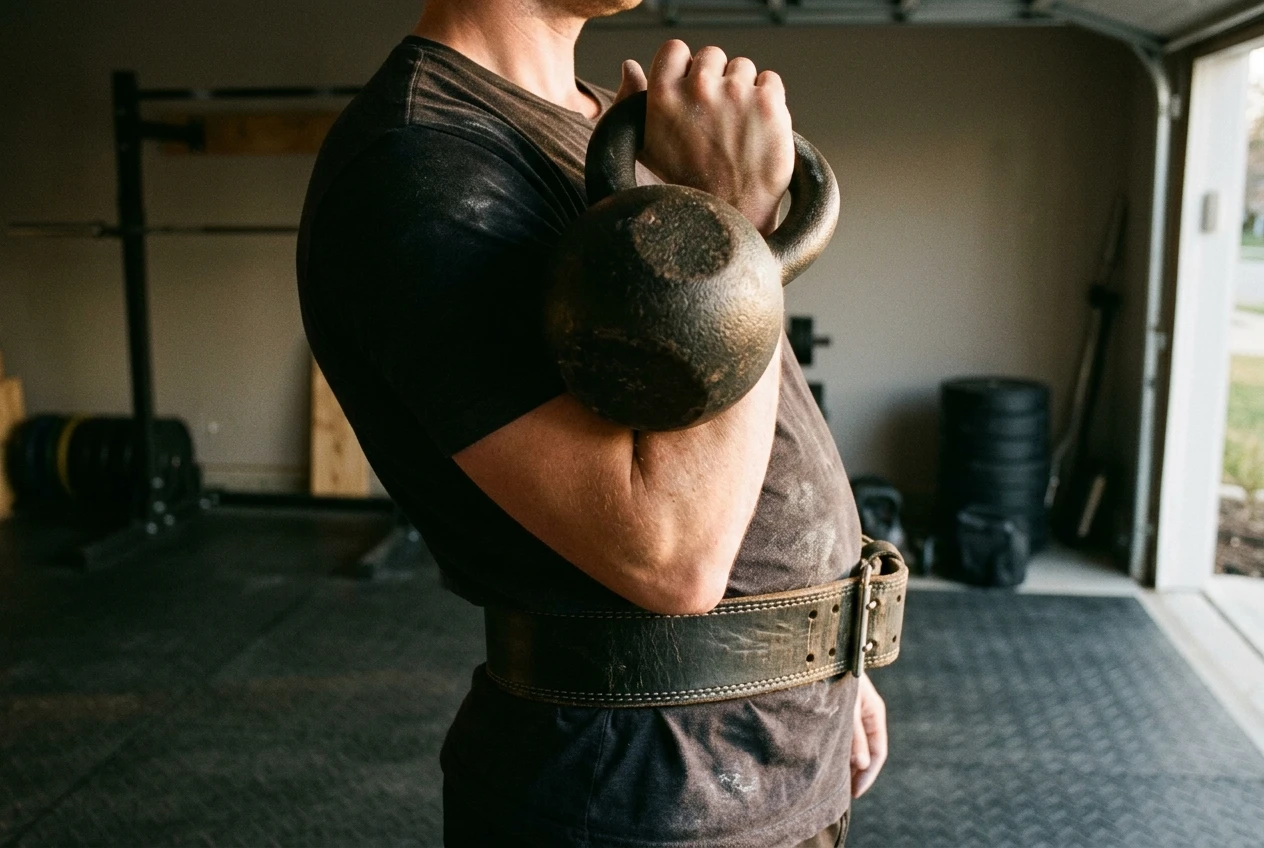
Close side view of a lifter in the kettlebell rack position in a garage gym, the bell resting on the back of the forearm with the elbow pressed against a black leather belt's upper edge at the hip, warm side light on rubber flooring.
The Best Lifting Belt for Kettlebell Complexes Is Decided by Width and Closure, Not Material 35

Rack, press and squat. In the rack, your elbow usually rests against the side of your torso, often near the top of the hip. The belt’s upper edge sits in that area. If the belt is too tall at the sides, the elbow lands on the belt and your forearm angle changes. If the belt is too tall at the front, it can press the bell away from your chest, or the belt can dig into your ribs when you inhale. In the squat, your elbows travel toward your thighs and the belt can block them from reaching their normal depth.

Write down the contact points for your own complex. For each move, note where the bell, forearm or elbow touches your torso. Those are the places where belt shape and hardware will matter.

Width and taper: how much belt your ribs and hips tolerate in the rack position

Belt width is the distance from the top edge to the bottom edge. Many lifting belts keep the same width all the way around. Others taper, meaning they are narrower at the front and wider at the back, or the reverse. In a barbell lift, a wide, even belt is fine because nothing interacts with the front edge. In a complex, the front and side edges are where the bell and elbow land.

Two things set how much width you can tolerate.

  1. The distance between your ribs and hips. Some lifters have a long gap between the bottom of the ribcage and the top of the hip bone. Others have a short gap. A belt that fits comfortably in a long gap can jam into the ribs or the hip bone in a short gap, and this shows up most when you bend or rack the bell.
  2. How you rack the bell. If your elbow rests on your hip, the belt’s top edge matters at the side. If the bell sits mostly against your chest and upper abs, the belt’s front height matters more.

A narrower belt, or one that tapers toward the front, leaves more room for the rack. A wider belt gives your abs more surface to press against, which helps bracing but takes up the space where the bell and elbow want to be. Neither is correct for everyone. What you are looking for is the widest belt that still lets you rack, clean and squat without it moving or bunching when the bell touches it.

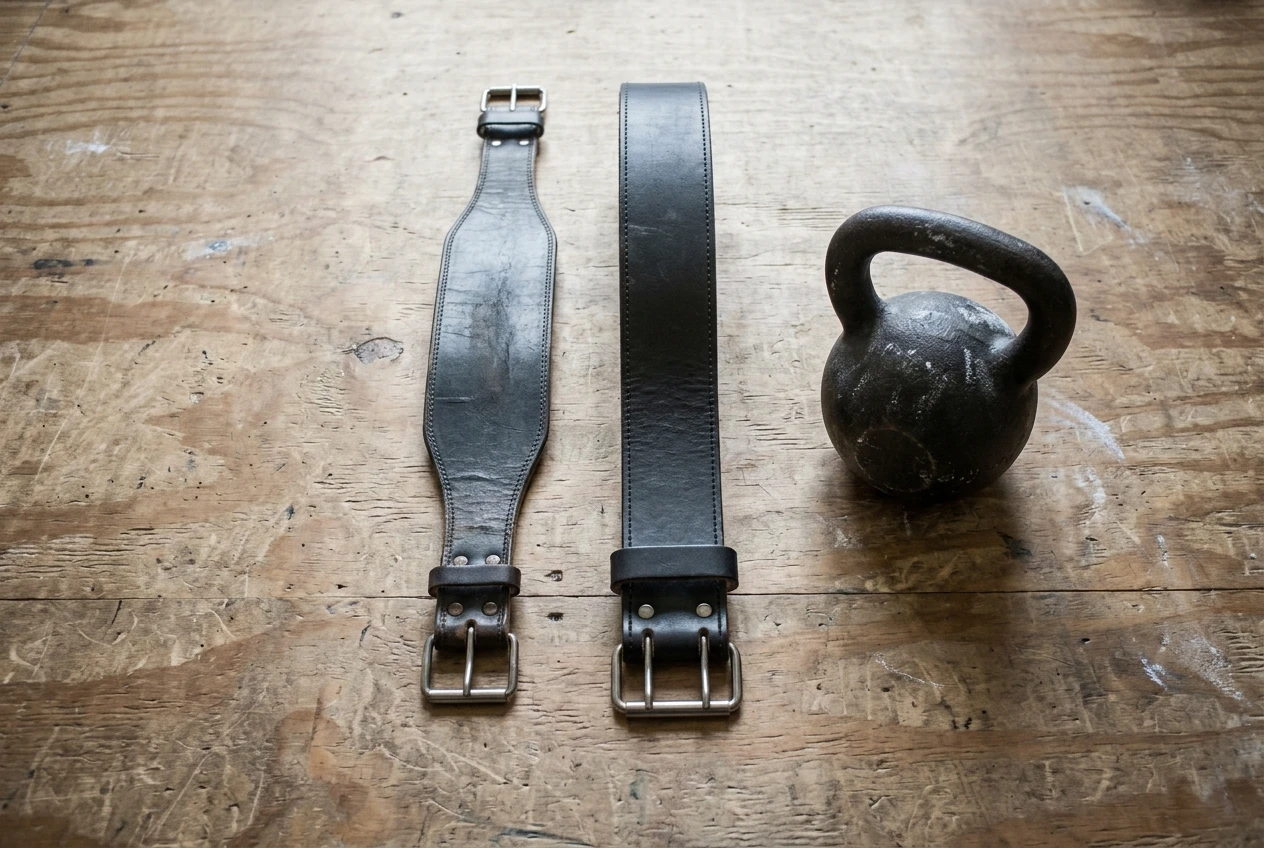
Two lifting belts laid side by side on a plywood gym floor, one narrow and tapering toward the front, the other a wide even-width belt, a single kettlebell beside them for scale, soft overhead daylight.
The Best Lifting Belt for Kettlebell Complexes Is Decided by Width and Closure, Not Material 36

Taper in the other direction, wider at the front and narrower at the back, is the least suited to complexes, because the front is where the bell touches. If you are buying online and cannot see how the belt is cut, look for a product description that gives the front width and the back width separately.

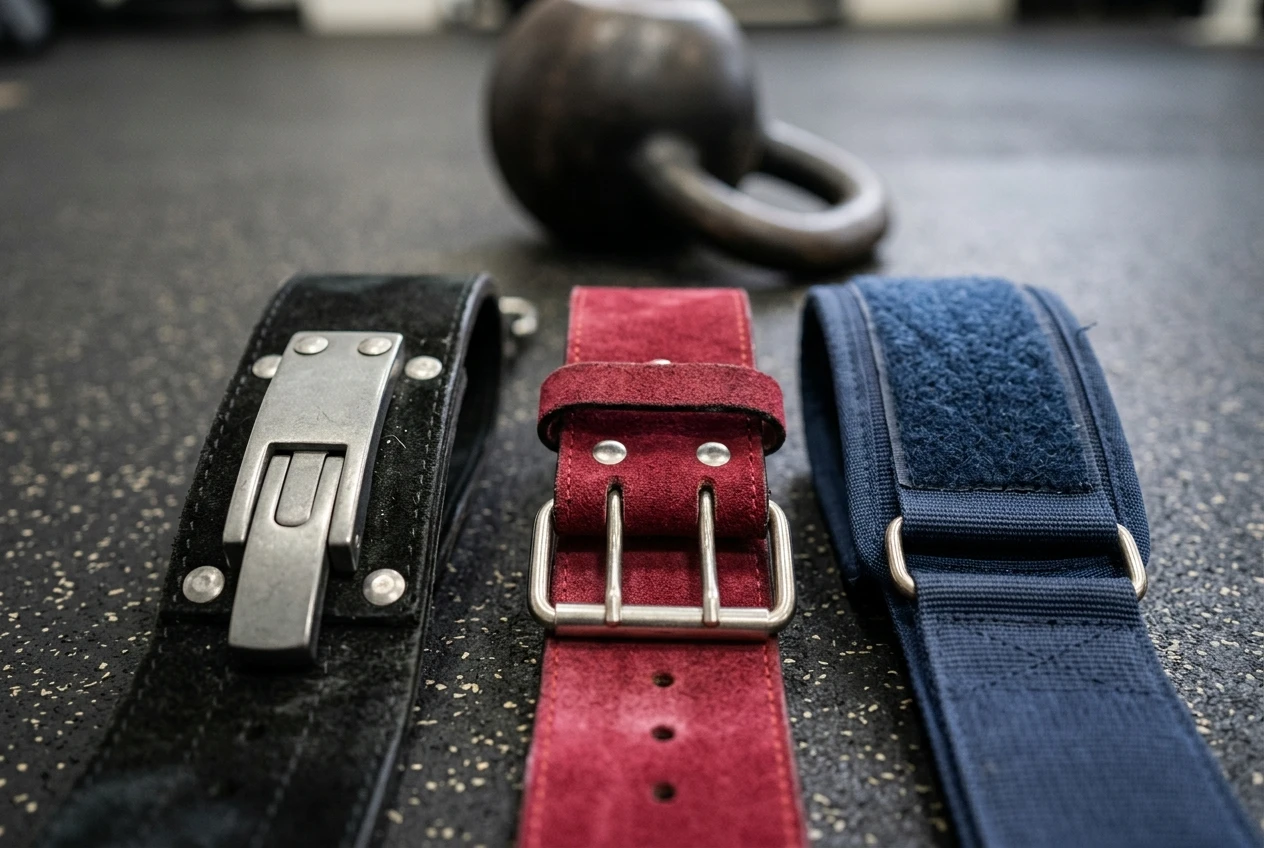
Closure type: lever, prong or velcro when you can’t stop between rounds

In a barbell set, you put the belt on, do the set, rest, and take it off. In a complex you may do five or six moves in a row with a bell in your hand, and the belt has to stay put the whole time. Closure matters in three ways: how it adjusts, how quickly it comes off, and what it does to the area where the bell lands.

Close-up of three belt closures laid in a row on a dark rubber mat: a steel lever clasp, a prong buckle and a flat strip of velcro, each on a different coloured belt end, with a kettlebell handle blurred in the background.
The Best Lifting Belt for Kettlebell Complexes Is Decided by Width and Closure, Not Material 37

Lever. A lever closure clamps shut and holds a set tightness. It is quick to open and close once you have set it, but changing the tightness usually requires a tool or some fiddling with a screw. The lever body is a solid lump that sits at one spot on the belt. If it sits at the front or side where your forearm or elbow lands, you will feel it. Rotate the belt so the lever sits at the back or behind your hip if you can.

Prong. A prong closure works like a regular belt buckle, with holes spaced along the belt. It is simple and adjusts in fixed steps. It takes longer to put on and take off than a lever, and the buckle is a metal piece that can press against the forearm or ribs in the rack. It suits complexes where you put the belt on once and keep it on for the whole session.

Velcro. Hook-and-loop fastening is the quickest to adjust, and it adjusts continuously rather than in steps, so you can tighten it a little between rounds. Its closure is flat, so it does not leave a hard lump under your forearm. The tradeoffs are that it is more likely to loosen over a long session if the hook-and-loop surfaces wear, and it can catch on clothing.

If you stop between rounds and have a minute to adjust, any of the three works. If you move from swings into cleans into presses without putting the bell down, a flat closure that does not sit where the bell lands is worth more than a closure that is slightly stronger. Position matters as much as type: a lever worn behind the hip can be less intrusive than velcro worn on the side where your elbow rests.

Material in one paragraph, and where to read the full comparison

Leather, nylon and suede all work for a complex belt. Leather and suede are stiffer and hold their shape, which also means they can be harder on the ribs in the rack. Nylon is lighter and more flexible, which can make it easier to fit around a bell, at the cost of less rigid support. Which one lasts longest in a home gym is a separate question from which one fits a complex, and it is covered in the full comparison of leather, nylon and suede lifting belt materials.

A fit check you can do at home with a bell in the rack

You can check a belt against your complex in a few minutes with a single bell. Do this before you decide a belt is wrong for you, since a belt that feels bad when it is too loose or too high can feel different once adjusted.

  1. Set the belt. Put the belt on at a snug but not maximum tightness, with the closure at the back or hip if the belt allows it.
  2. Rack the bell on each side. Hold the bell in the rack position and notice where your elbow lands. Check whether it rests on your hip or on the belt. Check whether the bell touches the belt, and whether you can still breathe into your belly.
  3. Run a slow clean. Bring the bell up from the hang position and watch for the bell catching on the belt’s upper edge. Note any scraping or snagging.
  4. Press and lower. Press the bell overhead and lower it back to the rack. Check that the belt does not shift upward or bunch.
  5. Squat with the bell racked. Go to your normal depth and check whether your elbow hits the belt before it reaches your thigh.
  6. Run a few swings. Check the bottom of the hinge for belt contact with your thighs and the bell handle, and look for any closure hardware in the path of your wrists.
  7. Time a change. Do a full complex round, then loosen and tighten the belt. If you cannot do this without putting the bell down for a long time, the closure is too slow for how you train.

Any step where the belt interferes tells you which feature to change: width if the edge is the problem, closure type or position if hardware is the problem.

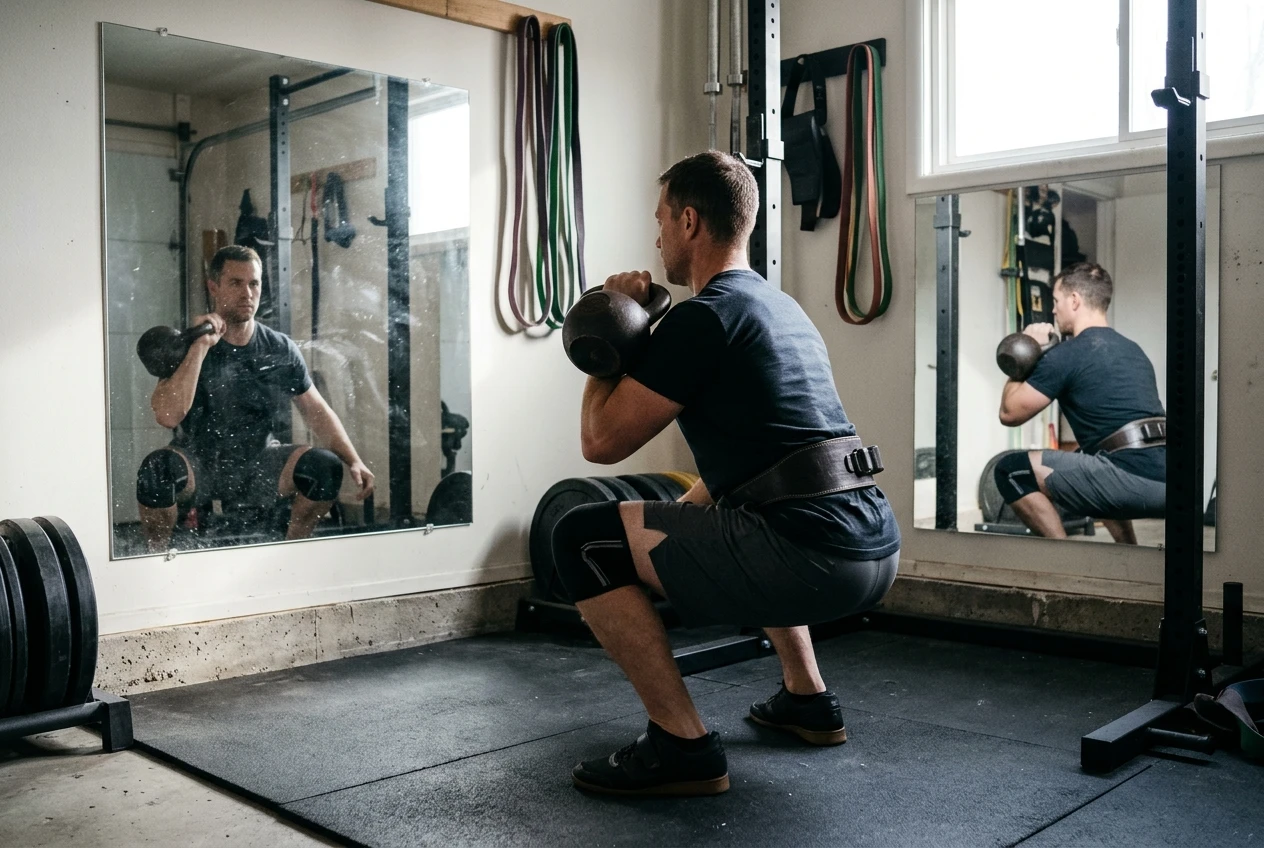
Lifter mid-squat holding a kettlebell in the rack in a home gym, elbows nearing the thighs, a belt worn with the closure turned toward the back, a mirror reflecting the side profile, cool morning light.
The Best Lifting Belt for Kettlebell Complexes Is Decided by Width and Closure, Not Material 38

Matching a belt to your complex: swing-heavy, clean-and-press heavy or mixed

Once you know where the contacts are, the choice follows from which moves dominate your session.

Swing-heavy complexes. Most of the work is hinging, and the bell stays off your torso. Prioritize freedom at the front and thighs: a belt that is narrow at the front, with no closure hardware where the wrists pass. A belt may not be needed for the swings themselves, so consider wearing one only for the heavier moves, if your complex has them.

Clean-and-press heavy complexes. The rack position is where you spend most of your time. Choose the belt with the least height at the front and sides, and the flattest closure, which usually points to a narrower belt with velcro or a lever worn at the back. Check the elbow rest carefully, because the rack is where a bad fit shows up on every rep.

Mixed complexes. If you run swings, cleans, presses and squats back to back, pick a belt that works acceptably in the rack, since that is the position that conflicts with a belt most. A tapered belt with a flat closure positioned away from the bell’s landing spot is the safest compromise. If a belt that suits the rack feels too thin for the squats, the difference is something you can judge during the fit check above.

Your experience level changes what you want from a belt, and the lifting belt you need at 6 months is not the one you need at 6 years goes into that. If your complex is limited by grip rather than by your trunk, read whether to strap up for kettlebell complexes, move by move before you spend money on a belt.

Run the complexes with a coach on screen

If you want complexes you can follow set by set, so that you spend your attention on where the bell lands and not on what comes next, take a look at kettlebell.monster. It gives you a structured workout to check your belt against.

Affiliate disclosure: the kettlebell.monster link is an affiliate link, so I may earn a commission if you buy through it.
Where Kettlebell Sessions Go in a Powerlifting Week So They Don’t Wreck Your Next Heavy Day

If you already run a squat, bench and deadlift split, the question is not which kettlebell program to pick. It is which day each session goes on.

If you already run a squat, bench and deadlift split, the question is not which kettlebell program to pick. It is which day each session goes on. The way to add kettlebell training to a powerlifting program without losing bar performance is to place each session by what it tires, and to put it as far as possible from the heavy lift that uses the same tissue.

This article walks through that method in order: map your lifting days, label your kettlebell sessions, apply a spacing rule, then see the rule applied to a 3-day and a 4-day split.

Start by mapping what each of your lifting days leaves tired

Before a kettlebell session goes anywhere, write down what each heavy day leaves sore or depleted for the next day or two. Use body parts, not lift names. For a standard split, the list looks like this:

  • Squat day: quads, glutes, lower back (from bracing under load), upper back.
  • Bench day: shoulders (especially the front of the shoulder), triceps, chest.
  • Deadlift day: grip, hamstrings, lower back, upper back.

Your own list may differ. If your squat leaves your hamstrings sore, or your bench leaves your elbows achy, add that. Include accessory days too, since a day of rows and curls taxes your grip and elbows even if no heavy barbell lift happens.

Put the list next to a seven-day calendar with your lifting days marked. You will use it in the next two sections.

Label every kettlebell session by what it taxes, not by its name

A session name tells you the theme. It does not tell you which part of your body will be tired afterward. Whichever Kettlebell Monster session you are considering, read through its exercise list and tag it with what those movements load. For most kettlebell work, three labels cover it:

  • Grip: swings in higher reps, cleans, snatches, rows, carries, and any movement where the bell is held for a long time. Forearm fatigue builds with time under tension, so long sets matter as much as heavy bells.
  • Hamstrings and lower back: swings, cleans, snatches, deadlift variations, and anything that has you hinging repeatedly. High-rep swings load the hamstrings and spinal erectors in a way that looks very much like a deadlift day.
  • Shoulders: presses, snatches, get-ups, windmills, and overhead carries. Anything that holds a bell overhead or presses it loads the same joint your bench press uses.

Most sessions carry more than one label. A snatch or clean session usually loads all three, which makes it the hardest kind to place. A session built around swings and goblet squats mostly loads hamstrings, lower back and grip. A session built around presses and get-ups mostly loads shoulders.

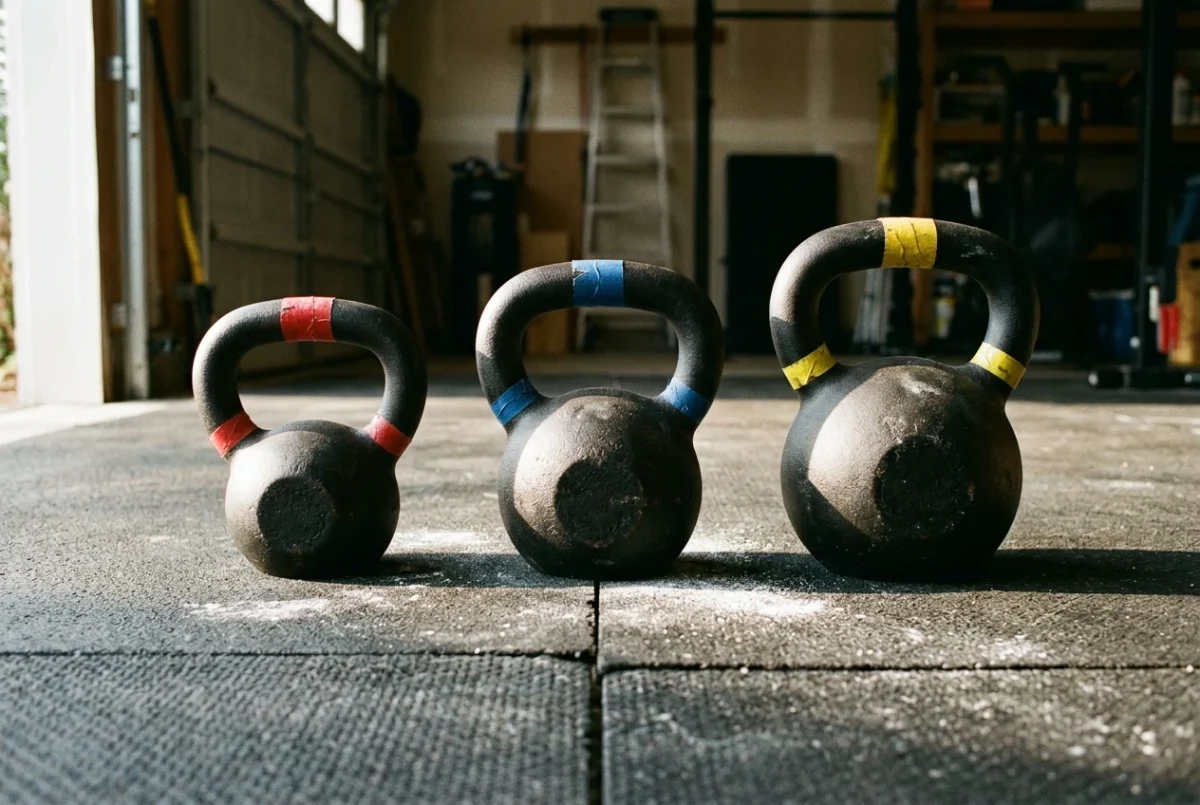
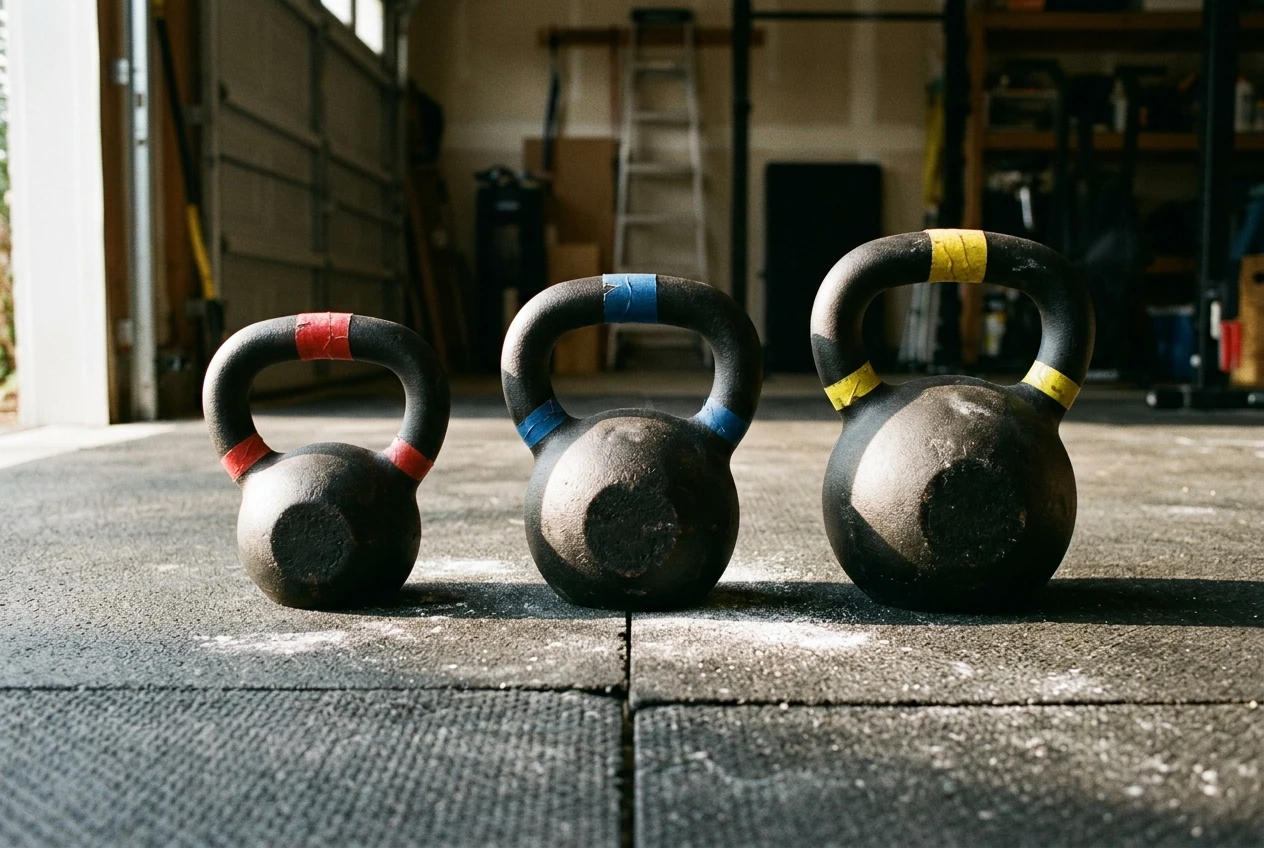
Three kettlebells of different sizes lined up on a worn rubber gym floor in a home garage, each with a strip of colored tape on the handle (one red, one blue, one yellow), side light from a roller door, chalk dust on the floor.
Where Kettlebell Sessions Go in a Powerlifting Week So They Don't Wreck Your Next Heavy Day 44

Write the labels beside each session you plan to run, ranking them if you can: “mostly hamstrings and back, some grip” is more useful than a single tag. If a session has three labels at similar weight, treat it as three problems when you place it.

If grip is the label you notice most often, the post on giving kettlebell grip its own block covers how to train it deliberately. Here it is just a tag.

The collision rule: keep like-taxing work two days from the lift it would hurt

The rule is short. A kettlebell session that shares a label with a heavy lift should sit at least two days away from that lift, on both sides when your week allows it.

Here is what that looks like in practice:

  • A hamstring and lower-back session should be two or more days after your deadlift day and two or more days before the next one.
  • A grip-heavy session follows the same spacing from the deadlift, and from any rowing or heavy pulling day.
  • A shoulder session should sit two or more days from your bench day, before and after.

The rule is about the specific tissue, not the whole day. A shoulder-heavy kettlebell session can go on the same day as a deadlift, because deadlifts barely load the shoulders. A hinge-heavy session can go on bench day for the same reason. That is why mapping comes first: it shows you which days are open for which labels.

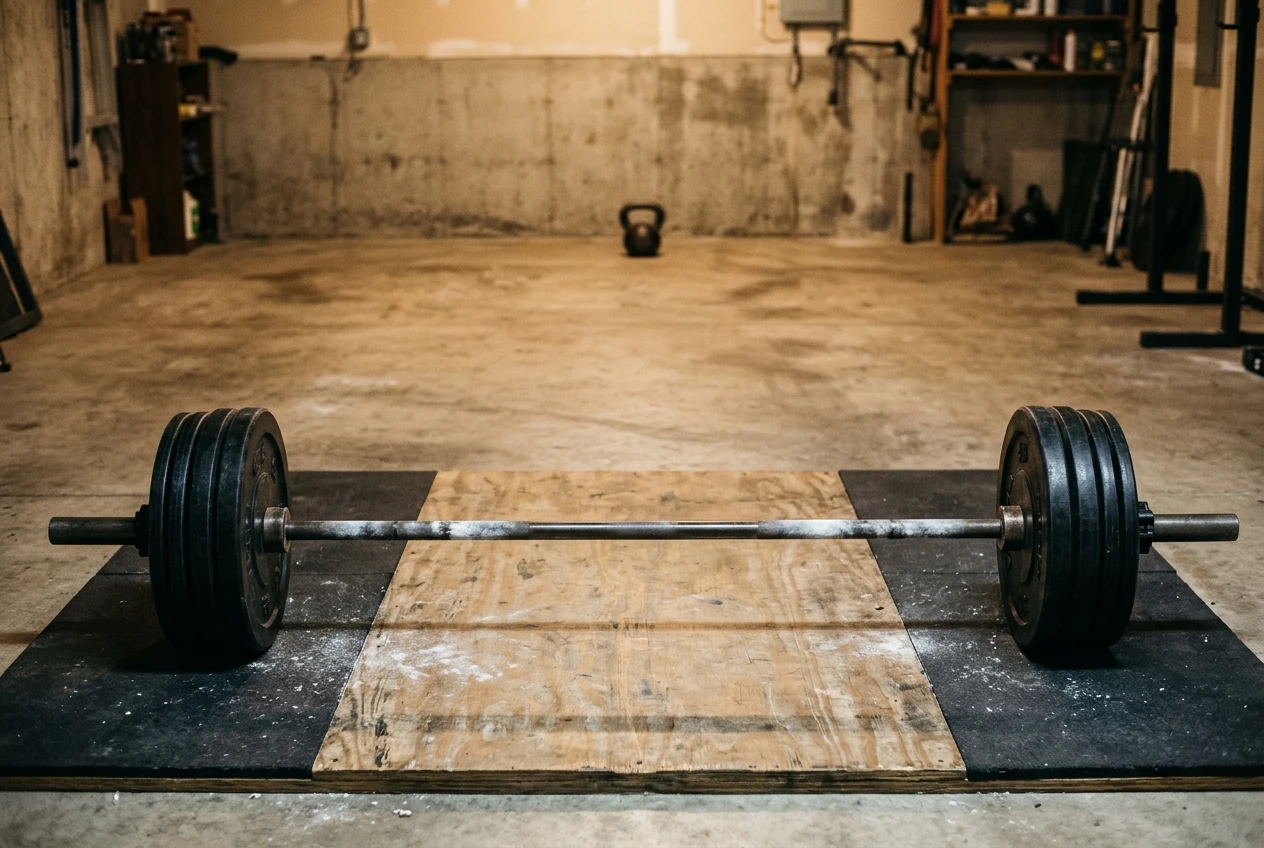
A loaded barbell resting on a deadlift platform in the foreground, with a single kettlebell sitting on the floor several metres behind it near the far wall, showing the gap between them. Warm tungsten light, chalk-marked bar, concrete garage walls.
Where Kettlebell Sessions Go in a Powerlifting Week So They Don't Wreck Your Next Heavy Day 45

Two cases do not fit cleanly:

  1. Squat day and hinge sessions overlap in the lower back. Treat squat day as a partial collision. Keep hinge sessions off the day directly after squats when you can, and run them at the light end if you cannot.
  2. A mixed-label session such as snatches or cleans. Place it by the label that collides with your most important lift, then shorten it or lighten the bell.

Your calendar will not always allow two clear days on both sides. When it does not, give priority to the side after the heavy lift’s recovery and to the side before your heaviest day of the week. That is usually the deadlift for lifters who pull heavy.

A 3-day split with kettlebell sessions placed around it

Take a common three-day layout: squat on Monday, bench on Wednesday, deadlift on Friday. That leaves Tuesday, Thursday, Saturday and Sunday open. Two kettlebell sessions fit as follows.

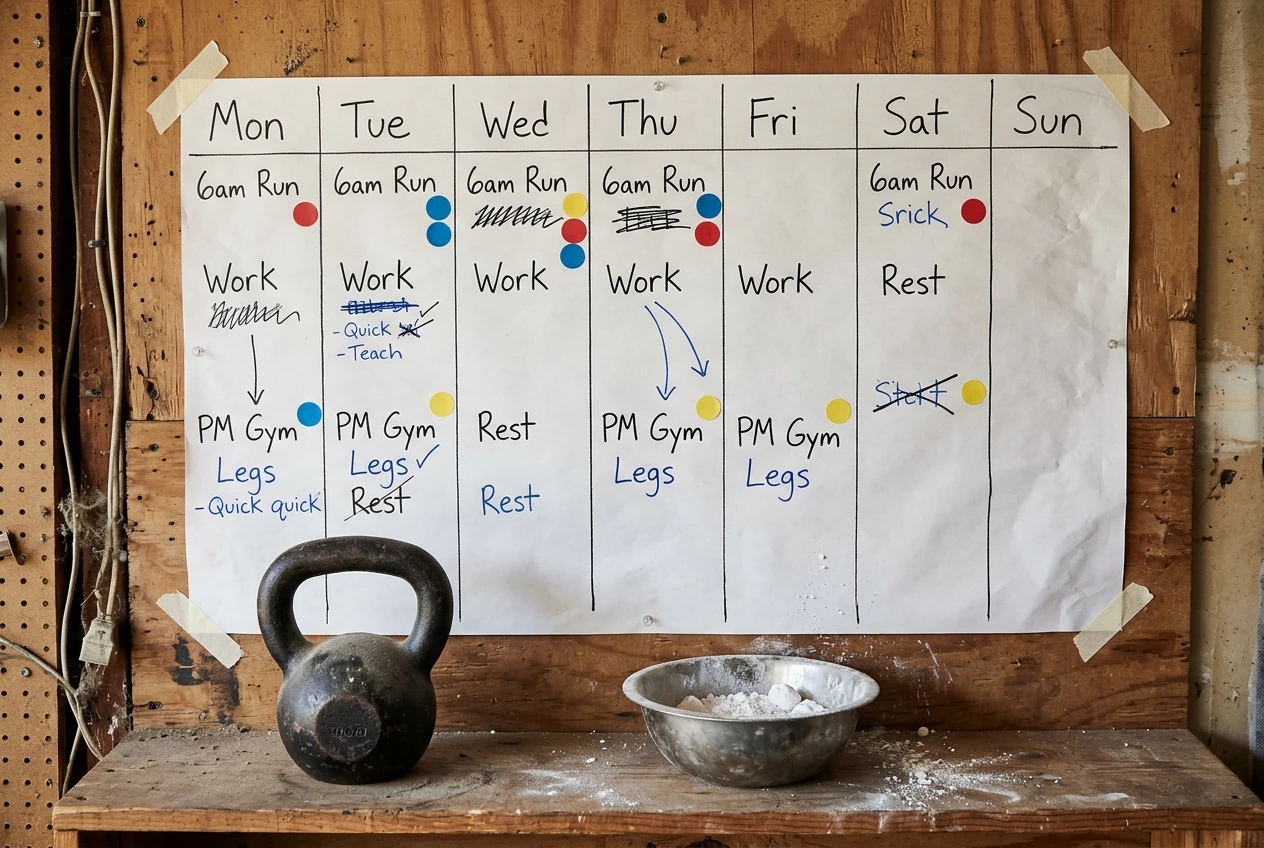
A paper wall planner on a garage wall with seven day columns, handwritten notes in marker, and colored sticky dots in red, blue and yellow placed on some days while others stay empty. A kettlebell and a chalk bowl sit on a shelf beneath it.
Where Kettlebell Sessions Go in a Powerlifting Week So They Don't Wreck Your Next Heavy Day 46
  • Monday: squat.
  • Tuesday: off.
  • Wednesday: bench, then a hamstring, lower-back and grip kettlebell session (hinge-focused, no overhead work). Wednesday is two days before Friday’s deadlift and five days after the previous one, so it meets the rule for the pull. Bench day does not load the hips or grip much.
  • Thursday: off.
  • Friday: deadlift.
  • Saturday: shoulder-focused kettlebell session (presses, get-ups, windmills). Saturday is three days after bench and four days before the next one.
  • Sunday: off.

Check the trade-offs. Wednesday’s session lands two days after squats, so the lower back is the shared area. Keep the swings in that session moderate in volume and leave the heavy bell for another week. Saturday’s shoulder session comes the day after deadlifts, but pressing work mostly spares the hamstrings and lower back. The one shared area is grip, so pick pressing work that does not need long holds.

If you only want one kettlebell session in the week, use Wednesday for hinge work or Saturday for shoulder work, depending on which area your heavy lifts leave in better shape.

A 4-day split with kettlebell sessions placed around it

A common four-day version is squat on Monday, bench on Tuesday, deadlift on Thursday, and a lighter squat or accessory day on Saturday. Sunday and Friday and Wednesday remain open, but not all of them are good for kettlebells.

  • Monday: squat.
  • Tuesday: bench.
  • Wednesday: off.
  • Thursday: deadlift.
  • Friday: off.
  • Saturday: squat variation or accessory work, then a hamstring, lower-back and grip kettlebell session if the accessory work is quad-focused. Otherwise place the kettlebell session here and keep the accessory work light. Saturday is two days after deadlift and two days before Monday’s squat, so the pull and the next squat are both protected.
  • Sunday: shoulder-focused kettlebell session. Sunday is five days after Tuesday’s bench and two days before the next one.

Saturday and Sunday back to back mean no full rest day on the weekend, so keep both sessions short. If that feels like too much, move the shoulder session to Thursday after the deadlift. It is two days after bench and five days before the next, which satisfies the rule, but you will be pressing on a day when your back and grip are already worked. Run it light on that day.

Do not place a kettlebell session on Wednesday or Friday just because the day is empty. Wednesday is one day after bench, so a shoulder session collides with it. Friday is one day before the Saturday work, which splits your recovery across the week.

What to cut first when a heavy week and a kettlebell week land together

Some weeks the plan collides with itself: a heavy deadlift top set, a test of a new max, or a peak-week block lands in the same week as your full set of kettlebell sessions. The main lifts stay. Cut the kettlebell work in this order:

  1. The session with the most labels. A mixed session that loads grip, hamstrings and shoulders is likely to collide with something, so it goes first.
  2. The session nearest to the heavy lift. If a kettlebell session is within a day of your heaviest top set and shares a label with it, skip it or move it two days away.
  3. Volume inside a session you keep. Cut sets or the heavier bell before you cut the session. A shorter swing set or a lighter press keeps the movement practice while lowering the fatigue.
  4. Frequency last. If everything else holds, drop to one kettlebell session for the week and keep the one that avoids your heaviest lift’s tissue.

If your work schedule is the reason your week is squeezed, the post on changing the dose, not the kettlebell, when work hours spike covers cutting volume while keeping the habit.

A lift you are about to test is a bad place to experiment. During those weeks, run a kettlebell session only if it does not share a label with the test lift.

How to tell after two weeks whether the placement is working

Give a new layout two full weeks before you judge it. One week can mislead you, because a single poor session might be caused by sleep or food. Two weeks of the same signal is a pattern.

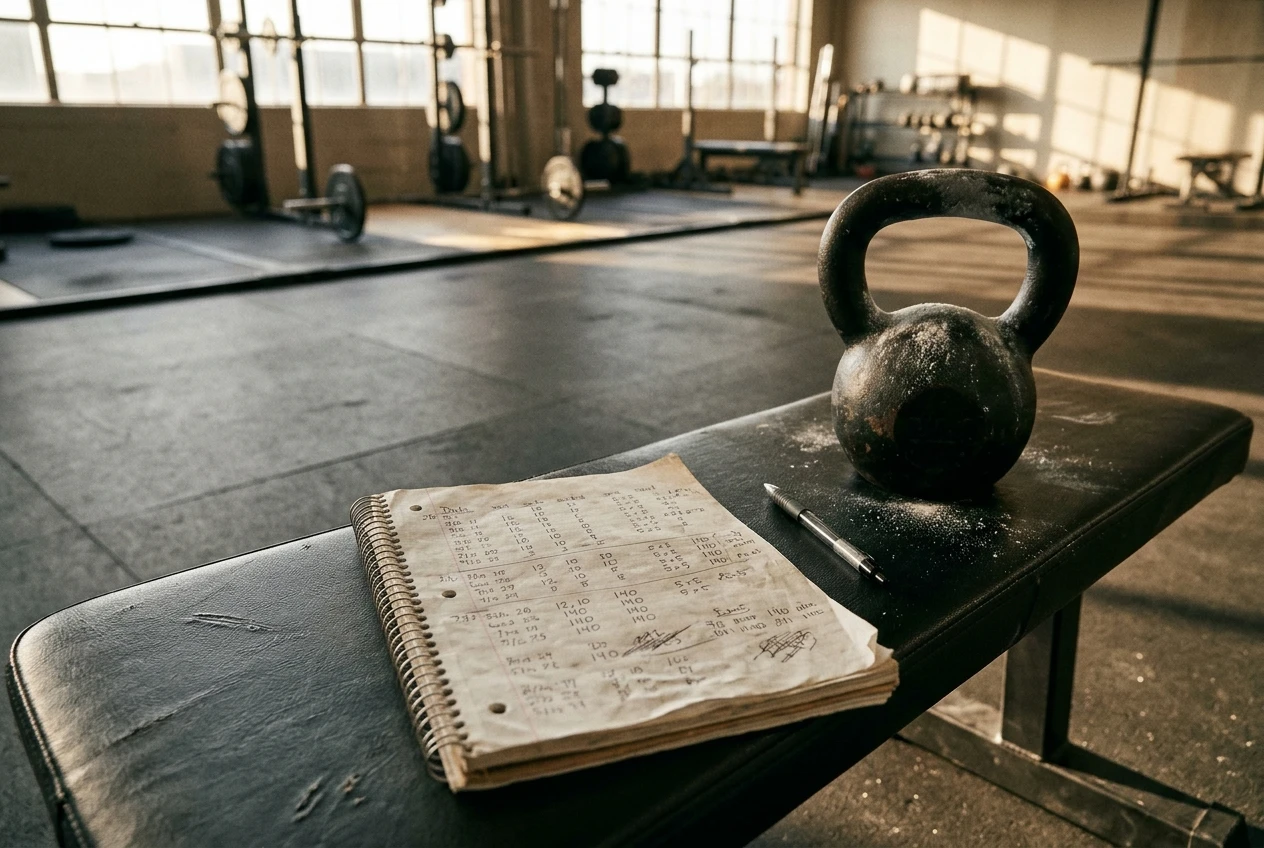
A open spiral training notebook lying on a loaded bench beside a pen and a chalk-dusted kettlebell, pages filled with handwritten numbers, morning light from a window across the gym floor.
Where Kettlebell Sessions Go in a Powerlifting Week So They Don't Wreck Your Next Heavy Day 47

Track these things for each heavy day, and compare them with the two weeks before you added kettlebells:

  • Warm-up feel. If the empty bar or your first warm-up sets feel heavier than usual, the previous day’s work has not cleared.
  • Top-set effort. Note how hard your top set feels at the same weight (an RPE number works). A rise of a point or more across both weeks points to a collision.
  • Grip on deadlift days. If your grip gives out before your back or legs, the grip label is landing too close to the pull.
  • Soreness at the start of a heavy session. Soreness that is still there on the day of the lift tells you which label to move.
  • Kettlebell session quality. If your swings or presses degrade on the kettlebell day itself, the heavy lift two days before may still be affecting you.

When a signal shows up, change one thing at a time:

  1. Move the offending session one day further from the heavy lift.
  2. If you cannot move it, cut its sets by about a third and keep the bell the same.
  3. If that does not help, swap it for a session with a different label.

If none of the signals show up, the layout works. Keep the week as it is and raise only one thing at a time, either bell weight or sets, so you can tell what changed if a signal returns later.

Where to go next

If you want kettlebell sessions you can slot into your week without building them from scratch, look at Kettlebell Monster and check how its session lengths fit the days you mapped. Affiliate disclosure: I earn a commission if you sign up through this link, at no extra cost to you.

A Five-Year Home Gym Plan Where Every Upgrade Has to Be Earned

Most home gyms get built in bursts: a sale, a good week, a new goal.

Most home gyms get built in bursts: a sale, a good week, a new goal. The result is a rack that doesn’t fit the room, a pair of shoes bought before the squat could use them, and a bench the lifter never needed. Knowing how to build a home gym over time means buying in an order, and the order matters less than the rule for moving from one purchase to the next.

This plan runs five years, from a single kettlebell to a barbell-based setup. Every stage ends with a gate: a condition you have to meet before you spend money on the next one. The years are a guide. If you pass a gate early, move on early. If you haven’t passed it, the next stage waits.

Decide what “professional” means for your training before you buy anything

A professional-feeling home gym is not the one with the most equipment. It lets you run your planned session from warm-up to last set without improvising: no moving a bench to make room, no stacking plates on a chair, no skipping a lift because nothing in the room supports it.

That definition depends on what you train for, so write down three things before Year 1:

  • The lifts you want to do in five years. For example: squat, press, deadlift and row with a barbell, plus kettlebell work for conditioning.
  • How many days a week you want to train at home. Two days and five days put very different demands on a room.
  • The space you can give the gym permanently. Measure the floor and the ceiling height, and note whether the room is shared with a car, a washing machine or a child’s bedroom.

Keep the note where you will see it. Each later purchase gets checked against it. If a piece of gear doesn’t serve one of those lifts, or doesn’t fit that space, it fails the check before the other questions are asked.

Year 1: One kettlebell, one patch of floor, and a habit you can prove

The first year is for building the thing that makes every later purchase worth it: a habit of showing up that you can prove with a log. One kettlebell supports a surprising amount of work. Swings, goblet squats, presses, rows and carries are all available with a single bell, and varying reps, sets and tempo gives you progression before you need more weight.

Pick a bell you can swing and press for clean reps without your form breaking down. Then give the training a fixed place: a patch of floor where you can swing, set the bell down and move without hitting furniture. If your program runs on a screen, how you position that screen decides how well you can follow it. The post on where to put the screen in a home gym covers that without neck strain.

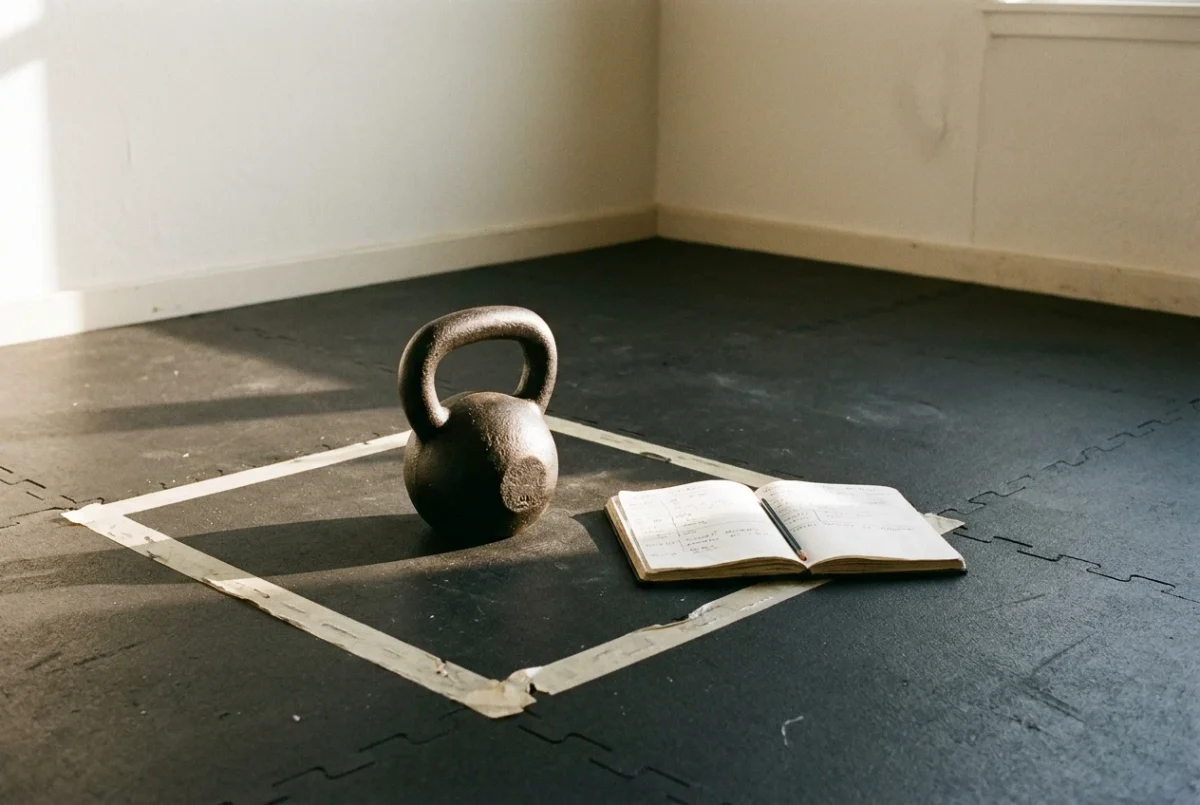
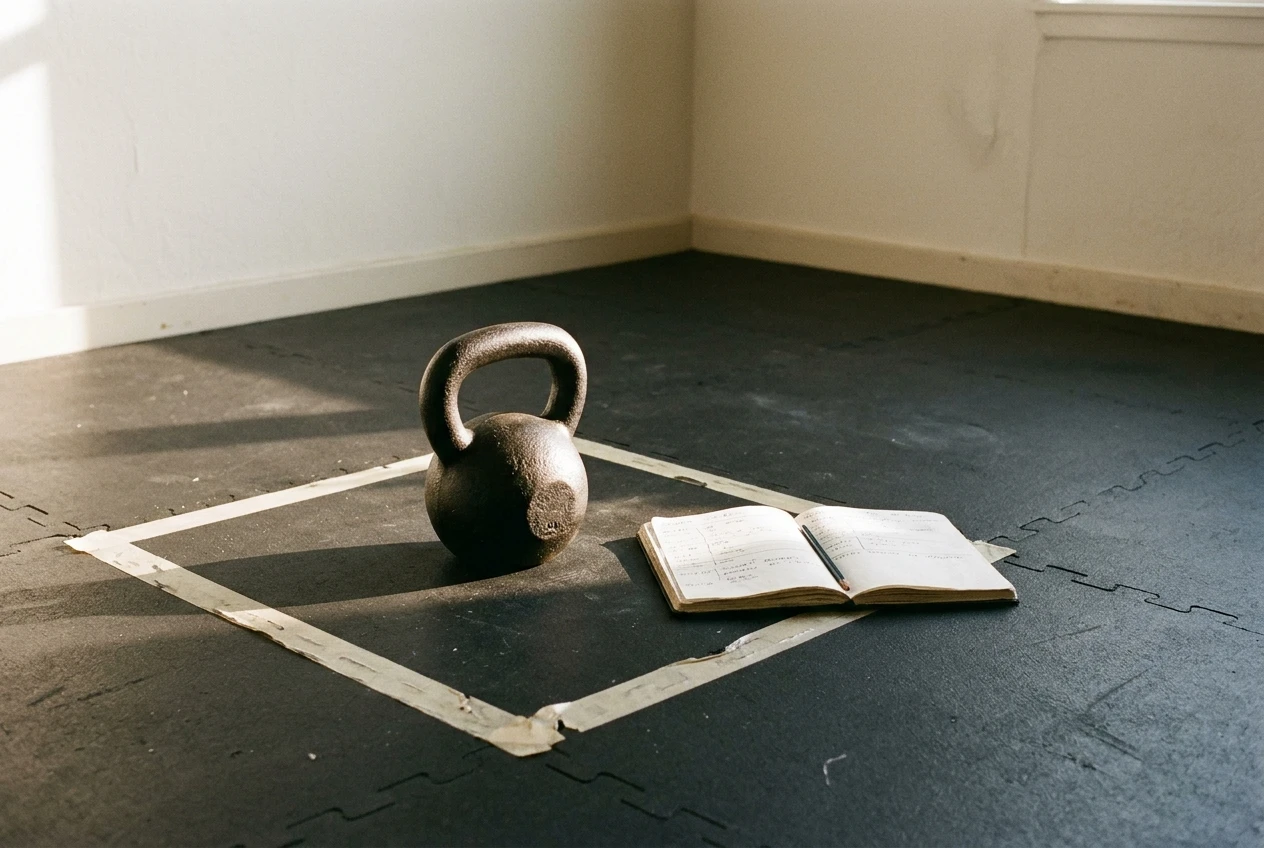
A single cast-iron kettlebell resting on a taped-off square of rubber floor in a bare spare room, morning light from a side window, a handwritten training log open on the floor beside it, with clear empty space around it and no other equipment.
A Five-Year Home Gym Plan Where Every Upgrade Has to Be Earned 53

Follow a program rather than inventing sessions. The sessions are planned, so the log shows what you did and the gate below has something to measure.

The Year 1 gate

You move to Year 2 when both of these are true:

  1. You have a written log of consistent sessions. A reasonable standard is twelve straight weeks in which you trained on the days you planned, with a short miss allowed for illness or travel. If you cannot produce the log, you haven’t tested whether this habit survives ordinary life, and more equipment will not fix that.
  2. The single bell has stopped being enough. The reps in your main movements have hit the top of your program’s range, and you have been there for at least two sessions.

If you meet the first and not the second, stay in Year 1 and keep progressing with reps, tempo and pauses. If you meet the second and not the first, buying gear is a way of avoiding the habit question, and the gate stays closed.

Year 2: Add load, bands and grip support only when reps stop progressing

Year 2 is about adding resistance and fixing the weak links in your single-bell routine. Three purchases belong here, each with its own trigger.

A heavier kettlebell. Buy it when reps, not weight, have run out of room. The reps-first test for buying a heavier kettlebell lays out how to check this. The short version: if you can still add a rep or a set at the current weight, the next bell is a purchase you don’t need yet.

Resistance bands. Bands take almost no space and add variation: assisted movements, accessory pulling, warm-ups, and resistance in places a kettlebell doesn’t reach. They are a good Year 2 buy because they fix specific gaps, such as upper back work or shoulder prep, without using floor area. If you are tight on space, bands compared with iron per square foot is worth reading before you choose how many to buy.

Grip support. Your hands often tire before your legs and back do. Before buying straps, check whether the grip is the actual limit and whether training it directly would fix it. Giving grip its own block is the cheaper first move. If you later decide support is warranted, chalk or straps are small purchases that don’t take space.

The Year 2 gate

Move on when your training has produced a clear problem a single bell and bands can’t solve. For most lifters that means you are doing your main kettlebell movements with a heavy bell, have worked through your progression options (reps, sets, tempo, single-arm variations), and still want to load a squat or a hinge beyond what a bell allows. That is the signal that a barbell is the next real step.

If your sessions are still progressing, you are not at the gate. Progress is the evidence that the current equipment is working.

Year 3: The barbell, rack and bench, and the floor space they take

Year 3 is the biggest jump in cost, in space and in what the room is for. A barbell setup changes your training because you can add weight in small increments and load the legs and back far beyond what a kettlebell allows. It also changes the room: the floor is now partly given over to a rack, a bench and a bar that needs space to be loaded, lifted and put down.

Run the space check first

Before ordering anything, measure and write down:

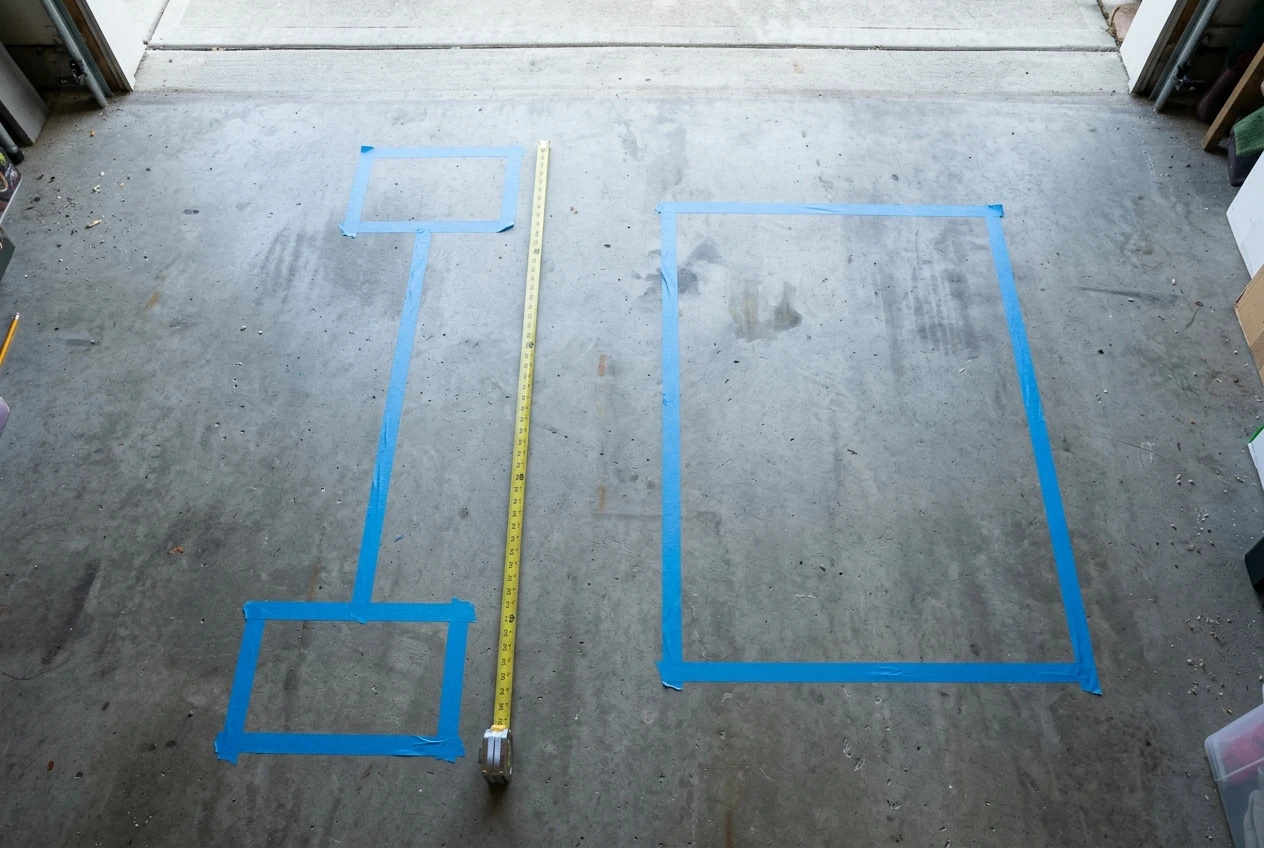
Overhead view of a garage floor with bright blue tape outlining the footprint of a 7-foot barbell with loading space at each end, a tape measure stretched along one side and a rack-sized rectangle marked out beside it, under cool daylight from an open garage door.
A Five-Year Home Gym Plan Where Every Upgrade Has to Be Earned 54
  • Bar length plus loading room. A standard Olympic bar is about 7 feet long, and you need room on both ends to slide plates on and off. Mark the footprint on the floor with tape.
  • Ceiling height. Check it against your overhead press and, if you rack from the floor, against the height of the rack. This is the check that most often rules out a particular rack.
  • Floor and noise. A dropped bar or plate is loud and can damage some surfaces. If you share walls or have a wooden or upper floor, plan the flooring before the plates.
  • Walking room. You need to get in and out of the rack and move around the bar without squeezing past it.

If the tape outline makes the room unusable for anything else you need it for, you have learned that before spending the money. Consider a smaller rack or a different room, or stay at Year 2 for longer.

What to buy, in order

  1. Rack with safeties. Safeties are what let you squat and bench alone with a margin for failing a rep. It is the item the others depend on.
  2. Bar and plates. Buy what your planned lifts need rather than a full set. You can add plates as your lifts rise.
  3. Bench. Add it when you are ready to bench or do supported pressing, not before. If your floor space is tight, a flat bench may do more than a multi-position one, because it takes the same room and has fewer moving parts.

A barbell setup comes with costs beyond the sticker prices, such as delivery, flooring and the training weeks lost when something doesn’t fit. The post on what a home gym really costs when you count the weeks you can’t train is a good companion at this stage.

The Year 3 gate

You move on when you have trained with the barbell for a sustained stretch, again shown by your log, and when the setup is stable: the rack is secure, the space works and you are not rearranging the room to start a session. Buying Year 4 gear for a setup you still use irregularly mostly adds cost.

Year 4: Footwear, a belt and recovery gear that keep you training week after week

By Year 4 you are lifting heavy enough that your equipment’s job changes from adding weight to keeping you training. Footwear, a belt and recovery tools don’t raise your numbers directly. They help you hold technique, tolerate heavier sets and avoid the interruptions that cost you training weeks.

A pair of raised-heel lifting shoes and a thick leather lifting belt laid on a plywood platform edge next to a loaded barbell, with chalk dust on the wood and warm low light in a home garage gym.
A Five-Year Home Gym Plan Where Every Upgrade Has to Be Earned 55

Lifting shoes. A raised, firm heel helps some lifters squat in a better position, particularly when ankle mobility limits depth. Buy them when you notice that limit in your own squat, not because they are standard gear. If you do buy a pair, cleaning and caring for lifting shoes in a garage or spare room will help them last.

A belt. A belt gives your trunk something to brace against on heavy squats and deadlifts. The one that suits a lifter early on can differ from the one that suits them later, which is covered in the lifting belt you need at 6 months versus 6 years. A belt is worth buying once your working sets are heavy enough that bracing is a limiting factor.

Recovery gear. This category is easy to over-buy. The useful question is what actually ends your training weeks: a sore elbow, a tight back, a lack of sleep. Choosing your next purchase by what ends your training weeks gives a method for matching a purchase to a real problem. If nothing is interrupting your training, you don’t need recovery equipment yet.

The Year 4 gate

For each item, the gate is a specific, repeated problem you can name. “My heels lift in the squat at working weights.” “My lower back loses tension on my top deadlift sets.” “My shoulder is sore after pressing days and keeps me out of the next session.” If you cannot finish that sentence, skip the purchase.

Year 5: Specialise with a platform, a second training zone or competition-style gear

By Year 5 the setup is stable and your training has a direction. This stage is for specialising the room around that direction. Three options fit, and you may need only one.

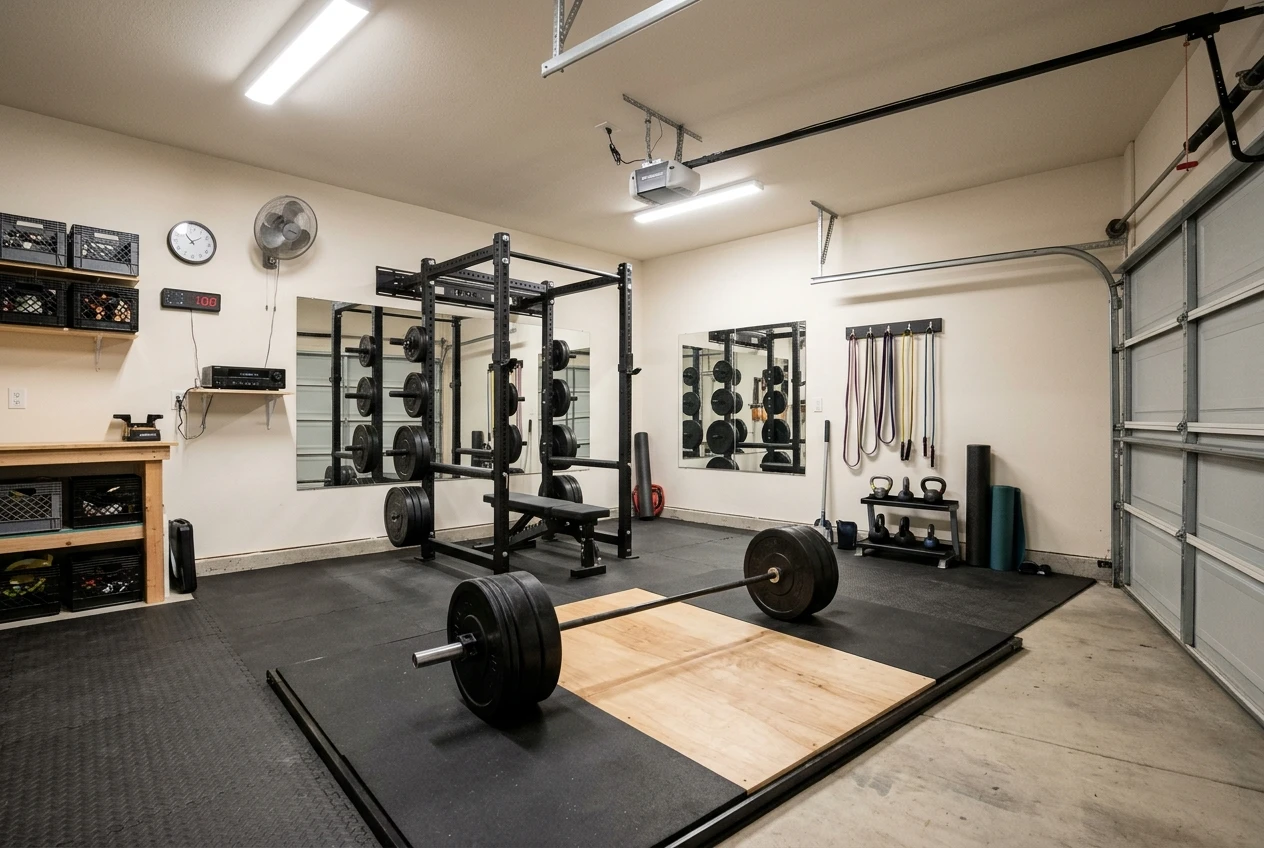
A finished home gym in a garage: a plywood-and-rubber lifting platform with a loaded barbell in the centre, a power rack behind it, and in the far corner a separate small zone with a kettlebell and bands on the wall hooks, tidy and evenly lit by overhead lights.
A Five-Year Home Gym Plan Where Every Upgrade Has to Be Earned 56

A lifting platform. If you do deadlifts, cleans or snatches, a dedicated platform protects the floor and gives you a consistent, level surface. It makes sense when your current floor is the limiting factor in how you lift or how heavy you can go.

A second training zone. A separate area for kettlebell conditioning, mobility or accessory work keeps the barbell zone set up for the next session. It costs floor space, so it pays off only if switching between kinds of training is currently slowing you down.

Competition-style gear. If you plan to enter a meet, your federation’s rules decide what is allowed, so read the rulebook before buying. For the order in which to buy, what to buy before your first powerlifting meet prep, sorted by month is built around that timeline.

The Year 5 gate

You specialise when you have a concrete reason: a meet date, a repeated limit on your current setup, or a training focus that has settled for long enough that you trust it. A professional-feeling room at this stage is one where every item is there because you use it, and the space shows it.

The upgrade gate: questions to answer before every purchase

The same set of questions applies at every stage. Answer them in writing, and if any answer is “no” or “I don’t know”, wait.

  1. What specific problem does this fix? Name it in one sentence. “It would be nice to have” is not a problem.
  2. Is the equipment the limit, or is the program? A stalled lift is often a programming, sleep or food issue. Check those first.
  3. Does my log show I’ve earned this stage? The gate for the stage you are in should be met on paper, not in memory.
  4. Does it fit? Check it against your space note: floor area, ceiling height, noise, and walking room around the rest of your gear.
  5. Will I use it in the next four sessions? If you can’t say where it fits in a planned week, it is not ready to be bought.
  6. Is there a cheaper way to learn whether I need it? Borrowing, using a gym session once, or buying used can answer the question before you commit.
  7. What will I stop doing, or not buy, if I spend this? If the money would come from a program, coaching or a repair you need, the order is wrong.

Spending a few minutes on these seven questions is cheap compared with storing, selling or working around gear you didn’t need.

When to stay put, skip a year or sell something

The plan runs on evidence, so it permits three moves that a shopping list doesn’t.

Stay put. If your reps, loads or consistency are still improving with what you own, the current stage is working. Staying in a stage for two years instead of one is a result, and your room, your budget and your joints all benefit.

Skip a year. Some lifters never need Year 2 gear, or move from Year 1 to a barbell once they have a rack-sized space. If you pass a gate early and the questions above all come back clean, go ahead. Skip a stage because the evidence says so, not because you are impatient.

Sell something. If a piece of equipment has gone unused for a full training block, it has failed question 5 after the fact. Selling it frees money and floor space for something you will use. Review your gear when you pass each gate and note what you have not touched since the last one.

The sequence matters more than the speed. A single kettlebell used consistently teaches you more about what to buy next than a full rack bought early and used sporadically.

Start Year 1 with a program you can follow

Year 1 is the stage where a plan saves the most money, because the habit you build there decides whether any of the later purchases get used. Start Year 1 with a kettlebell program you can follow on your TV or phone: see kettlebell.monster. Affiliate disclosure: if you buy through this link, I may earn a commission.

Your Kettlebell Grip Gives Out Before Your Legs Do, So Give It Its Own Block

Most kettlebell lifters treat grip as a side effect. You swing, clean, snatch and carry, and your hands get stronger as a by-product.

Most kettlebell lifters treat grip as a side effect. You swing, clean, snatch and carry, and your hands get stronger as a by-product. That works until the day your hands quit at rep 14 of a set your hips could finish twice. From then on, your hands set the ceiling on your whole program, and extra work at the end of the session won’t raise it.

Grip strength training for kettlebell lifters works better when it gets its own block, with its own goal and its own way of being measured. This article covers how to spot the problem, what the block looks like, and how to tell whether it worked.

How to tell if your hands are ending the set instead of the muscles you meant to train

A set is over when you can’t continue with acceptable form. The question is what made you stop. Run through these signs after your next hard session:

Close-up of a hand at the top of a kettlebell swing, the iron handle sitting askew in the open palm with fingers loosening, chalk dust on the knuckles, in a dim garage gym with warm side light and a rubber floor.
Your Kettlebell Grip Gives Out Before Your Legs Do, So Give It Its Own Block 63
  • The bell slips or you re-grip mid-set. In swings, the handle shifts in your palm at the top. In carries, you shorten the walk and set the bell down early.
  • Your forearms burn or cramp before your glutes and hamstrings do. If your legs and hips feel fresh while your forearms are done, your hands set the limit.
  • You stop with reps left in the tank. Ask yourself honestly whether you could have done five more swings if the handle weren’t a problem. If the answer is yes, the target muscles were not the limit.
  • Your rep counts stall while your legs and back keep recovering fine. Soreness and general fatigue are normal, but a set that ends early week after week at the same point points at one weak spot.
  • Your hands are the first thing you think about when you rack the bell. Most people can tell what ended the set once they pay attention.

One distinction matters here. If the skin on your palm tears or blisters, you have a hand-care problem, and a grip block won’t fix it. Grip strength is about muscle in the forearm and fingers. Torn skin is about friction, callus management and handle fit.

If two or three of the signs above sound familiar, your grip is limiting the work you came to do.

Why a few finishing hang holds don’t fix a grip bottleneck

The usual fix is to add a couple of dead hangs or a farmer carry at the end of the session. It feels productive, and it rarely changes anything, for three reasons.

First, your hands are already tired. After heavy swings and cleans, the muscles that close your fingers have been working for the whole session. A hang hold done in that state measures how much fatigue you carry, and it gives your hands little reason to get stronger.

Second, the dose is too small. A single hang to failure at the end of a workout is a few seconds of real stimulus per week. Strength in any muscle comes from repeated hard sets over weeks, and the forearms are no different.

Third, there is no target. When grip work is whatever you have left over, you never find out whether it helps. You can’t tell if your hands improved, so you can’t tell whether to push harder, change the drill or leave it alone.

A dedicated block fixes all three. The work happens when your hands are fresh enough to be challenged, it is large enough to matter, and it has a number you can check.

What a dedicated grip block looks like inside a kettlebell training week

A grip block is short. It does not need its own long session, and it should not eat time you need for the lifts themselves. A workable structure is two or three slots per week of about 10 to 15 minutes each.

Placement matters more than length. Three options, in order of preference:

A small home-gym corner set up for a short grip session: a pair of kettlebells, a towel wrapped around a bar, a hand gripper and a pull-up bar overhead, on a plank floor in soft morning window light.
Your Kettlebell Grip Gives Out Before Your Legs Do, So Give It Its Own Block 64
  1. A separate short session. On a day with no swings or cleans, do the grip work alone, or after a low-hand-demand workout such as squats or presses.
  2. The start of a session where the main work is easy on the hands. Do the grip work right after your warm-up, then lift.
  3. After a lighter kettlebell day. If you must attach it to a swing or snatch day, make sure the main session was not a hard grip day and that the block sits at the end of a session that left your hands with something in reserve.

Avoid putting the heavy grip work right before a high-rep swing or snatch session. You would be pre-tiring the exact muscles that cap your sets, and your swing numbers will drop for reasons unrelated to your hips.

Here is one way a week could look, assuming three kettlebell sessions:

  • Day 1: Swings and goblet squats. No grip block.
  • Day 2: Grip block alone (10 to 15 minutes), plus any easy mobility work.
  • Day 3: Cleans, presses and carries, grip block first if the session is light on volume.
  • Day 4: Rest.
  • Day 5: Snatches or heavy swings. No grip block.
  • Day 6 or 7: Optional second grip slot, kept short.

Give the block a goal in a sentence, such as “add reps to my unbroken swing set with the same bell” or “carry my bell for a longer distance with the same rest.” A goal like that tells you which drills to pick.

Match the drill to the way your grip fails: crushing, holding or hanging on through swings

Grip is not one quality. Three different failures call for three different drills, and picking the wrong one wastes the block.

Crushing: the bell feels too thick or heavy to squeeze

If you can barely close your hand around a handle or a heavy implement, you have a crushing problem. Useful drills include:

A forearm and hand squeezing a thick towel wrapped around a barbell sleeve, tendons and veins standing out, white chalk on skin, against a dark concrete wall with a single overhead light.
Your Kettlebell Grip Gives Out Before Your Legs Do, So Give It Its Own Block 65
  • Thick-handle holds or squeezes using a towel wrapped around a handle or bar.
  • Hand grippers, if you have one, for low-rep hard squeezes.
  • Heavy single-hand kettlebell holds in a deadlift position, with a fixed hold time.

Keep reps low and effort high. Crushing strength builds from short, hard efforts, and long sets turn it into endurance work.

Holding: your hands open up during carries and long holds

If the bell drops during a carry or a rack hold, you have a holding problem, which is about time under tension. Useful drills:

A lifter seen from behind walking a straight path across a garage floor carrying a heavy kettlebell in each hand at their sides, shoulders level and arms taut, with a second pair of bells waiting at the far end in golden late-afternoon light.
Your Kettlebell Grip Gives Out Before Your Legs Do, So Give It Its Own Block 66
  • Farmer carries with a pair of kettlebells for distance or time.
  • Suitcase carries with one bell, switching hands.
  • Dead hangs from a pull-up bar, if you have one.

Pick a bell weight you can hold for about 30 to 60 seconds with good posture, then add time or distance before you add weight. Using a heavier bell too soon makes you cut the set short, which defeats the purpose.

Hanging on through swings: your hands fail mid-set at moderate weight

Dynamic grip is its own problem. In a swing, the bell pulls on your fingers hard at the bottom of every rep and floats weightless at the top. Lifters whose hands tire in the middle of a swing set often squeeze the handle with full force through the whole rep, which wears out the forearm early.

Two fixes go together:

  • Technique. Keep a firm hold at the bottom of the swing, where the bell is pulling hardest, and let your fingers relax a little at the top, where the bell is nearly weightless. This saves forearm energy across a long set. A video of your own swing helps you see whether you are strangling the handle.
  • Specific drills. Practice swings in shorter sets with more rounds, or use a slightly heavier bell for low reps. Your hands get used to the handle’s pull at a quality you can control.

Pick one primary drill for the failure that stops you most often. A second drill can fill in a weaker area. Three or more drills in a 15-minute block spreads the effort too thin.

How long to run the block, and a reps-first way to check it worked

Run the block for about six weeks. Grip adapts slowly enough that two weeks tells you little, and by eight to ten weeks most people need a new drill or a heavier load anyway. After six weeks, take a lighter week, then retest.

Before you start, set your benchmark. Choose one test that matches your goal and record it:

  • For swings: the number of unbroken swings you can do with your current bell before your hands force you to stop or re-grip.
  • For carries: the distance or time you can carry a specific bell or pair of bells before setting them down.
  • For hanging: how many seconds you can hold a dead hang or a heavy single-hand hold.

After six weeks, repeat the exact test with the same bell, the same rest and the same conditions. If the number went up, the block worked. If it did not, change the drill, add a slot or raise the load, and run another cycle.

A paper training notebook open on a workbench beside a single kettlebell and a stopwatch, with handwritten tally marks in pencil down the page, lit by a warm desk lamp against a gray wall.
Your Kettlebell Grip Gives Out Before Your Legs Do, So Give It Its Own Block 67

The most important rule is to keep the bell the same during the block. If you switch to a heavier bell halfway through, you can no longer compare your reps, and you lose the one measure that tells you whether your hands improved. A reps-first test for deciding when to buy a heavier kettlebell uses the same logic: let the rep count tell you when you are ready, rather than the calendar.

Where straps fit while you build grip, and when to put them away

Straps and a grip block do different jobs. Straps let your hands stay out of the way so the target muscles can work harder. A grip block trains your hands directly. Using straps on the right sets and leaving them off the block drills keeps both jobs separate.

A reasonable approach:

  • Leave straps off during the grip block itself. The purpose of those drills is to make your hands work.
  • Use straps on heavy sets where grip would otherwise end the set early and the goal is the legs, hips or back. This lets you train those muscles with full effort while your grip catches up.
  • Take straps off for any lift you want your hands to get better at, especially swings and snatches, where hand endurance is part of the skill.
  • Put straps away entirely for a lift once your grip no longer ends the set. If your benchmark rises and your hands no longer limit you, there is little reason to keep strapping that movement.

Not every kettlebell lift calls for straps, and the answer shifts from move to move. The article on whether to strap up for kettlebell complexes goes through that move by move.

Running a grip block alongside a follow-along program or your own plan

If you follow a structured program, the block fits as a fixed addition on a day when the main session is light on hands, or as a short standalone slot. Treat it as part of your weekly workload. If the program already has heavy carries or high-rep swings several days in a row, your hands may be getting plenty of volume, and the better move is to shift when the grip block happens rather than add more on top.

If you write your own plan, give the grip block the same status as any other training block: a fixed slot, a goal, a drill list and a benchmark. Write it in your plan before the week begins, so it doesn’t get skipped when you are tired. If you are deciding between a prewritten plan and your own, how to pick between following a kettlebell program and writing your own covers the trade-offs.

Either way, change one thing at a time. If you add a grip block and a new swing progression in the same week, you will not know which one moved your numbers.

If you want a follow-along kettlebell program to slot your grip block into, take a look at kettlebell.monster. Affiliate link: I may earn a commission if you sign up, at no extra cost to you.

Where to Put the Screen: A Home Gym Setup That Lets You Watch Your Coach Without Twisting Your Neck

A bigger screen helps your lifting only if you can see it from where your body ends up in the lift.

A bigger screen helps your lifting only if you can see it from where your body ends up in the lift. In a garage or spare room, a TV that sits in the wrong place turns a bigger picture into a worse view of the coach. This walkthrough covers where the screen goes, how high, how far away, and what else in the room affects it. It fits in one session, and it ends with a short test to run before your first real workout. Most of it applies to any workout TV setup for a home gym, whatever program you follow.

Why a screen that is easy to watch changes what you can fix mid-set

When you follow a coach on a phone propped against a wall, you tend to check the demo before the set and then train from memory. A screen you can see without moving your head lets you check during the set. You can compare your hip position at the bottom of a swing with the coach’s, or see where the coach’s elbow sits in a press, while your own rep is still happening.

That only works if looking at the screen does not change your position. If you have to turn your neck, step sideways or squint, you correct one thing and break another. The goal of the setup is for the glance to cost nothing: the screen is already where your eyes go during the lift.

Sight line first: matching screen height to where your head actually goes

Start from your head, not from the wall. Different lifts put your eyes in different places, so check the positions you will actually use:

  • Swing and hinge work: your torso tips forward at the bottom, but your head should stay in line with your spine. Your eyes land on a spot ahead of you, a few feet out and not far above the floor.
  • Goblet squat, press and clean: you are mostly upright, so your eyes are near standing eye level.
  • Floor work such as the Turkish get-up: you start lying down, looking at the ceiling or at the bell. A wall-mounted screen at standing eye level may be out of sight from there.

Put a piece of tape on the wall at standing eye level, then get into the bottom of a hinge and note where your eyes point. For most standing and hinging work, the screen’s center belongs somewhere between those two heights. For most people that is a little lower than a living-room TV would sit. If you plan to do a lot of floor work, a lower screen or a tilting mount makes more sense than one fixed high.

Which lifts you most want to check matters here. The piece on phone or Samsung TV for kettlebell form goes through that lift by lift. Use it to decide which two or three positions your screen height has to serve, then set the height for those.

A strip of blue painter's tape on a bare garage wall at standing eye level, with a second strip much lower beside it, and a kettlebell resting on the concrete floor below in soft morning light from a side window.
Where to Put the Screen: A Home Gym Setup That Lets You Watch Your Coach Without Twisting Your Neck 73

Distance and angle: how far back to stand

Stand where you will lift, not where you will admire the screen. The test for distance is simple: from your starting stance, can you see the coach’s hands, feet and the path of the bell clearly enough to copy them? If you find yourself leaning in, you are too far. If you have to move your head to take in the whole frame, you are too close.

Screen size changes the answer, so there is no single number that works for every room. Mark your lifting spot on the floor with tape, set the TV where it seems right, and adjust from there. If your room only allows one distance, change the screen height or the angle instead.

A taped X on a grey concrete garage floor where a lifter would stand, with a kettlebell beside it and a wall-mounted flat-screen TV directly ahead at a measured distance, shown from behind the X.
Where to Put the Screen: A Home Gym Setup That Lets You Watch Your Coach Without Twisting Your Neck 74

Angle matters as much as distance. If the screen sits to one side of your lifting spot, every glance twists your neck, and the twist travels into your torso. Put the screen directly in front of you, or only slightly off to one side. If you cannot face it, rotate your stance and your whole body, not just your head.

One safety point comes from facing the screen. A kettlebell swing sends the bell forward, away from your body, at roughly chest height. Leave enough clear floor between you and the TV that a bell released early lands on the floor, not on the glass. A TV on a low stand directly in the bell’s path is a bad idea. A wall mount or a spot off to the side of the bell path is safer.

Glare, chalk, sweat and noise: problems a phone never had

A phone is small and sits close, so glare, dust and echo rarely matter. A TV across a garage meets all three.

Glare. Check the screen from your lifting spot at the times of day you train. Garage door windows, side windows and bare overhead bulbs all reflect off a TV. If you see a reflection that hides part of the picture, move the screen, change the angle, or cover the window. Lights placed behind you are the usual culprit.

A TV on a garage wall showing a bright window reflection across one corner of the screen, with a chalk-dusted kettlebell and a bare overhead bulb in the foreground, warm and cool light mixing.
Where to Put the Screen: A Home Gym Setup That Lets You Watch Your Coach Without Twisting Your Neck 75

Chalk and dust. Chalk, sawdust or concrete dust settles on a screen and softens the image. Keep the TV out of the area where you chalk up, and wipe it with a soft, dry cloth, following the manufacturer’s cleaning instructions for your model. Do not use a damp cloth unless those instructions allow it.

Sweat. Sweat on the screen is unlikely, but sweat on the remote is routine. Put the remote somewhere you can reach without wiping your hands first, and keep a towel next to it.

Noise. A concrete floor and bare walls bounce sound around. A coach’s voice that is clear in a living room can get lost under a clanging bell, a fan or a compressor. Test the volume while you swing, not while you stand still. If the TV’s own speakers lose to the noise in your room, an external speaker placed nearer your lifting spot helps more than turning the volume up.

Taking the phone out of the workout

A phone makes the workout compete with everything else it does. A message, an email or a news alert lands on the screen in the middle of a set. Then your sweaty finger taps the wrong thing and you lose your place in the session.

Moving the workout to the TV removes most of this, provided the phone leaves the room or stays out of reach. Switch it to Do Not Disturb before you start, and put it on a shelf away from your lifting spot. If you need it as a timer or a music source, set that up before the first set and leave it alone.

Next, plan how you will control the TV. A remote has larger buttons than a touchscreen and does not smear when it is wet, but you still have to find it and reach it. Put it on a shelf or bench within one step of your starting position. Decide before the workout where it goes after each use, so you never search for it mid-session.

If you have followed the same program on your phone for a while, you already know the habit of looking down to find your place. On a TV, put that habit to use: pause at the start of each block, look at the screen and note what is next before you pick up the bell.

A ten-minute setup test before your first session

Run this test with a Samsung TV and a kettlebell. Use a light bell, since you are testing the room and not your strength. If you follow a kettlebell program, such as the ones at Kettlebell Monster (affiliate link), use its warm-up. Otherwise, a halo, a goblet squat, a hip hinge and a few light swings cover the positions that matter.

A lifter in the bottom of a kettlebell hinge on a taped spot, head level, eyes on a Samsung TV across a spare room, a towel and remote sitting on a bench within arm's reach.
Where to Put the Screen: A Home Gym Setup That Lets You Watch Your Coach Without Twisting Your Neck 76
  1. Mark your spot (1 minute). Put tape on the floor where you will stand. Everything else is measured from it.
  2. Check the height (2 minutes). Stand on the spot, then hinge. Without moving your head, can you see the screen in both positions? If not, raise, lower or tilt it.
  3. Check the distance (2 minutes). Play a demo and look at the coach’s hands and feet. Can you read them without leaning forward or squinting? Move the TV, or your tape, until you can.
  4. Run the warm-up (3 minutes). Do each movement with the bell, glancing at the screen at the bottom and top of each rep. Note any glare, any twist of your neck, and any moment where you cannot hear the cues over the bell.
  5. Check the controls (1 minute). Pause and resume the session without touching your phone. Can you reach the remote without moving off your spot?
  6. Check the clearance (1 minute). Do a few light swings and see where the bell goes. Make sure the TV is out of its path.

Write down whatever failed and fix that one thing before the real workout. Repeat the test after the fix, since moving a screen to cure glare often changes the angle.

When your room can’t fit a TV

Some rooms will not take a TV at a useful height and distance. A narrow spare room, a garage with a low ceiling or a space shared with storage may leave no clear wall for it. Some people also train in a spot where a bell path and a screen cannot coexist safely.

In those rooms, the phone is still the right call. Put it on a stand at the height you worked out above, a little way back from your lifting spot, and use the same checks: glare, angle, clearance and notifications. The size of the screen matters less than whether you can see it during the lift.

If you are still deciding whether to switch, the review of the Kettlebell Monster Samsung TV app covers what changes when you move from the phone to the TV. The setup test above is the practical side of that decision, since a TV that fails it will not improve your form.

If your room has a Samsung TV, try the Kettlebell Monster Tizen TV app for your next session and run the setup test from this article. This is an affiliate link, so this site earns a commission if you buy through it.
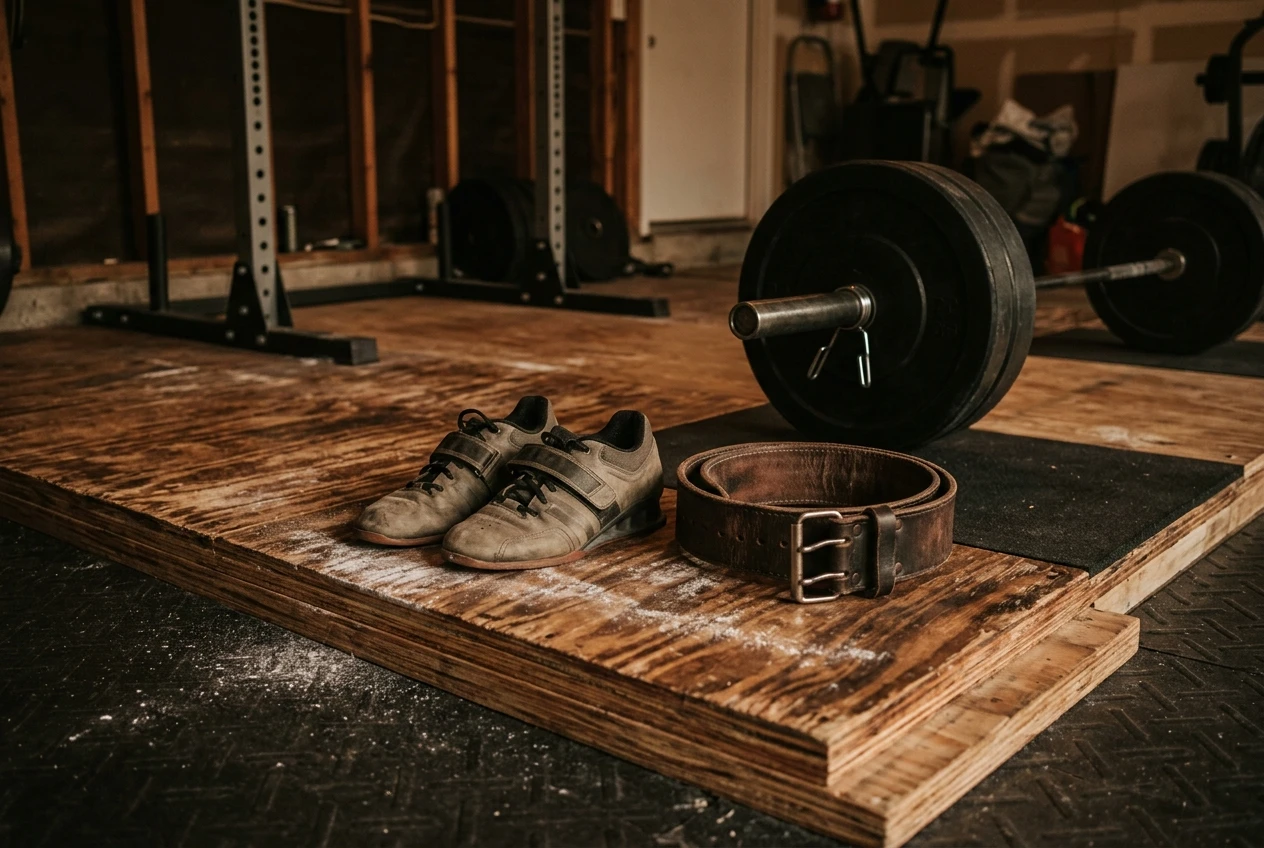
Your Next Home Gym Purchase Should Fix What Ends Your Training Weeks, Not Just What Stalls Your Lifts

Most gear advice for home lifters starts with the price or the product category.

Most gear advice for home lifters starts with the price or the product category. Home gym equipment for longevity starts somewhere else: with the thing that is currently limiting your training. If that limit is a lift that won’t move, you may need heavier or finer-graded loads. If it is a sore elbow, a grip that quits first or sessions you keep skipping, a heavier barbell will make the problem worse.

This article gives you one question to ask before the next purchase, then maps gear to each answer and to how long you have been training. It assumes you have at least a year of steady training and a log you can check.

The two questions behind every gear purchase

The first question is: what is stopping me right now? The second is: for how long has it been stopping me? Together they separate a bad month from a real limit.

There are two possible answers to the first question.

  • Recovery limit: you cannot train as often, as comfortably or as consistently as your program asks. Joints complain, grip fails before the working muscles do, or you skip sessions because you dread how you will feel.
  • Strength limit: you show up and train well, but one lift has stopped progressing despite adequate sleep, food and effort.

The second question filters out noise. One bad week of sleep produces a stalled lift or a sore shoulder that disappears on its own. A pattern that holds across six to eight weeks of your log is a limit. Buy for the pattern, not the week.

I put the recovery question first for a reason. A recovery limit costs you whole training weeks, and a stalled lift only costs you progress on one movement. If you want to see how those lost weeks add up financially, what a home gym really costs when you count the weeks you can’t train works through it with your own numbers.

Signs your limit is recovery: the patterns that show up in your log before an injury does

Your log usually shows trouble before your body announces it. These are the entries to look for.
A well-worn spiral-bound training log lying open on a wooden bench in a garage gym, pencil-written columns of sets and reps with a few scribbled notes in the margin, a kettlebell and a chalk-dusted barbell blurred behind it in soft morning window light.
Your Next Home Gym Purchase Should Fix What Ends Your Training Weeks, Not Just What Stalls Your Lifts 83
  • Skipped or shortened sessions. If you planned four sessions a week and completed three for most of a month, something is making training unattractive or hard. Check what you wrote on those days.
  • The same body part appearing in your notes. One note about a tight shoulder means nothing. The same shoulder noted in five of the last ten sessions is a pattern.
  • Grip ending sets early. If you stop a deadlift, row or kettlebell swing set because your hands let go while your back and legs still have reps left, grip is limiting the work.
  • Reps falling across sets at a fixed weight. Dropping from 8 reps to 5 over three sets, week after week, suggests you are not recovering between sessions or even between sets.
  • Warm-ups getting longer. If you need more and more minutes to feel ready to lift, your joints are telling you something about accumulated wear.

None of these says you are injured. They say your current setup is costing you more recovery than it should, and that is exactly the situation where the right purchase pays back in years of training.

Signs your limit is strength: when a stalled lift really does need new equipment

A stalled lift needs equipment only after you have ruled out the cheaper explanations. Check these first: you are completing all planned sessions, your sleep and food have been steady, and you have not changed the lift’s technique or setup. If those hold and the same weight for the same reps has not moved in four or more weeks, you probably have a genuine strength limit.
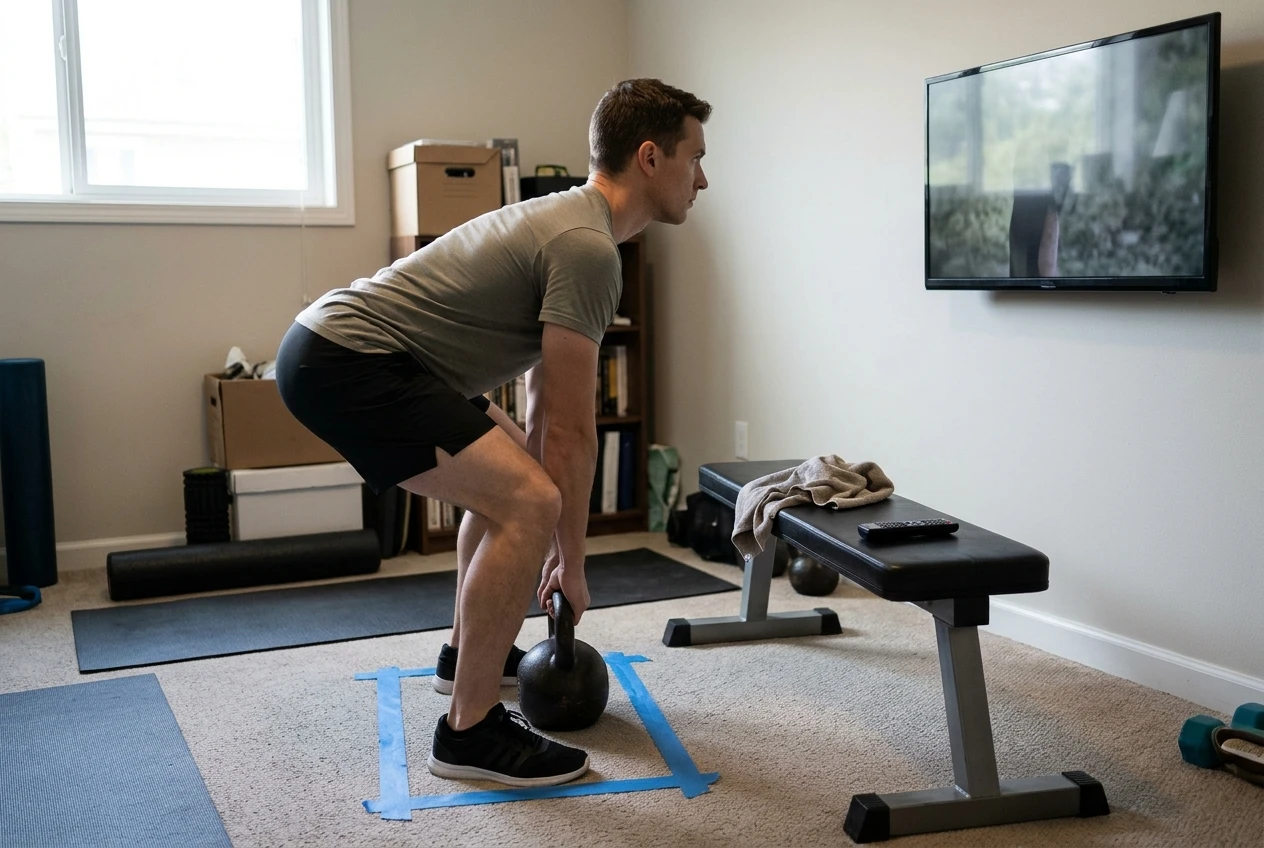
Then ask whether gear is the cause. Equipment limits strength in two ways.

The jump is too big. If your smallest available increment is a large fraction of what you lift, you cannot add load gradually. This shows up as a lift that stalls, then jumps one session and stalls again for weeks. Smaller increments, such as fractional plates for a barbell or a kettlebell closer in weight to your current one, solve this directly. Before buying a heavier kettlebell, the reps-first test tells you whether you have actually used up the weight you own.

You have run out of weight. If you are completing the top of your rep range with clean form and the heaviest implement you own, there is nothing left to progress with. That is a legitimate reason to buy heavier equipment, and the only one that is purely about strength.
If neither applies, the stall is probably about programming, and no purchase will fix it.

Gear that protects training years: what to consider for grip, feet, joints and warm-ups

If your answer was recovery, the purchase belongs in one of four areas. Match it to the specific entries in your log.

Grip

When grip ends sets before the target muscles are worked, you have three options: train grip separately, use chalk, or use straps for some work. Straps let heavy pulling volume go on without grip being the cutoff, but they also reduce grip work, so most lifters keep them for specific sets. Material matters too: the leather vs synthetic straps guide matches each to the lift you actually do. For kettlebell work in particular, lifting straps for kettlebell training covers which movements benefit.

Close-up of a lifter's chalked hands gripping a loaded barbell mid-deadlift, knuckles pale and tendons tight, with a pair of worn leather lifting straps and a chalk bowl resting on the rubber floor beside the plates.
Your Next Home Gym Purchase Should Fix What Ends Your Training Weeks, Not Just What Stalls Your Lifts 84

Feet

Your feet are the contact point for every standing lift. If your notes mention knee or ankle discomfort, or an unstable feeling in squats and deadlifts, look at what you stand on. A firm, flat surface helps, and so does a pair of shoes with a stable sole. Lifting shoes have a raised heel that suits some squat styles, while a flat, hard-soled shoe suits deadlifts and kettlebell work. Pick based on the lift that bothers you.

Joints

Joint complaints often come from the setup around the lift. A bench that wobbles, a bar path that forces an awkward angle, or a floor that is too hard for kneeling work can all add up over months. Fix the setup before adding load. Padding, a stable bench and enough space to move without twisting are cheap compared with weeks off.

Warm-ups

If your warm-ups keep growing, make them faster to start. Resistance bands cost little, take almost no storage space, and let you load shoulders, hips and glutes lightly before the heavy work. They also pair well with a short routine you can do the same way every session, which makes it easy to notice when something feels different.

A set of colored resistance bands hanging from a squat rack upright next to a folded mat, with a pair of flat-soled shoes on the floor, in a tidy home gym lit by warm afternoon light.
Your Next Home Gym Purchase Should Fix What Ends Your Training Weeks, Not Just What Stalls Your Lifts 85

Gear that raises the ceiling: when heavier loads or a belt actually earn their space

Gear that increases what you can lift is worth buying when your log shows a strength limit and no recovery limit. Two items come up most often.

Heavier loads. Buy them when you have hit the top of your rep range on your heaviest implement with good form, and have done so across at least two consecutive sessions. Buying earlier means the new weight sits unused or gets used with sloppy technique.

A thick black leather lifting belt cinched around a lifter's waist at the bottom of a heavy squat, bar on the back, seen from the side in a garage gym with grey concrete walls and bright overhead light.
Your Next Home Gym Purchase Should Fix What Ends Your Training Weeks, Not Just What Stalls Your Lifts 86

A belt. A belt gives you something to brace against, which can help on heavy squats and deadlifts. It earns space when you are regularly lifting near your limit and have practiced bracing without it. It does not fix a recovery problem, and wearing one for light work gives you very little. Which belt suits you depends on how long you have been training, and the post on the lifting belt you need at 6 months versus 6 years walks through the differences.

In both cases the test is the same: can you point to a log entry showing you ran out of room with what you already own?

How the answer shifts from your first year to your fifth

In the first year, most limits are about technique and consistency. Gear that makes it easier to show up and practice, like a stable bench, decent flooring and a few bands, tends to matter more than heavier loads, because the body adapts quickly and weights you already own stay challenging for a long time.

By the second and third years, progress slows and small increments start to matter. This is when fractional plates or a closer-spaced set of kettlebells make sense, and when grip becomes a common limiter on pulling days.

By year five, the likelier limit is accumulated wear. Joint-friendly setup, warm-up tools and recovery between sessions deserve more of your budget, because the cost of one missed month is higher relative to the small gains available. Lifters at this stage often find that protecting their training weeks produces more total progress than chasing a heavier top set.

These are tendencies, not rules. A lifter who trained inconsistently for three years may still be in first-year territory. Your log is a better guide than the calendar.

A simple purchase test you can run in ten minutes with your own training log

Open your last eight to twelve weeks of training and work through these steps.

  1. Count sessions. Compare planned sessions with completed ones. If you finished fewer than about four out of five, suspect recovery or scheduling.
  2. Scan your notes. Mark every mention of pain, tightness, grip failure or unusual fatigue. Group them by body part or cause.
  3. Check your main lifts. For each, note whether the weight or reps have moved in the last four weeks.
  4. Name the limit. Write one sentence: “My limit is recovery because…” or “My limit is strength because…”, and finish it with a specific log entry.
  5. Match the item. Write one more sentence: “This purchase will fix that by…”. If you cannot finish it using something from step 4, wait.

If steps 1 and 2 turn up patterns, buy for recovery first. If both come back clean and step 3 shows a stall with the heaviest implement you own, buy for strength. If everything looks fine, the right purchase is probably none at all.

Where a structured program beats another piece of gear

Some limits that look like gear problems are planning problems. If your sessions are inconsistent, if you add weight whenever you feel good, or if you never schedule an easier week, a new purchase hides the cause for a while without removing it. A written block with set exercises, rep targets and planned progression makes recovery and strength problems visible in your log, which makes the purchase test above much easier to run. If you are deciding whether to follow a program or write your own, this comparison for the next two years is worth reading.

A row of three kettlebells of increasing size lined up on a rubber mat in a home gym, with a printed weekly training plan taped to the wall above them and a small towel draped over the heaviest bell, in neutral late-day light.
Your Next Home Gym Purchase Should Fix What Ends Your Training Weeks, Not Just What Stalls Your Lifts 87

Before buying more, try running a structured block with the gear you already own. Kettlebell Monster offers guided kettlebell training you can follow at home, and a few weeks of consistent logging on a set plan will tell you whether your limit is gear or something else. Affiliate disclosure: I may earn a commission if you purchase through this link.

When Your Work Hours Spike, Change the Dose, Not the Kettlebell

If your hours jump for a few weeks every year, kettlebell training during busy work season comes down to one question: what is the smallest load that…

If your hours jump for a few weeks every year, kettlebell training during busy work season comes down to one question: what is the smallest load that keeps what you have built, and how do you get back to your normal load afterward? Most advice answers it with “train less” and stops there. That leaves you guessing how much less, for how long, and how to restart.

A better approach is to treat your work calendar as the training plan. Sort the year into zones, give each zone its own load, and change the amount of work you do while keeping the bell you already own.

Why a busy work season hits your training harder than the clock suggests

A fifty-hour week does not only cost you ten hours. Long days usually cut sleep, push meals later, add hours of sitting, and leave you mentally tired in the evening when you would normally train. Recovery, the part of training where you actually get stronger, gets worse at the same moment your available time shrinks.

A single kettlebell sitting untouched on a rubber mat in a dim corner of a home garage at night, a work bag and loosened tie dropped nearby, a laptop glowing faintly through the doorway. Cool blue evening light with one warm lamp.
When Your Work Hours Spike, Change the Dose, Not the Kettlebell 93

That is why a workout you handle easily in a normal month can leave you flat for days in a peak week. The session did not get harder. Your capacity to recover from it dropped.

Two common reactions both go wrong. Some lifters keep the full program and fall behind on sessions, which turns every missed workout into a small failure. Others stop completely and find, a few weeks later, that their swings feel heavy and their grip gives out early. Either way, the load was never matched to the season.

Mark your work year on a calendar and sort it into three load zones

Open a calendar for the next twelve months and mark the weeks when your hours change. Tax season, quarter-end close, year-end deadlines, a holiday retail rush and a product launch all count. Then sort every week into one of three zones:

A paper wall calendar pinned above a home desk, weeks shaded with three colours of highlighter (red, yellow, green) and a pen resting on the desk. Soft morning window light, a kettlebell on the floor below.
When Your Work Hours Spike, Change the Dose, Not the Kettlebell 94
  • Peak weeks: long hours, poor sleep, high stress. The goal is to hold your strength.
  • Normal weeks: your usual schedule. The goal is steady progress.
  • Quiet weeks: shorter days, vacation, slow periods. The goal is to rebuild and add work.

Seeing the year laid out changes how you plan. A crunch of six weeks stops looking like a failure of discipline and becomes a known block with a known load. You can also see how many quiet weeks follow it, which is where your ramp-up happens.

Each zone then gets its own prescription. As an example, say your normal week is three sessions with four sets of eight on each main lift (swings, goblet squats, presses). It might look like this:

Zone Sessions per week Sets per lift Reps per set Peak 2 2 8 Normal 3 4 8 Quiet 3 to 4 4 to 5 8 to 10

Those numbers are only an illustration. Yours depend on your own baseline. The point is that every zone has a written number before the week starts, so you are not deciding at 9 p.m. after a fourteen-hour day.

The three dials you can turn: sets, reps and sessions per week

Your total training dose is the product of three things you control. Each one has a different cost when you turn it down.

Sets are the first dial to turn. Cutting from four sets to two removes half the volume without changing the bell, the technique or the rep range. Each set still feels like your normal training, so the movement pattern stays sharp.

Sessions per week are the second dial. Going from three sessions to two works well when you keep each session full-body, so every main lift still gets trained each week. Dropping to one session is possible but leaves a long gap between exposures. Keep that for the worst week of the year.

Reps are the dial to protect. If you keep your usual bell and cut reps from eight to four, the set becomes easy and the training signal gets weak. If you keep the reps and cut the sets, each set stays demanding. Holding reps near your normal range is what tells your body the bell is still worth adapting to.

So the order is: sets first, sessions second, reps last. In a peak week, you will usually turn down sets and sessions and leave reps alone.

Set a minimum effective dose you can hold through the worst weeks

The minimum effective dose is the smallest session pattern that maintains your current strength. It should be small enough that you can still do it on your worst day at work, and written down before the crunch begins.

A lifter in work clothes pausing mid-swing with one kettlebell in a small living room early in the morning, sleeves pushed up, coffee cup and a phone left on a shelf, pale sunrise light.
When Your Work Hours Spike, Change the Dose, Not the Kettlebell 95

A reasonable starting point:

  • Two sessions per week, on days that are usually the least busy
  • Your usual bell and your usual rep range
  • Two hard working sets of each main lift
  • Rest between sets as needed, and stop when the sets are done

Treat it as a rule with two sides. If you cannot do your normal session, you do the minimum instead of nothing. If you finish the minimum, you stop, even if you feel good. Extra work in a peak week borrows from recovery you do not have.

Write the plan somewhere you will see it, such as a note on your phone or a row in a log. If you already track your training, a simple sheet is enough, and this piece on whether a spreadsheet can run your kettlebell progression as well as an app covers how to set one up. Logging each minimum session also gives you a record that you kept training through the season, which matters when it ends and you decide how fast to rebuild.

How to ramp back up when hours drop without jumping to a heavier bell

When your hours come back down, the tempting move is to make up for lost time with a heavier bell. That is usually the wrong move. After a stretch of reduced volume, your recovery and your tissues have adapted to less work. A heavier bell adds load on joints, hands and the lower back all at once.

Rebuild in the order you cut, in reverse:

  1. Return the sessions. Go back to your normal number of weekly sessions, still using minimum sets.
  2. Return the sets. Add one set per lift, then another, until you are back at your normal volume. A week or two per step is a sensible pace.
  3. Push the reps. Once volume is normal, work toward the top of your rep range with the same bell.
  4. Only then consider a heavier bell. When you can finish all your sets at the top of the range with good form, you have a real reason to move up.

That last step is the one most people skip, and it is covered in detail in this reps-first test for deciding when a heavier kettlebell is worth buying. Quiet weeks are the best time to run it, because you have the energy and the time to test properly.

A quiet stretch also gives you room to go slightly above your normal volume, such as five sets instead of four. That extra work builds a buffer for the next peak, though it should come only after your normal week feels easy again.

Adjusting by feel: using sleep, grip and swing speed to decide when to back off

A calendar tells you what to expect, but a week does not always behave as planned. Three quick checks tell you when to move down a zone, and none of them need equipment.

Sleep. If you have slept noticeably less than your usual amount for several nights in a row, run the minimum session even if the calendar says it is a normal week. Sleep loss is one of the clearest signs that recovery is behind.

Close-up of chalky hands gripping a kettlebell handle at the top of a swing, the bell floating weightlessly against a plain garage wall, tendons visible in the forearms. Warm side light.
When Your Work Hours Spike, Change the Dose, Not the Kettlebell 96

Grip. Pay attention to when your hands start to give out on swings or carries. If your grip fades earlier than normal, or the bell feels like it is slipping when it did not before, your system is tired. Hold on to the quality of your sets by cutting one of them.

Swing speed. In a good swing, the hips drive the bell up and it floats briefly at the top. When you are tired, the hip snap slows, the arms start to help, and the bell does not reach the same height. If you see that in the first few reps, finish the set early and treat it as your signal to drop to the minimum.

A simple rule works: if one of the three checks is off, keep your plan. If two are off, drop one zone for the week. If all three look normal in a peak week, you still stay with the minimum, because those weeks are not the time to test your limits.

These checks work best when you compare against your own usual numbers, not against some standard. Over a season you will learn what your normal grip, sleep and swing feel like, and the signals become easier to read.

Keep your sessions short and ready when the hours swing

If you would like sessions already sized for light weeks, kettlebell.monster has ready-made kettlebell workouts you can follow, so you do not have to rebuild a plan each time your schedule changes. You can look at them at kettlebell.monster.

Disclosure: that link is an affiliate link, so I earn a commission if you buy through it.