If you are dealing with kettlebell swing lower back pain, the cause is often one of four recurring technique faults, and each has a specific accessory movement that trains the part of the swing that is missing. The swing is meant to be a hip movement: the glutes and hamstrings produce the force, and the back holds a stiff, neutral position while they do. When the hips contribute too little, the lower back does more of the work, and you feel it the next morning.
This article covers the four faults that most often shift load to the back, how to check for each one, and which single movement to add for each. Learning the basic pattern is a separate job, covered in what a written guide can’t teach you about a kettlebell swing. This piece is for the stage after that, when the swing is already in your routine and something about it is off.
Is it a form fault or a reason to stop? What to check before you reach for any accessory work
Technique work only helps if the problem is technique. Before you change anything, sort what you feel into one of two groups.
A muscular, dull, tired feeling across the lower back that shows up during or after swings, fades within a day or two, and does not change how you walk or sit is the pattern form fixes tend to address. Soreness like that usually means the muscles are being asked to do a job the hips should share.
Stop swinging and get a professional’s opinion if you notice any of these:
- Sharp or stabbing pain, or pain that catches when you move.
- Pain that travels into the buttock or down a leg, or any numbness or tingling.
- Pain that wakes you at night or does not ease with rest.
- Pain that began after a fall, a collision, or a single awkward rep.
- Pain that is getting worse from one week to the next despite lighter training.
Accessory exercises and filming yourself cannot diagnose any of those. A physiotherapist or doctor can examine you, and a video of your swing cannot. Form work and a professional’s opinion also coexist well: once you have been cleared to train, the checks below tell you what to practice.
Also check the basics. Use a bell you can swing for your whole set with the same shape on the last rep as the first. If the bell is too heavy, none of the faults below can be fixed with a drill alone.
Fault one: the swing turns into a squat, so the back picks up the slack
In a squatty swing, the knees bend deeply, the hips drop straight down, and the torso stays upright. The bell is then lifted by the quads and shoulders instead of being launched by a hip snap. The back picks up the slack because the hamstrings and glutes are never loaded at the bottom, so nothing is storing and returning the force.
Self-check: Film one set from the side, or have someone watch. At the bottom of the swing, your shins should be close to vertical and your hips should be well behind your heels, with your torso tipped forward. If your knees travel far forward and your chest stays tall, you are squatting the swing.
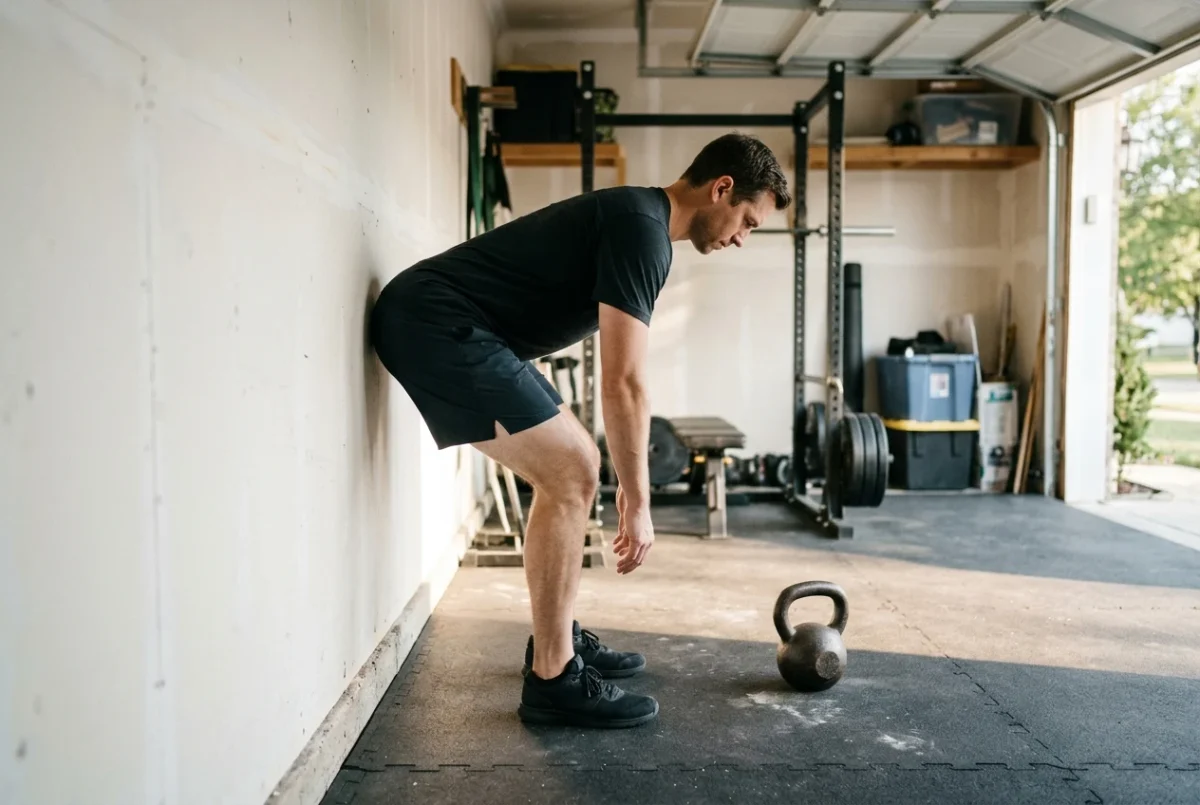
The accessory movement: the wall hinge. Stand with your back to a wall, about a foot in front of it. Push your hips straight back until your glutes touch the wall, keeping your knees only softly bent and your back flat. Stand up by driving your hips forward, not by pulling your chest up. Do 2 or 3 sets of 6 to 8 slow reps, and move slightly farther from the wall as it gets easy.
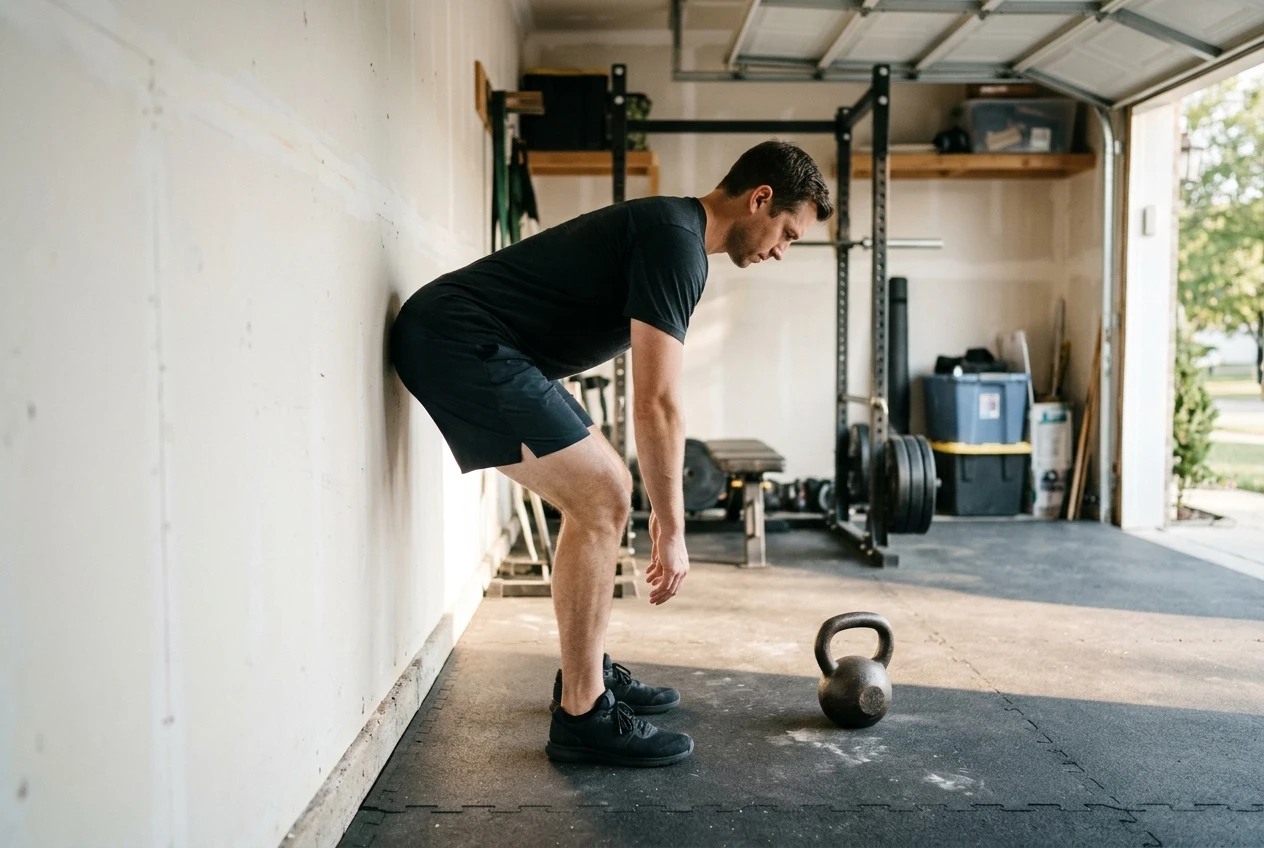
The drill works because the wall gives you a target that a squat cannot reach. If you bend your knees too much, you sit down before you touch it. Once the wall hinge is easy, a kettlebell deadlift with the same hip-back pattern is the loaded version.
Fault two: leaning back at the top of the swing
At the top, the hips should be fully extended, the glutes squeezed, and your body stacked in a straight line from ankles to ears. Some lifters lean back, tilt the pelvis forward, and let the ribs flare to make the bell float higher. That puts the lower back into an arched position under the momentum of the bell, and it is a common source of that pinched feeling at the top.
Self-check: Film from the side and pause on the top frame. Draw a mental line from your ankle through your hip and shoulder to your ear. If your shoulders sit behind your hips, or your ribs poke forward while your belly drops, you are overextending. You can also test it without video. Stand against a wall with your heels a few inches away, tuck your ribs down, and see whether you can keep your lower back close to the wall while squeezing your glutes. Needing to arch away from the wall to feel your glutes working is the same fault.
The accessory movement: the paused glute bridge. Lie on your back with knees bent and feet flat. Brace as if someone were about to tap your stomach, lower your ribs toward your hips, and drive your hips up until your body forms a straight line from knee to shoulder. Hold the top for 2 to 3 seconds while squeezing your glutes, and make sure the effort is in your glutes and not your lower back. Do 2 or 3 sets of 8 to 10.
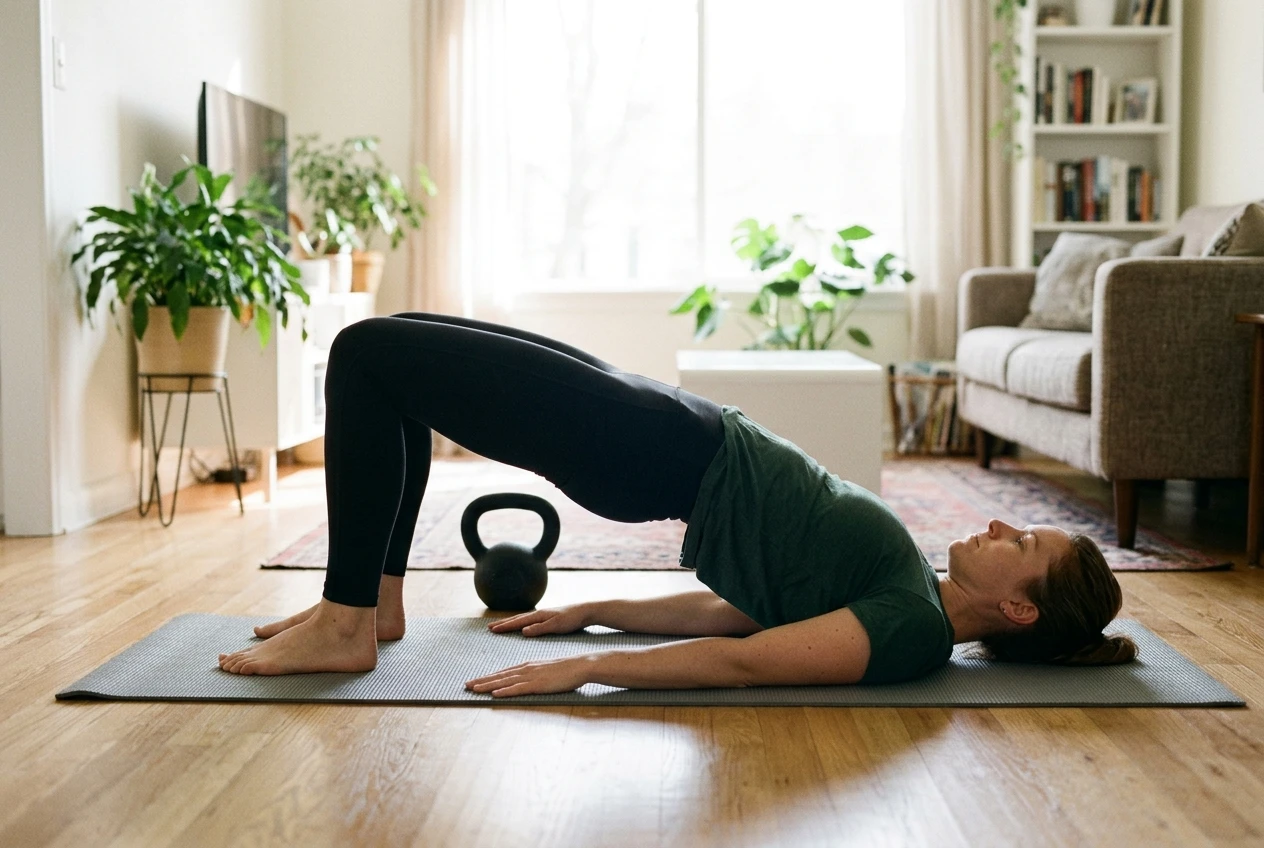
This trains the position you want at the top of a swing: hips fully extended with the ribs down. If your lower back cramps during bridges, the arch is the problem, so shorten the range and tuck the ribs before lifting higher.
Fault three: the arms lift the bell because the hips are late
When the hips snap late or too weakly, the bell has no speed by the time it reaches the front, so the shoulders and arms raise it. The lower back suffers because the hinge drops into a sloppy rounded or hanging position while the arms do work that should have come from the legs. The bell often rises on a curve, and it can drag you forward at the top.
Self-check: Watch your arms. They should stay mostly straight and behave like ropes, and the bell should float to about chest height by itself. If your elbows bend, your shoulders shrug upward, or the bell reaches its height before your hips have finished extending, the arms are doing the lifting. A second check is sound and feel: a good swing has a crisp snap of the hips at the top, while a late one feels like a gradual lift.
The accessory movement: the hike-and-stand drill. Set the bell about a foot in front of your feet. Hinge back, grip the handle, tilt it toward you, and hike it back between your legs, with your forearms landing against your inner thighs. Then stand up fast by snapping your hips forward, and let the bell travel forward without lifting it with your arms. At first it may only reach hip or belly height, and that is acceptable. Do 3 sets of 5 reps, resetting between reps.
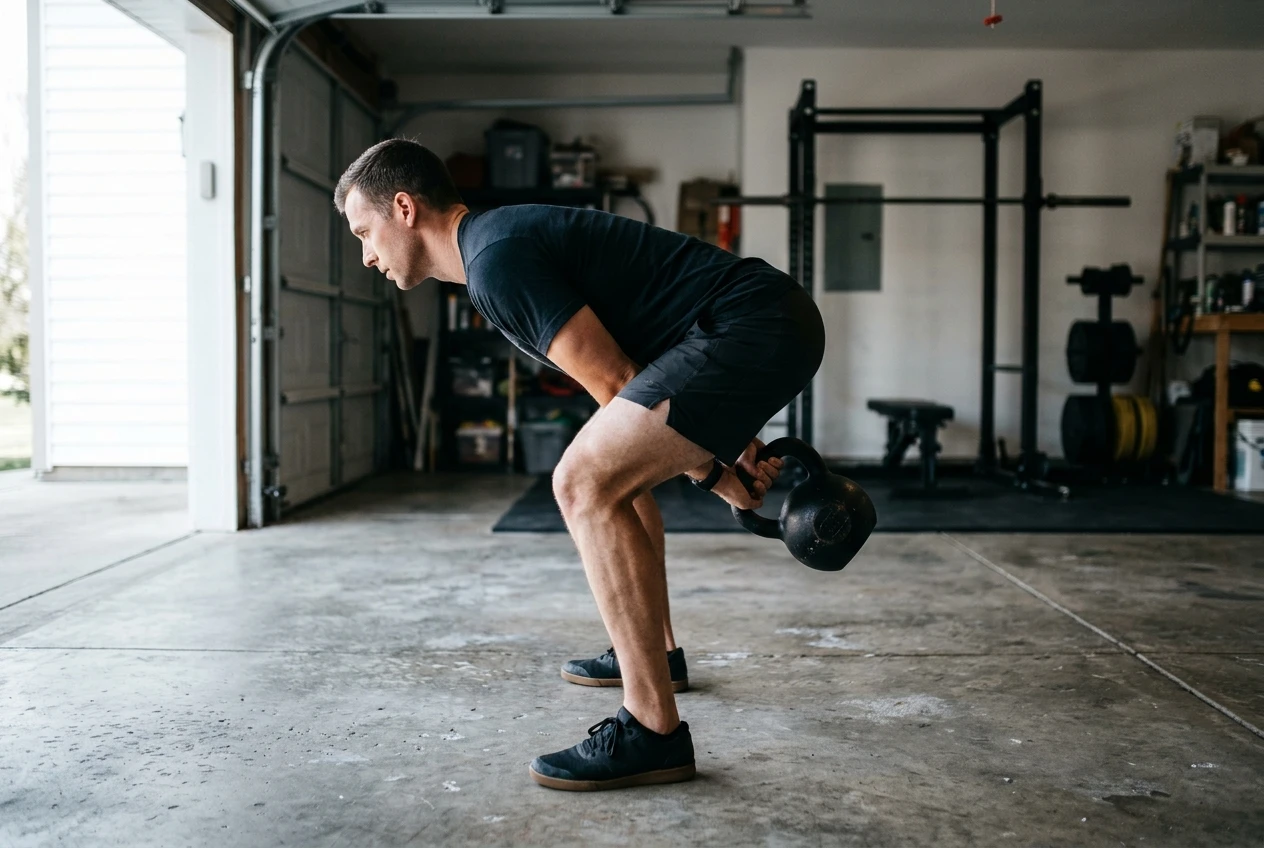
Because every rep starts from a stop and ends with the snap, you can feel the hike and the hip drive separately before putting them back into a flowing swing. Raise the height of the bell only by snapping harder, never by pulling.
Fault four: the brace fades as the set gets long
A swing that looks fine for the first ten reps and then changes is a bracing problem, not a hinge problem. As the torso muscles tire, the ribs flare, the lower back sags into extension at the top or rounds at the bottom, and the spine ends up taking load that the trunk was supposed to resist. If your back only hurts after long sets, this is the likeliest fault.
Self-check: Compare the first three reps and the last three reps of the same set on video. Look at the back’s shape at the bottom of the swing and your ribs at the top. If the last reps show a rounded back, a bigger arch, or a head poking forward, the brace is fading. The practical fix is shorter sets, but training the brace directly helps you hold form longer.
The accessory movement: the suitcase carry. Hold a single kettlebell in one hand at your side, with no leaning toward the weight. Stand tall, ribs down, shoulders level, and walk slowly for 20 to 30 steps. Switch hands and repeat. Do 2 or 3 rounds per side. The weight pulls your trunk sideways, and your abdominal muscles and the muscles around your spine must keep you upright. That is the same job they do in a swing, only done for time under tension.
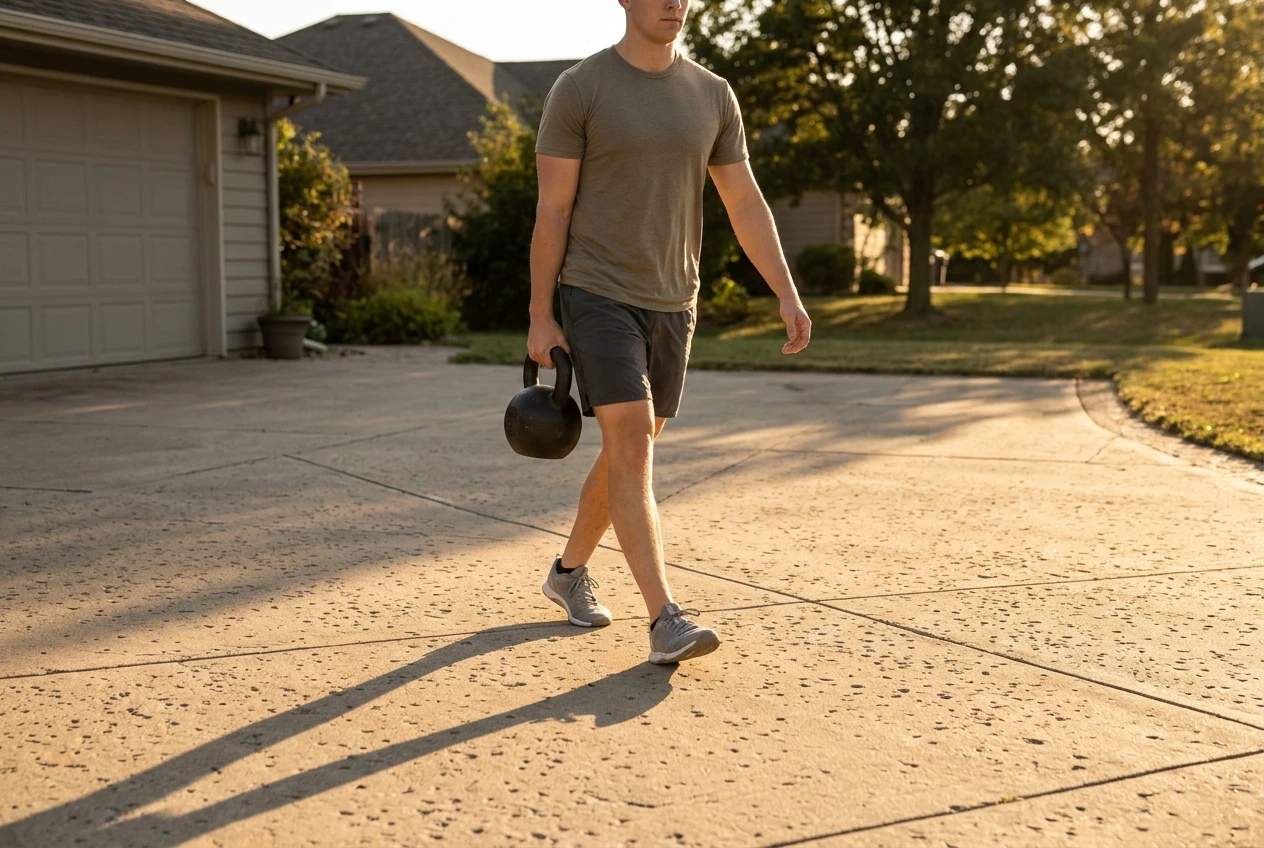
If you want a heavier option, use a bell you can carry with a tall posture for the full distance. Losing posture on the last steps means the weight is too heavy. Grip may limit you before your trunk does, and a separate grip block can deal with that, as covered in this grip strength article.
How to slot two accessory movements into your week without adding a new training day
Pick the two faults that your video check showed most clearly, and add only those two movements. Trying to fix all four at once spreads your attention thin and makes it hard to tell what worked.
Here is a simple way to place them:
- On a swing day, before swings: Do the movement that trains the position, such as the wall hinge or the paused glute bridge, as 2 sets in your warm-up. It primes the pattern right before you use it.
- On a swing day, after swings: Put the carry at the end, once the swing work is done, so tired trunk muscles do not make your swings worse.
- On a non-swing day: If you lift weights on another day, add the second movement at the end of that session in place of one of your regular accessory exercises.
Keep the effort moderate. Accessory work that leaves your back more sore than the swings did has defeated its purpose. Two to three sets per movement, once or twice a week, is enough to start with, and you can adjust from there.
How to film a set from the side and judge whether the fix is working before you add swings back
Cut your swing volume while you work on the fault, for example by doing fewer sets or shorter sets, and keep the weight where you can swing it cleanly. Then use video to decide when to add volume back.
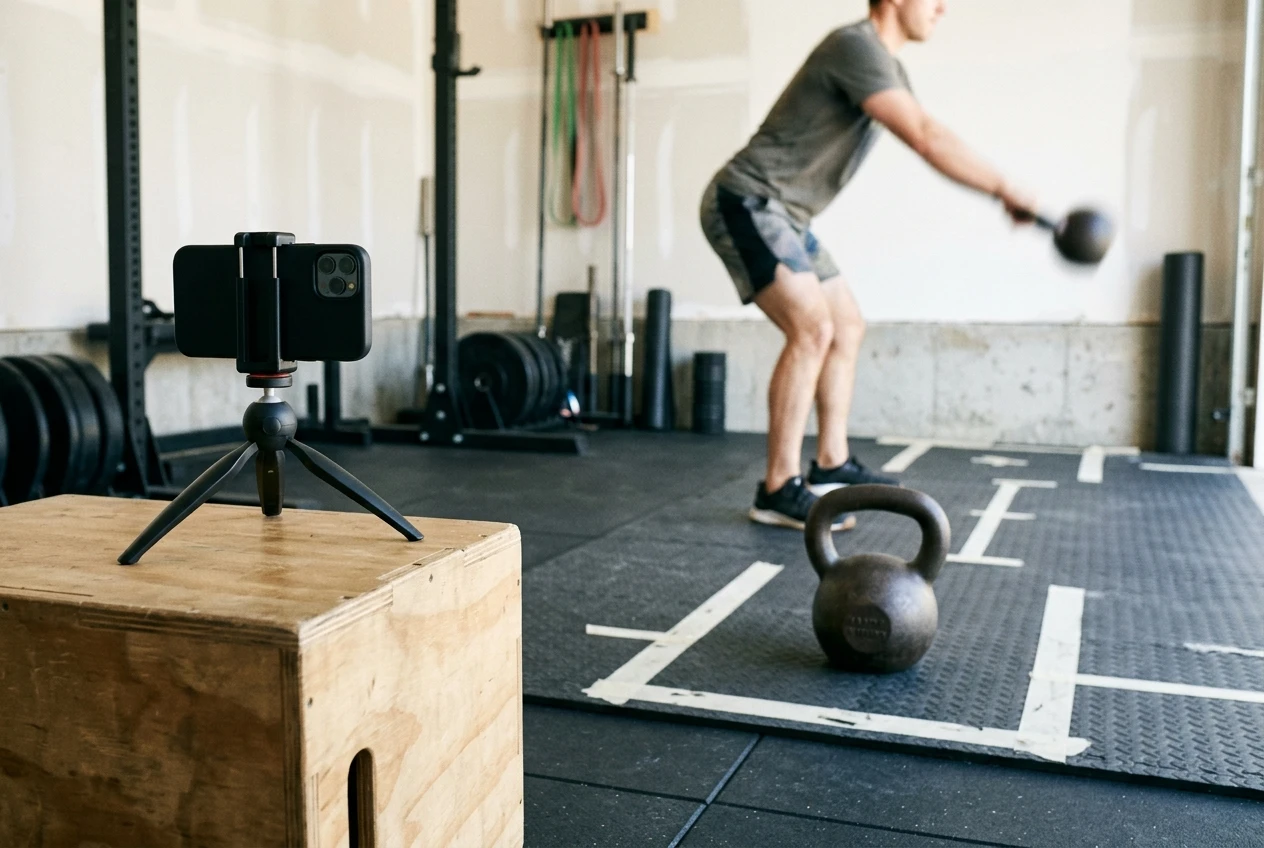
Set up the camera. Place your phone at about hip height, side-on, far enough away to capture your whole body and the bell’s full path. Film in decent light so you can see your hips and ribs. If a screen setup helps you watch playback and demos without twisting your neck, this home gym screen placement guide covers where to put it.
Film a short set. Record 8 to 10 swings, because a handful of reps will not show how your form changes over a set. Then watch the clip once at normal speed and once slowed down.
Check four things, one for each fault:
- Bottom of the swing: shins near vertical, hips behind heels.
- Top of the swing: ankles, hips, shoulders, and ears stacked, ribs down.
- Arms: straight, with the bell floating after the snap.
- Last three reps: same back shape as the first three.
Decide what to do next. If the fault is visibly smaller and your back feels better the next day, add a few swings back, then watch again. If the fault is unchanged after a few weeks of consistent accessory work, or your back pain is getting worse, that is the point to bring in a coach or a physiotherapist rather than keep experimenting alone.
Get a coach on screen while you rebuild your swing
Many lifters find it easier to correct a swing when they can watch a demonstration and match it rep for rep. If you want a coach on screen while you rebuild the pattern, kettlebell.monster offers kettlebell workouts you can follow along with. For a side view at full size, the Kettlebell Monster Samsung Tizen TV app puts the demo on your television so you can compare your own side-on video against it.
Affiliate disclosure: these are affiliate links, so I earn a commission if you buy through them.