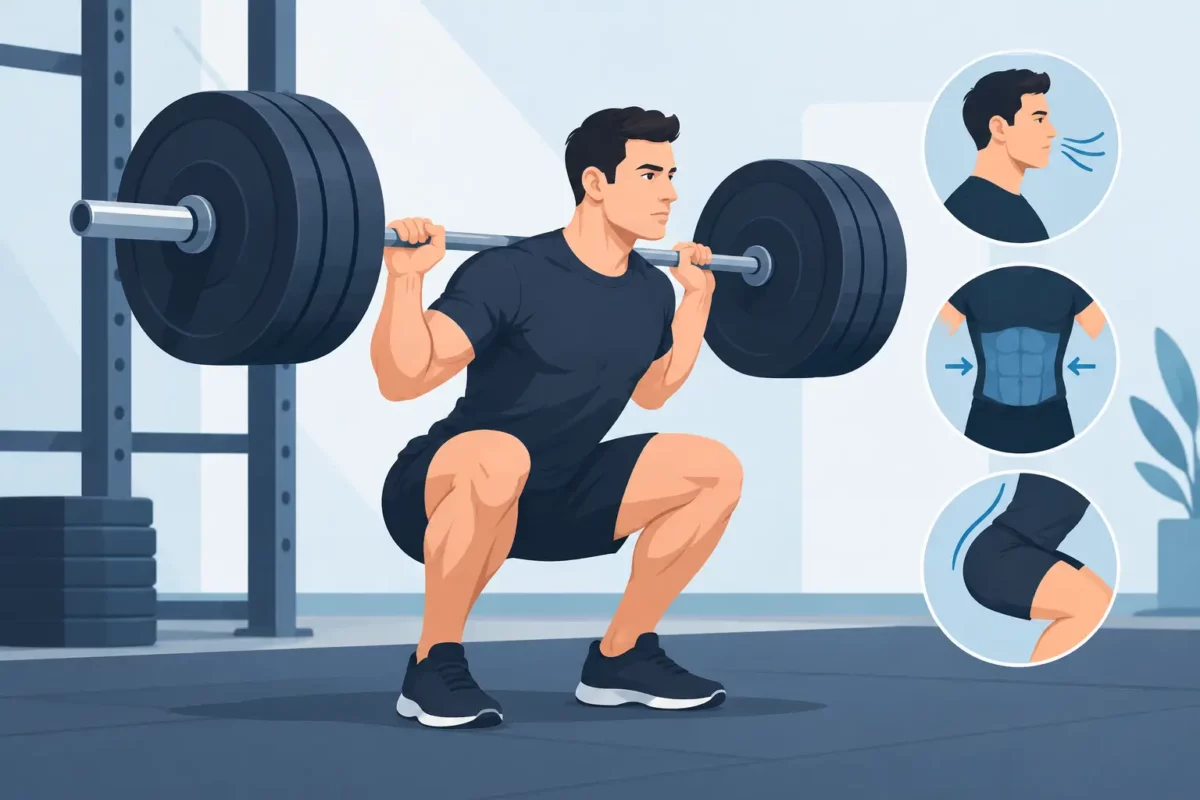
A heavy squat rarely breaks down because your legs suddenly forget how to work. More often, the bar drifts, your torso softens, your hips shoot back, and force leaks before you reach the sticking point. Learning how to brace heavy squats gives your legs a stable platform to push from. It is not a cosmetic cue to “keep your core tight.” It is a skill that turns your trunk into a rigid transfer point between the bar and the floor.
For strength athletes, that matters on every demanding rep. A stronger brace helps you preserve spinal position, keep the bar over the middle of your foot, and produce force without folding under load. You do not need a complicated breathing ritual. You need a repeatable sequence that holds up when the weight is heavy.
What Bracing Does Under a Heavy Bar
Your squat is a whole-body lift. The quads, glutes, and adductors create much of the movement, but they cannot express their full force if the torso is loose. When the trunk bends or collapses, the bar path changes, your leverage worsens, and the rep becomes harder than it needs to be.
Bracing creates stiffness through the abdominal wall, obliques, diaphragm, spinal erectors, and upper back. A strong breath expands the torso while muscular tension resists that expansion. The result is intra-abdominal pressure and a more stable cylinder around the spine.
Think of it as preparing to take a hard body shot from every direction, not sucking your stomach in. Pulling the navel toward the spine may feel controlled, but it usually reduces the pressure and stiffness you need for a heavy squat. Your goal is expansion and tension: 360-degree pressure around the front, sides, and back of the torso.
How to Brace Heavy Squats Step by Step
The best brace begins before you unrack the bar. If you wait until you are descending, you will rush the breath, lose your upper-back position, or start the rep with only partial tension.
Set the rack position first
Place the bar at a height that lets you unrack it with a small knee and hip extension. You should not need to rise onto your toes or perform a half-squat just to clear the hooks. Set your hands, pull your shoulder blades and upper back into a secure shelf, then wedge yourself under the bar.
Before lifting the bar out, lock your ribs and pelvis into a stacked position. Do not crank into an exaggerated lower-back arch, and do not let the ribs flare high. A neutral, controlled torso gives you room to build pressure without losing position.
Take a deep, low breath
Breathe in through your mouth or nose, whichever lets you fill quickly and consistently. Aim the breath down into your midsection rather than lifting your chest toward the bar. You should feel expansion in the belly, sides, and low back.
A useful cue is: breathe into your belt, even when you are not wearing one. If your shoulders rise dramatically but your waist does not expand, the breath is too shallow. Reset and take a fuller breath.
Lock the air in and contract around it
Once the breath is in, close your throat as if you are about to exhale but choose not to. Then contract your abs hard in all directions. The air creates pressure, but the muscular contraction makes that pressure useful.
Do not only tense the front of your abs. Push tension into the sides and back of your torso as well. At the same time, keep your upper back active by pulling the bar down into your traps. A hard brace with a loose upper back still leaves the bar free to shift.
Unrack, walk out, and re-brace
Stand tall to clear the hooks, then take the smallest walkout that puts you in your squat stance. Two or three deliberate steps are usually enough: step back, set the second foot, then make a minor adjustment if needed. Every unnecessary step wastes energy and gives the brace time to fade.
Once your feet are set, take another full breath and brace again before the descent. This is the breath that should carry you through the rep. Your shoulders, abs, and feet should all feel connected before your hips move.
Descend under control, then drive through the floor
Break at the hips and knees together according to your squat style and proportions. Keep the brace as you descend. Do not relax at the bottom to chase depth, and do not dump your chest forward as you change direction.
Out of the hole, drive your upper back into the bar and push the floor away with your whole foot. The brace should remain aggressive through the sticking point, where the torso is most likely to pitch forward. Finish the rep before you exhale.
For most heavy singles and low-rep sets, exhale only after you are standing tall and stable. Then reset with a new breath before the next rep. Trying to take a small breath while moving is possible with lighter sets, but it is usually not the best choice when the load demands maximum positional control.
The Difference Between Bracing and Holding Your Breath
Heavy squatting often uses a Valsalva maneuver: taking a breath, closing the airway, and contracting the trunk to create pressure. Some lifters hear “do not hold your breath” and assume they should exhale continuously through the rep. Under heavy load, that can make the torso less stable and compromise the lift.
The better distinction is this: passive breath-holding is not bracing. Bracing is an active, deliberate contraction around a full breath. You are not simply keeping air trapped. You are using that air to reinforce a strong position.
There are individual considerations. If you have uncontrolled high blood pressure, a cardiovascular condition, are pregnant, or have been told to avoid breath-holding during exertion, get direction from a qualified medical professional and an experienced coach. Training hard does not require ignoring medical context.
Use a Belt to Improve the Brace, Not Replace It
A lifting belt can be valuable when squat loads are high enough to challenge your ability to stay rigid. But a belt is not a brace. It gives your trunk a firm surface to press against, which can improve feedback and increase pressure when you already know how to expand and contract effectively.
Set the belt at a height that lets you brace into it without blocking your hip position at the bottom. For many lifters, that means around the natural waist rather than cinched excessively high or low. Tighten it enough to feel resistance when you inhale, but not so tightly that you cannot take a full breath.
Practice both beltless and belted squats. Beltless work develops your ability to create tension without external feedback. Belted top sets can help you handle heavier loading and sharpen your competition-style setup. The right balance depends on your goals, lifting experience, and recovery.
Common Bracing Errors That Cost You Strength
The first mistake is taking a chest-only breath. If the breath lives in the upper chest, the torso will not expand where it needs to. Train low, wide expansion during warm-up sets until it becomes automatic.
The second is bracing only at the bottom. The descent starts the moment your hips and knees unlock, so your brace must already be in place. A rushed breath halfway down is usually a sign that the setup lacks discipline.
The third is overextending the lower back. Lifters often mistake a hard arch for tightness. In reality, excessive rib flare can make it harder to generate complete abdominal tension and may push you into a poor bar path. Stack the ribs over the pelvis, then brace hard.
The fourth is losing tension between reps. On a five-rep set, do not bounce at the top and hope the brace survives. Stand tall, regain your balance, inhale, and re-brace. That extra second is productive work, not hesitation.
Build a Brace That Holds Up Under Load
You do not need endless ab circuits to improve your squat brace. You need frequent, high-quality practice in positions that resemble the lift. Use your empty-bar and warm-up sets as technique work. Pause for one second at the top, take a full breath, brace, and execute every rep as though it matters.
Paused squats are especially useful because they expose a brace that fades at the bottom. Front squats can also demand more upright torso control, while tempo squats teach you to maintain pressure during a longer descent. These variations are tools, not mandatory accessories. Choose the one that addresses your specific weak point without taking recovery away from your primary squat work.
For a simple test, film a hard set from the side or at a slight rear angle. Look for rib flare before the descent, a chest collapse out of the hole, hips rising much faster than the bar, or a bar path that pitches forward. Those patterns can come from several causes, including mobility, upper-back strength, or squat mechanics, but an inconsistent brace is often part of the problem.
A heavy squat rewards discipline before it rewards aggression. Build your position, fill the torso with air, contract hard around that breath, and make every rep start from the same stable base. When the bar gets heavy, that repeatable brace is what lets your strength show up on the platform and in training.