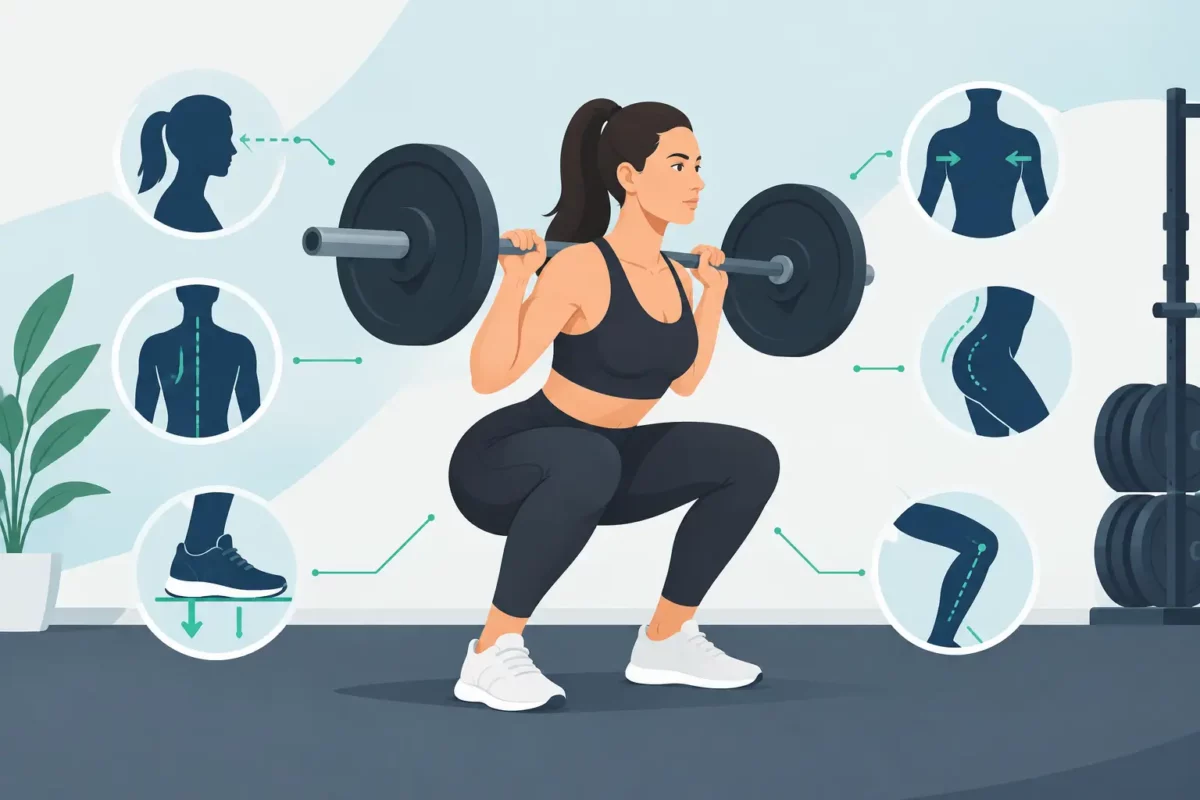
A squat can look strong from across the gym and still leak force at the exact points that matter. The right squat technique cues give you something useful to do under the bar: create tension, control the descent, own the bottom position, and drive the floor away with intent. They are not motivational slogans. They are short instructions that help your body produce more force with less wasted motion.
The goal is not to recite ten cues before every rep. That usually creates hesitation and turns a hard lift into a complicated checklist. Pick one or two cues that address your biggest technical limitation, practice them with loads you can control, and keep them until they become automatic.
Start With a Setup You Can Repeat
A powerful squat starts before the bar leaves the rack. If your walkout is loose, your feet are inconsistent, or you are already breathing hard before the first rep, your technique has less room to hold up when the load gets serious.
1. Get tight before you unrack
Pull the bar into your upper back instead of letting it rest there passively. Squeeze your shoulder blades toward each other, keep your upper back rigid, and create a bar position that will not shift during the set. Whether you use a high-bar or low-bar position, the standard is the same: the bar should feel connected to your torso.
A useful cue is: “Bend the bar over your back.” You will not actually bend it, but the intent encourages upper-back tension and active hands. Avoid cranking your wrists back to hold the bar in place. Your back should support the load, while your hands and arms reinforce the position.
2. Own the walkout
Take the bar out with your legs, not with a good-morning. Stand tall to clear the hooks, then take two or three deliberate steps. Do not turn the walkout into a dance. One step back, one step to set the other foot, then make a small adjustment only if needed.
Your stance depends on your structure, mobility, and squat style. Some lifters are strongest with a closer stance and more forward knee travel. Others need a slightly wider stance with more hip involvement. Start with feet roughly shoulder-width apart and toes turned out enough that your knees can track naturally over them.
The cue is simple: “Build your stance, then stop moving.” A stable base lets you direct force into the floor instead of spending energy finding balance.
Create Pressure Before You Descend
The squat is not just a leg exercise. A hard, well-braced torso gives the hips and legs a solid platform from which to produce force. Without that pressure, the bar folds you forward, your pelvis loses position, or your ascent turns into a grind before your legs have done their work.
3. Breathe low and brace hard
Take a deep breath into your abdomen and sides, not just high into your chest. Then tighten your trunk as if preparing to absorb a hard body shot. The cue “brace 360 degrees” reminds you to create pressure around the entire midsection, including the sides and back.
For a single heavy rep, take your breath and brace before descending. For multiple reps, many lifters reset their breath and brace at the top of every rep. That takes more time, but it usually produces better positions and cleaner force output. Higher-rep training may require a different breathing rhythm, but do not let fatigue turn every rep into a loose, shallow breath.
4. Keep pressure through the whole foot
You need contact through the heel, base of the big toe, and base of the little toe. This is often called a tripod foot. It does not mean your weight stays perfectly still. In a deep squat, pressure may shift slightly while the knee moves forward and the hips move down. The point is to avoid rolling onto your toes or letting the arches collapse.
Use the cue: “Grip the floor with your feet.” Think of creating tension between your feet and the ground before you move. This gives your knees, hips, and torso a more stable base.
Control the Descent Without Sitting Back Too Far
Many lifters hear “sit back” and immediately push their hips far behind them. That can work for some wide-stance, low-bar squatters, but taken too far it shifts the bar forward, limits knee travel, and turns the squat into a compromised good-morning.
5. Break at the hips and knees together
Let your knees and hips unlock at the same time. Your hips travel down and back while your knees travel forward in the direction of your toes. The bar should stay balanced over the middle of your foot, not drift toward your toes or heels.
The cue “sit down between your heels” often works better than “sit back.” It encourages a more direct descent, especially for lifters who cut depth because they are afraid to let the knees move forward. Forward knee travel is not a technical failure. It is a normal part of many strong, athletic squats when the foot stays planted and the knee tracks under control.
6. Push the knees where the toes point
Knees collapsing inward can reduce stability and make it harder to apply force consistently. But do not force an exaggerated outward knee position if it pulls you off your feet. Your knees should generally track in line with your toes, with enough outward pressure to maintain a stable arch and hip position.
Try: “Spread the floor apart.” This creates external rotation intent at the hips without requiring you to shove your knees as far out as possible. If your knees cave only at a maximal effort, it may be a manageable compensation. If they collapse early on moderate sets, reduce the load and build better control.
Use the Bottom Position to Reverse With Force
Depth matters because it determines the training effect and the positions you must control. For most lifters, a productive standard is reaching at least parallel, with the hip crease level with or below the top of the knee. Athletes and weightlifters may benefit from a deeper squat if they can maintain position and recover well.
Your individual depth will depend on hip structure, ankle range of motion, stance, and bar placement. Do not chase a picture-perfect depth by sacrificing spinal position or foot pressure.
7. Stay stacked at the bottom
At the bottom, keep your ribs and pelvis organized instead of letting your lower back suddenly round or your chest collapse. A small amount of pelvic motion may occur in a deep squat, particularly for lifters with certain hip structures. The real concern is a major loss of control under load.
The cue is: “Keep your chest and hips rising together.” This is most useful as you begin the ascent, but it starts with the bottom position. If your hips shoot up first, the bar moves forward and the lift becomes much harder than it needs to be.
8. Drive up, not forward
When the rep gets difficult, lifters often think about lifting the bar. That can cause the chest to pitch forward and the feet to lose pressure. Instead, direct your effort into the ground.
Use “push the floor away” or “drive through the whole foot.” These cues encourage vertical force and help maintain balance over midfoot. Keep the bar path as vertical as possible. A squat does not need to be perfectly straight in every frame, but large forward drift is usually a sign that tension, balance, or positioning has broken down.
9. Finish with your glutes, not your lower back
As you pass the sticking point, continue extending the knees and hips together. Stand tall by squeezing the glutes through to lockout, but do not lean back and overextend your lower back to prove the rep is finished.
Think: “Stand tall and stay braced.” You are done when your knees and hips are extended, your torso is stable, and you are ready to take another breath for the next rep.
How to Apply Squat Technique Cues in Training
Technique changes stick when they are trained under manageable conditions. If a cue only appears during a near-maximal attempt, it is probably too late. Use your warm-up sets to rehearse the same setup, brace, descent, and ascent you want when the bar is heavy.
For working sets, identify the error with the largest cost. If you lose your upper back, prioritize “bend the bar.” If you pitch forward out of the hole, use “chest and hips up together.” If your feet roll inward and your knees collapse, work with “grip the floor” and “spread the floor.” One focused cue can clean up several problems because squat mechanics are connected.
Paused squats are especially useful when you rush the bottom and lose position. A one- to three-second pause exposes whether you can maintain foot pressure, brace, and balance at depth. Tempo squats can help lifters who dive-bomb the descent, while lighter speed squats can reinforce aggressive upward intent. These are tools, not permanent replacements for regular heavy squatting.
Video can also cut through guesswork. Film from a rear-side angle that shows the bar, feet, knees, and torso. Look for repeatable patterns across several reps, not one imperfect frame. A small bar drift on a hard final rep is different from a consistent breakdown that appears every set.
The best squat is not the one that looks identical to someone else’s. It is the one you can brace hard, load progressively, hit to a useful depth, and repeat with authority. Build that rep one cue at a time, then let disciplined practice turn it into power.