Kettlebell Monster or a Paper Log? Choose by the Question Your Lifting Goal Needs Answered

Choosing between Kettlebell Monster and a paper workout log is easier when you start from what you are training for right now.

Choosing between Kettlebell Monster and a paper workout log is easier when you start from what you are training for right now. Each goal depends on one question about your past sessions. If your format answers that question quickly, it is the right format for that block of training. If you have to dig or guess, it is the wrong one.

This piece covers four goals: a heavy strength peak, steady kettlebell conditioning, general fitness, and coming back after a layoff. It also covers what to check on the Kettlebell Monster page before you rely on it, and how to split the two formats if your goals overlap. It is written for lifters who already know their exercises. How to perform them is not covered here.

Start with the one question your goal needs your history to answer

Before the session starts, you decide something based on what happened last time: how much weight goes on the bar, how long the flow runs, whether today happens at all. That decision is the question your history has to answer.

For a strength peak, the question is “what did I do on this lift last time, and what is the smallest step up from it?” For conditioning, it is “what is the next session in the sequence?” For general fitness, it is “did I train this week?” For a return from time off, it is “what can I safely repeat, and how did it feel?”

These questions need different records. The first needs exact numbers per set. The second needs a plan that has already been laid out. The third needs only a yes or no per day. The fourth needs a few numbers plus a note on how the session felt.

A paper log is a blank page, so it holds whatever you decide to write. A program on Kettlebell Monster comes with sessions already laid out for you to follow. Which of those costs less effort depends on which question you are answering.

If you have already counted the choices your session forces on you mid-workout, that app-versus-paper comparison covers the same decision from the session side. This article covers it from the goal side.

Heavy strength block: when a paper log is enough and what it cannot show you

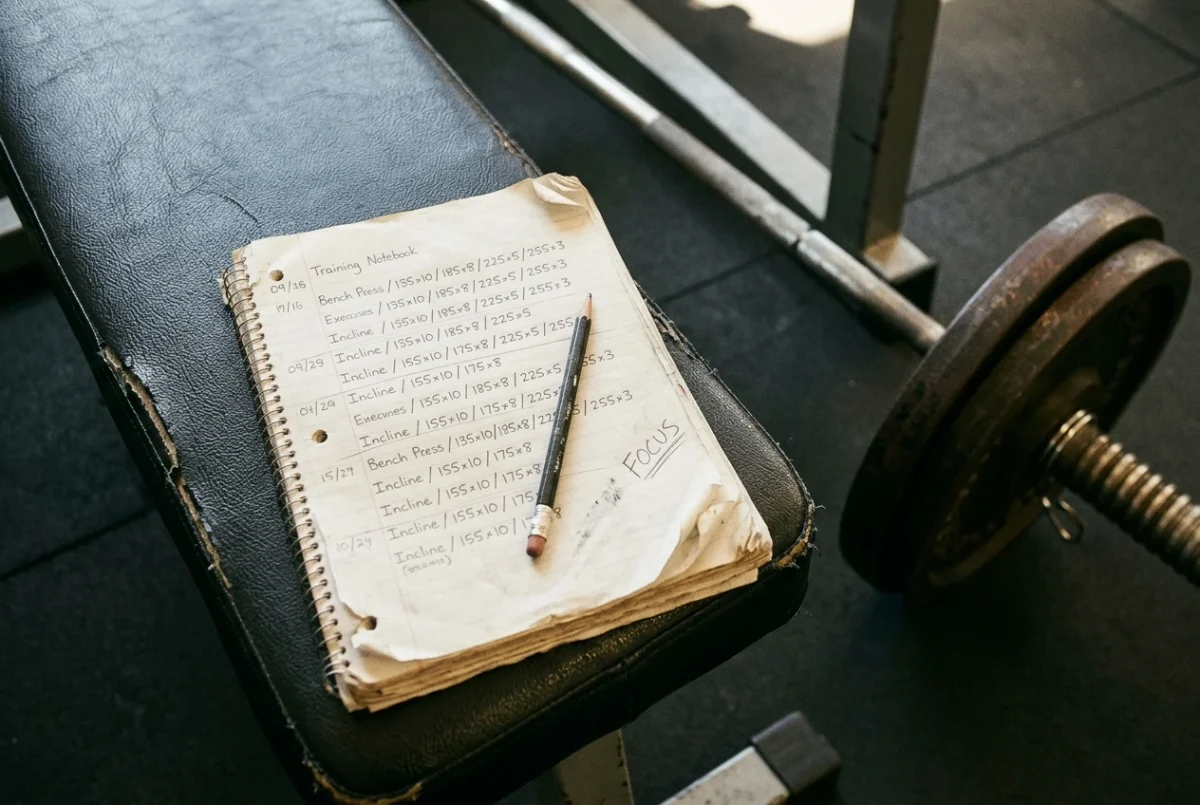
A strength peak asks a narrow question: what were the weight, reps and effort on this lift last time? You answer it with a line of numbers for each top set and the working sets behind it. A paper log does this well. You write the date, the lift, the load and the reps, and you can add a short note such as “bar speed slowed on rep 3” or “belt on from set 2.”

Paper has real advantages here. A notebook sitting next to the rack takes no charging, no screen and no login. You can look back through four or eight weeks on facing pages and see the trend by eye. Heavy singles and doubles also leave long rests, so the few seconds spent writing cost nothing.
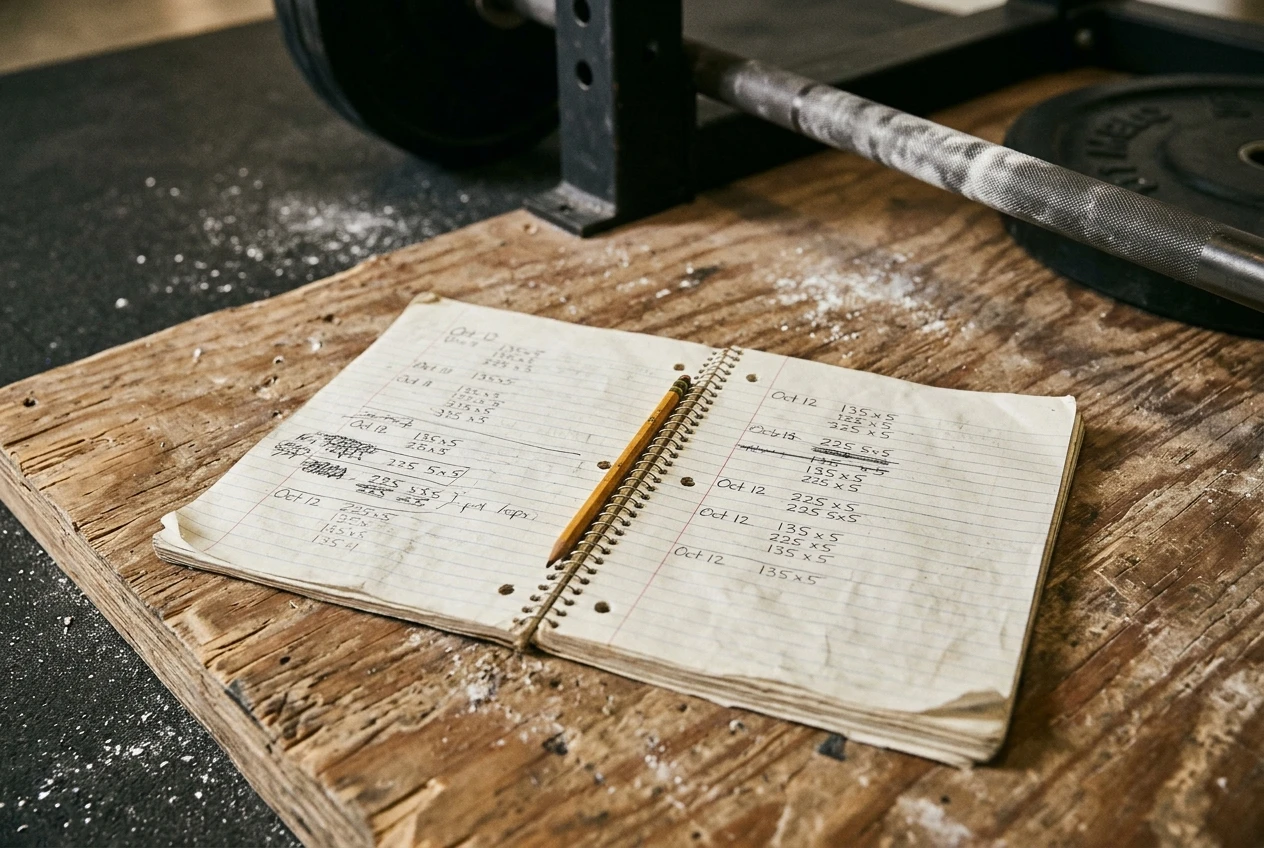
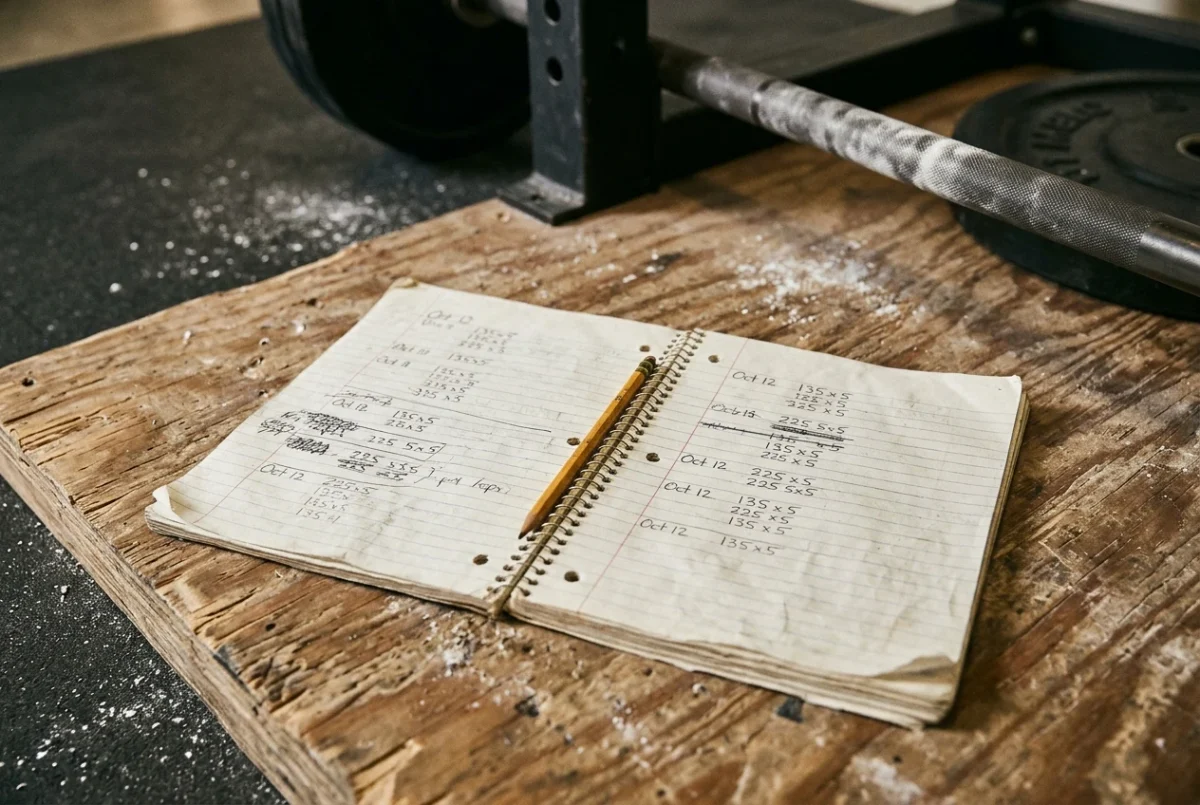
A worn spiral notebook lying open on a plywood platform beside a squat rack, two facing pages filled with handwritten lines of dates, loads and reps, a pencil in the gutter and a chalk-dusted barbell behind it in warm gym light.
Kettlebell Monster or a Paper Log? Choose by the Question Your Lifting Goal Needs Answered 6

Paper has one weakness: it cannot tell you anything you did not write down. It will not show total volume across a block unless you add it up yourself. It will not flag that your accessory work crept up while your top set stalled. If that is the question you suspect, plan a weekly five-minute review where you add up the sets. Pricing each accessory by the reps it costs your next main lift works well with a paper log, because the log already holds the numbers you need.

For a heavy strength block, paper answers the main question with the least effort. Kettlebell Monster is a kettlebell program, so it would not replace the barbell log in a peak anyway.

Kettlebell conditioning and flows: when a guided digital program earns its place

Steady kettlebell conditioning asks a different question. The weight on the bell matters less than the structure: which flow, how long, how many rounds, and what comes next in the progression. If you write this yourself on paper, you also have to design the progression, and that is where paper starts to cost effort.

A paper log for flows needs a lot of writing. You have to record the movement order, the work and rest times and the round count. On top of that, you have to decide every week how to change them. Many lifters end up repeating the same flow because designing the next one takes more thought than doing it.

A program that lays out the sessions removes that design work. You open the next session and follow it. This is the situation where Kettlebell Monster earns its place, since it is built around following a kettlebell program rather than writing your own. If you train in front of a TV, the Samsung Tizen TV app lets you run the session on the big screen, so you are not propping a phone against a water bottle between rounds.

A living room with a living-room TV showing a kettlebell workout session, a single iron kettlebell mid-swing on a mat in the foreground, a water bottle and towel on the floor, soft evening light and no phone propped anywhere.
Kettlebell Monster or a Paper Log? Choose by the Question Your Lifting Goal Needs Answered 7

Your hands are also busy during flows, which makes writing mid-session awkward. A guided session means you are not stopping to write.

If you already run flows inside a strength split, the dials that control how much flow you can add are covered in turning down one of three flow dials before you cut your lifting.

General fitness and consistency goals: which format makes you show up more often

For general fitness, the question your history needs to answer is “how many days did I train this week?” You do not need set-by-set records for that. A tick on a calendar is enough.

The best format here is whichever one makes starting a session easiest on a tired weekday. Two things drive that: how few decisions stand between you and the first rep, and how visible the plan is.
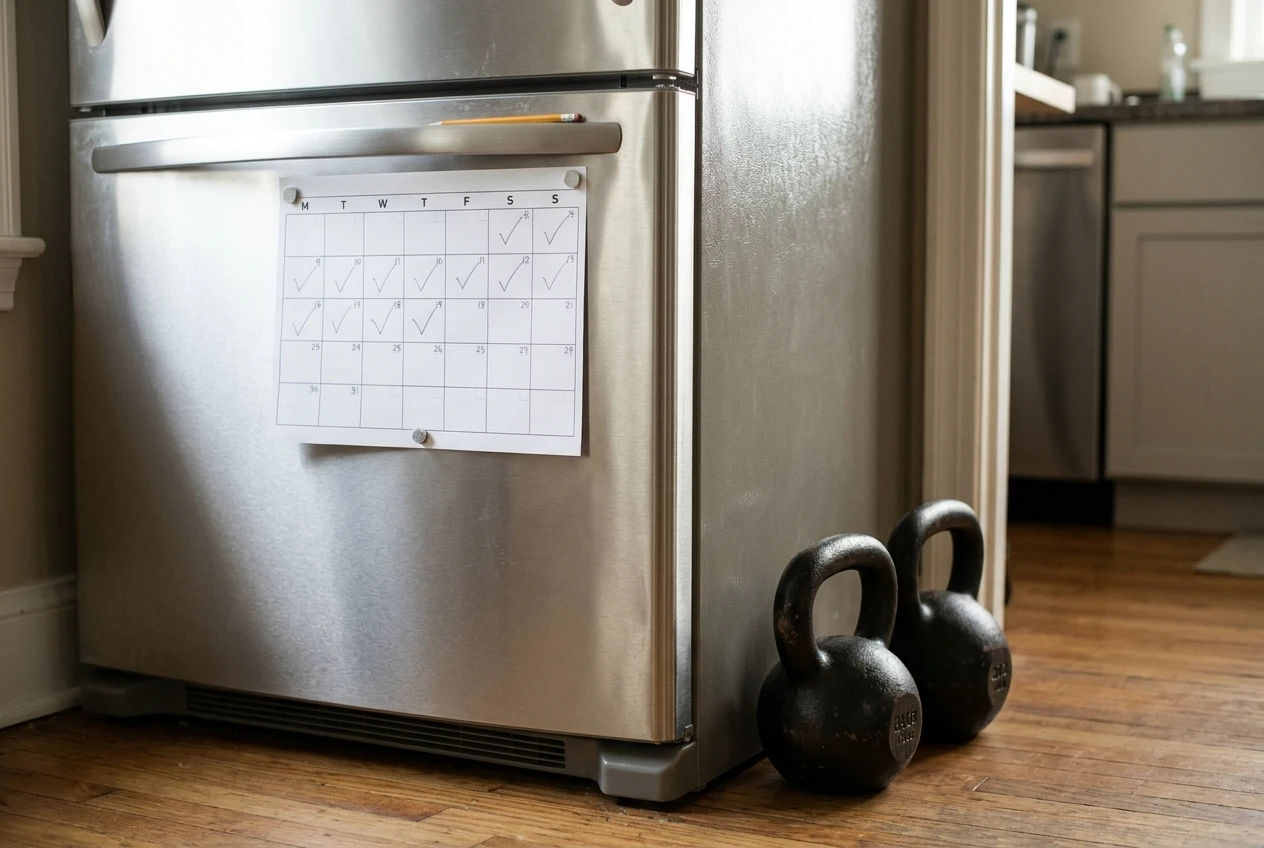
A paper wall calendar pinned to a fridge beside a pair of kettlebells on the floor, with a row of pencil ticks across the week's days and a gap on two days, morning kitchen light, white and steel tones.
Kettlebell Monster or a Paper Log? Choose by the Question Your Lifting Goal Needs Answered 8

A paper log on the fridge or beside the kettlebells makes the weekly count visible, which is a real strength. It does not tell you what to do once you are standing there, though. If you are the kind of lifter who stalls on “what am I doing today?”, that missing instruction can cost you the session.

A guided program answers “what am I doing today?” before you ask it. If you already train in front of a screen, opening the next session on the TV may be the smallest step you can take. If you prefer to move through your own routine without a screen, paper wins.

A simple test: look at the last four weeks. If you skipped sessions because you did not know what to do, choose the guided program. If you skipped because the day got away from you, neither format fixes that, so put the session at a fixed time and use whichever tracking method you find least annoying.

Coming back after a layoff: choosing the format that keeps your first weeks simple

After time off, the question changes to “what can I repeat without a setback, and how did it feel?” You are not trying to beat an old number. You are trying to find a load and volume you can recover from.

Paper is good for this because you can write the feeling down in your own words. A note like “easy, could have done two more rounds” or “low back tight after swings” tells you what to do next. The numbers matter less than the notes in these early weeks.

A guided program helps for a different reason: it limits your choices. The usual return mistake is picking a session that is too long, or loading a position you have not trained in months. A pre-built session means you are not making that call while excited to be back. Check the program’s starting level against your layoff before you commit, though. That means reading what the page says about who the program is for.

If your layoff included shoulder or hip stiffness, run through five mobility checks before you add load to a kettlebell position first. No format can do that for you.

For most returning lifters, the simplest setup is a guided program for the sessions plus a few lines of notes on paper about how each one felt.

What to check on the Kettlebell Monster page before you count on it for tracking

This article does not assume Kettlebell Monster records your history the way a log does. Whether it stores your weights, completed sessions or progress is something to confirm on the page itself before you rely on it. Here is what to look for.

  • What it records. Look for whether it saves completed sessions, the weight you used, or neither. If it saves nothing, you still need a paper note for the numbers.
  • How progression works. Check whether the program describes how sessions change from week to week, and whether it tells you when to move up.
  • Who it is for. Look for the stated starting level, the kettlebell weights it assumes and the equipment you need.
  • Session length. Compare the listed session length to the time you actually have. A long session you skip beats nothing, but only if you do it.
  • How you run it. If you plan to use the Samsung TV app, check that your TV is on the Tizen platform, and read the TV app’s own page for what it covers.
  • Terms. Read what the page says about price, access and cancellation. This article does not state any of those, because they can change.

If the page does not answer one of these, treat the answer as unknown. A paper log works the same whether or not the page answers.

A hybrid setup: paper for the heavy lifts, Kettlebell Monster for the kettlebell sessions

Many lifters have two goals at once: a squat, press or deadlift number, and some conditioning. They have two different questions to answer, so two formats can work side by side.

Keep a paper log for the barbell lifts. It records top sets, accessory counts and notes on belts, straps and shoes. This is where precise numbers matter, and paper handles them without any setup.
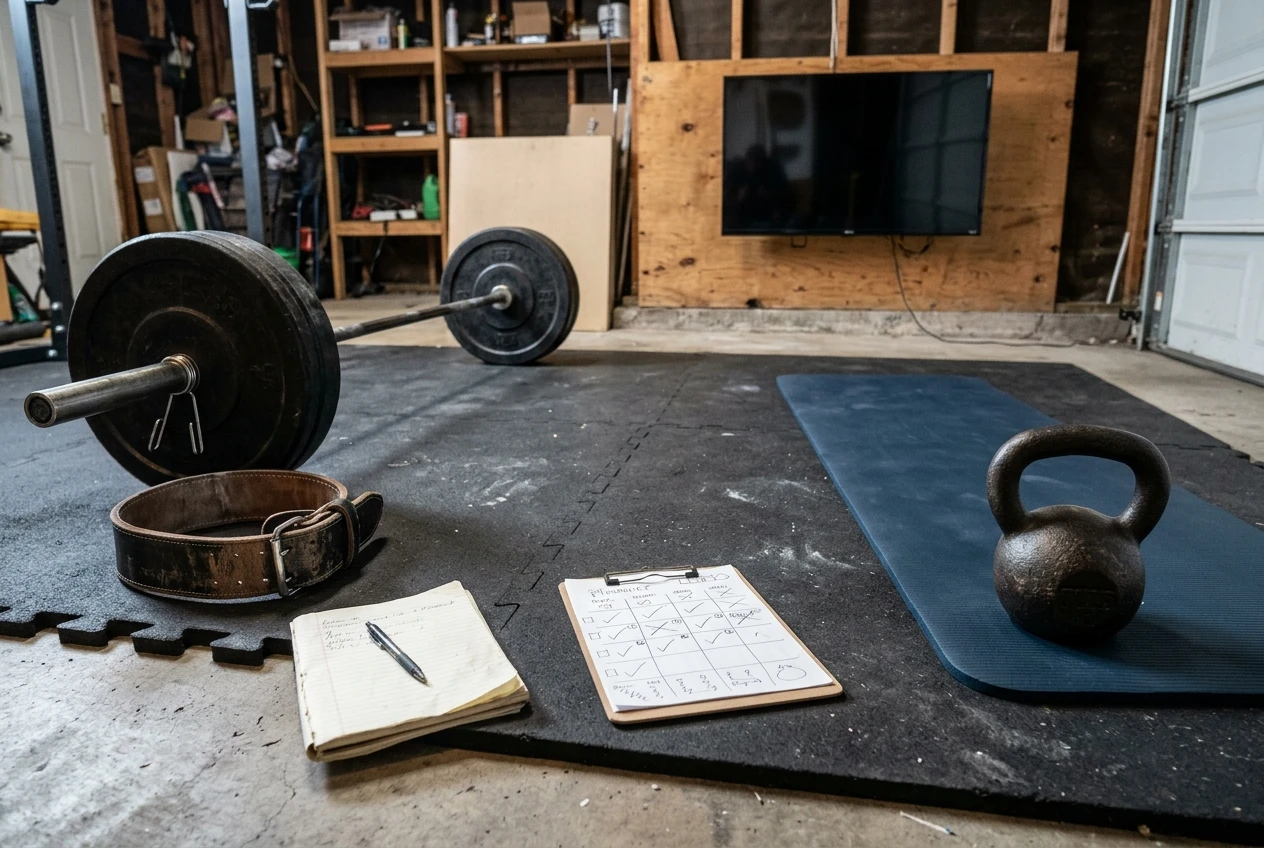
A split scene on a garage gym floor: on one side a barbell with plates, lifting belt and a notebook; on the other a kettlebell on a mat facing a wall-mounted TV, a hand-drawn weekly planner lying between them, with cool overhead light.
Kettlebell Monster or a Paper Log? Choose by the Question Your Lifting Goal Needs Answered 9

Use the guided kettlebell program for the conditioning days. You open the next session and follow it, with no design work and no writing mid-flow. Your paper log needs only a single line for those days: the date and a note on how it felt.

This split also helps you decide which day does what. A kettlebell session can sit after accessories as a finisher or between heavy days as lighter work, and two jobs for a kettlebell flow in a powerlifting split explains how to choose. Whichever you pick, write it on the paper log so one page shows your whole week.

The cost of a hybrid is two places to look. If that bothers you, a good compromise is a weekly calendar on paper that marks each day as either “barbell, logged below” or “kettlebell, program.”

Match your current goal to a format in one table

Current goal

The question your history must answer

Format with less effort

What to watch

Heavy strength peak

What did I lift last time, and what is the smallest step up?

Paper log

Add up weekly volume yourself

Steady kettlebell conditioning

What is the next session in the progression?

Kettlebell Monster program

Confirm what the page says about progression

General fitness

Did I train this week?

Whichever lowers your barrier to starting

Check why you skipped sessions before changing format

Returning after a layoff

What can I repeat, and how did it feel?

Guided program plus short paper notes

Match the starting level to your layoff

Strength plus conditioning

Both of the above

Hybrid: paper for barbell, program for kettlebell

Mark each day on one calendar

If two rows fit you, treat the goal you want to move most over the next eight weeks as the deciding one, and use the other format for the rest.

Where to look next

If your goal points to the kettlebell sessions, look at Kettlebell Monster and check it against the list above. (Affiliate link: I may earn a commission if you buy through it.)

If you train in front of a TV, there is also the Samsung Tizen TV workout app. (Affiliate link: I may earn a commission if you buy through it.)

If your goal is a heavy strength peak, a notebook is all you need today.
Turn Down One of Three Flow Dials Before You Cut Your Lifting

Kettlebell flow can help a strength cycle or quietly eat it.

Kettlebell flow can help a strength cycle or quietly eat it. The same ten minutes of swings, cleans and presses that clear your legs between heavy days can also leave your first squat warm-up feeling like a working set. The difference is dose, and dose has three adjustable parts.

This article gives you a way to find your own ceiling for flow across a full cycle, so you can learn how to add kettlebell flow to strength training without overtraining. If you still need to decide where flow sits in your week, the two jobs flow can do in a powerlifting split cover that. What follows assumes you already have a slot and want to size the dose.

Flow becomes overtraining when it stops being easy to recover from

Flow earns its place in a strength cycle because it is low in skill demand, continuous, and light enough to do between or after heavy work. Its value is recovery and conditioning. Once it begins to cost you recovery, it has stopped doing the job you added it for.

So the useful definition of too much is practical: flow is too much when it changes how your next heavy session feels. A flow session that leaves you pleasantly warm and loose is fine. One that leaves your hamstrings sore two days later, or your grip fried before deadlifts, is a heavy session in disguise, and you have not programmed or counted it.

Most lifters overdo flow gradually. A session goes well, so the bell gets heavier. The timer gets another few minutes. The rest between rounds shrinks because the session feels easy. Each change is small, and none of them looks like a problem until the barbell numbers stall. That is why the approach below tracks three separate variables and one signal, instead of a single “how hard was that” rating.

The three dials: bell weight, minutes, and rest between rounds

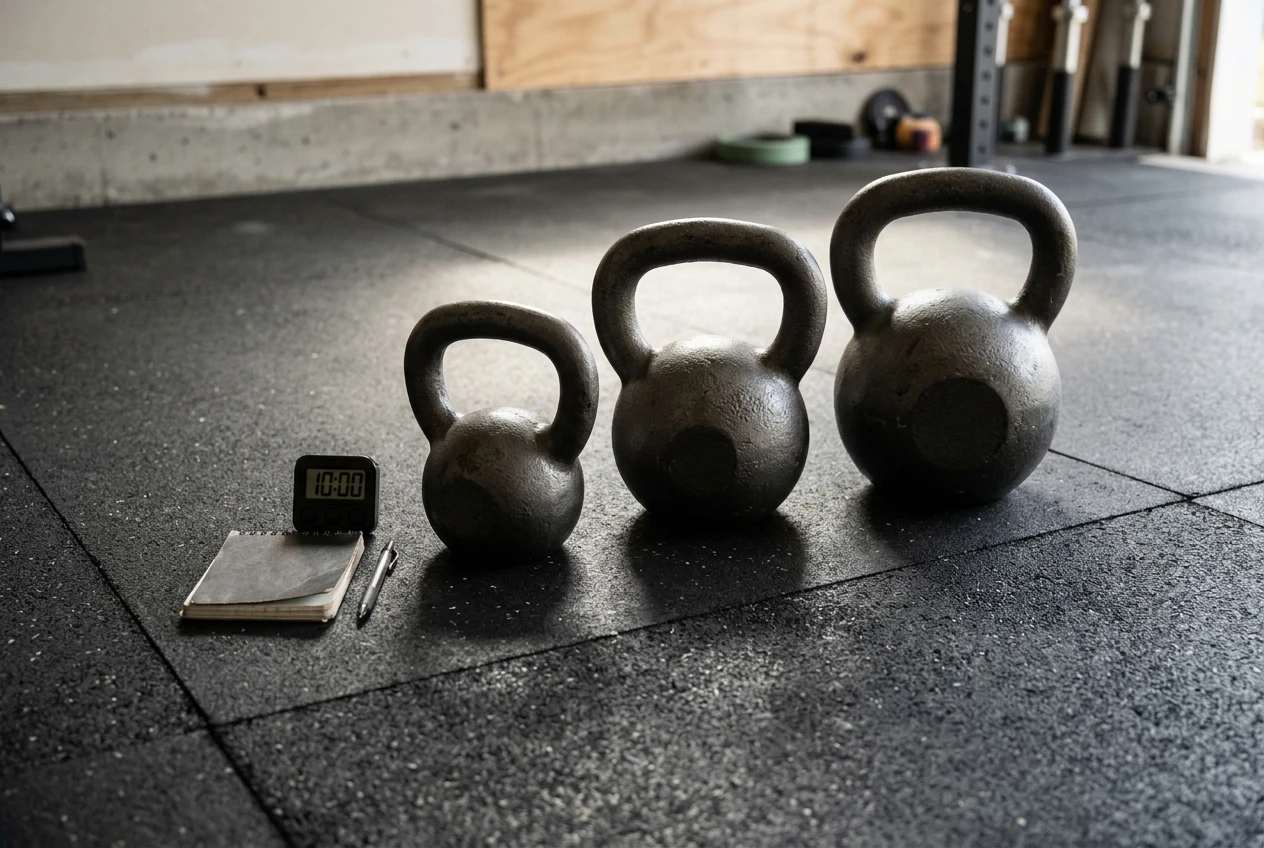
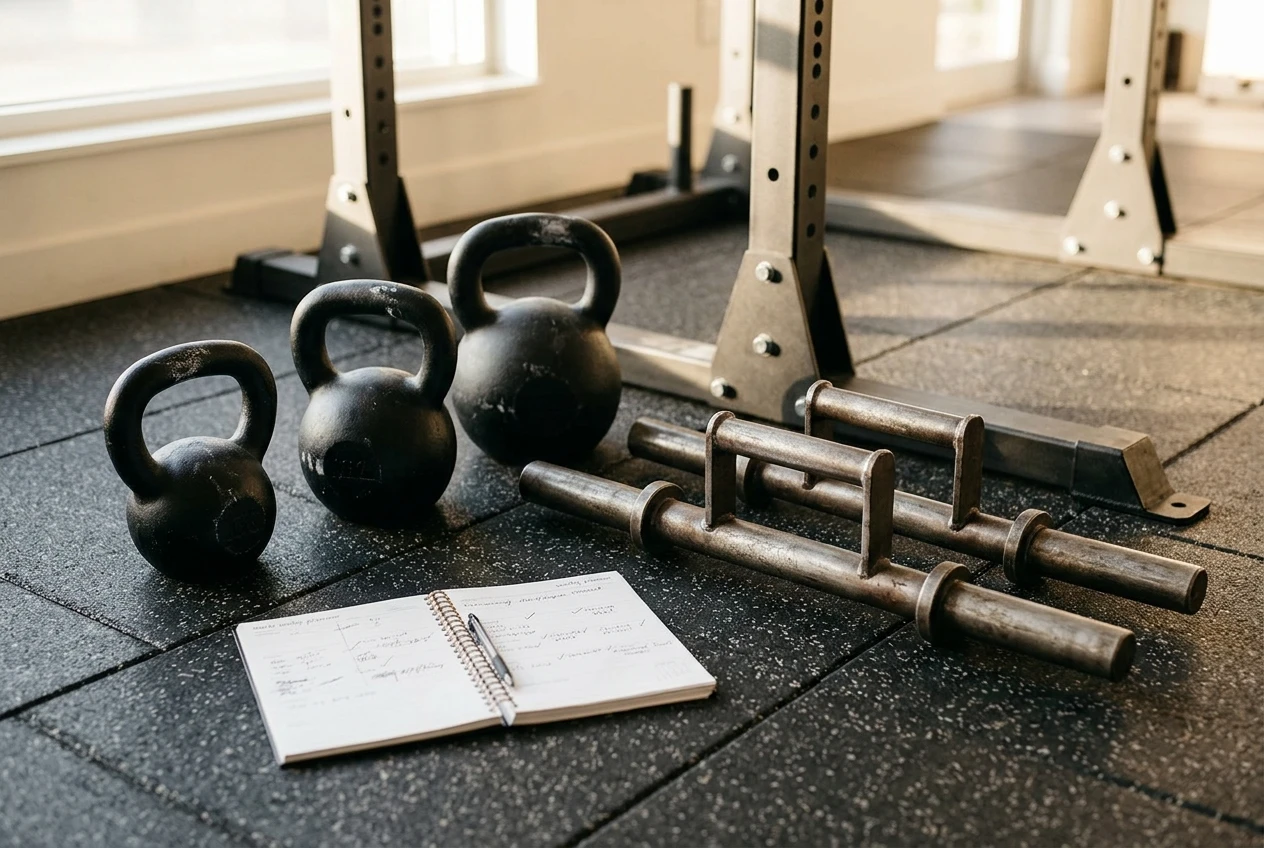
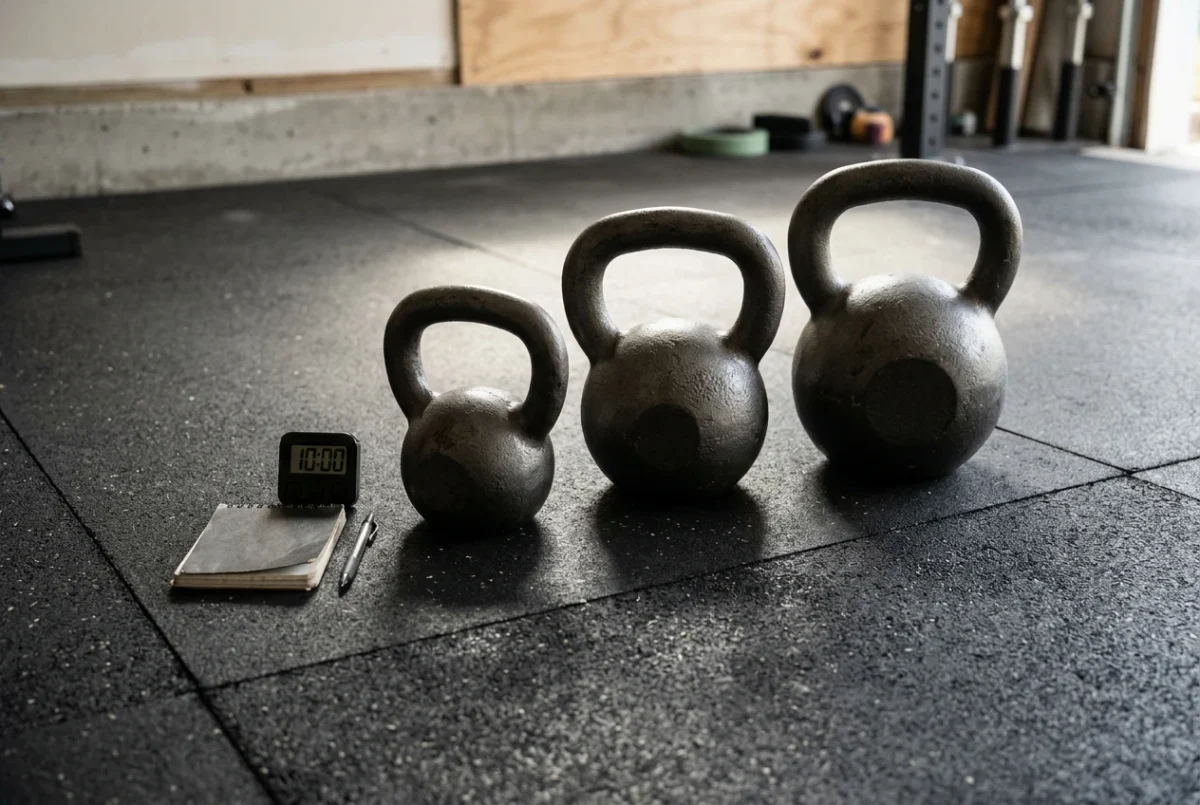
Three kettlebells of different sizes lined up on a rubber gym floor beside a plain interval timer and a small notebook with a pen, in soft side light from a garage-gym window, grey iron against black rubber.
Turn Down One of Three Flow Dials Before You Cut Your Lifting 15

Every flow session is set by three dials. You can raise or lower each one independently, and each one stresses something different.

Dial 1: bell weight

Bell weight controls how much load your hips, lower back, grip and shoulders carry on every rep. A heavier bell raises the cost of each swing, clean and press, and it is the dial most likely to bleed into your barbell work, because it taxes the same posterior chain and the same grip. If your grip is the first thing to go, the three places swing grip can fail are worth reading before you decide what to change.

Dial 2: minutes

Minutes of work set the total volume. Two sessions with the same bell and the same movements are very different if one runs eight minutes and the other twenty. Minutes accumulate fatigue quietly, because no single rep feels hard.

Dial 3: rest between rounds

Rest sets the intensity of the session as a whole. Short rests keep your breathing and heart rate high and push the session toward hard conditioning. Longer rests let you start each round recovered, which keeps the session closer to the easy, restorative end. Shortening rest is the easiest dial to turn without noticing, because you are not adding anything to the bar or the clock.

Pick your starting point for each dial deliberately, and write it down. A session note such as “one bell, 12 minutes, 60 seconds between rounds” gives you something to adjust. “Did some flow” gives you nothing.

The next-day check: what your first warm-up sets should tell you

You need one signal that is cheap, repeatable and tied to the thing you are protecting. Your first warm-up sets on the next heavy day work well, because they are the same weights every cycle, they are light, and your body has no reason to be anything other than fresh for them.

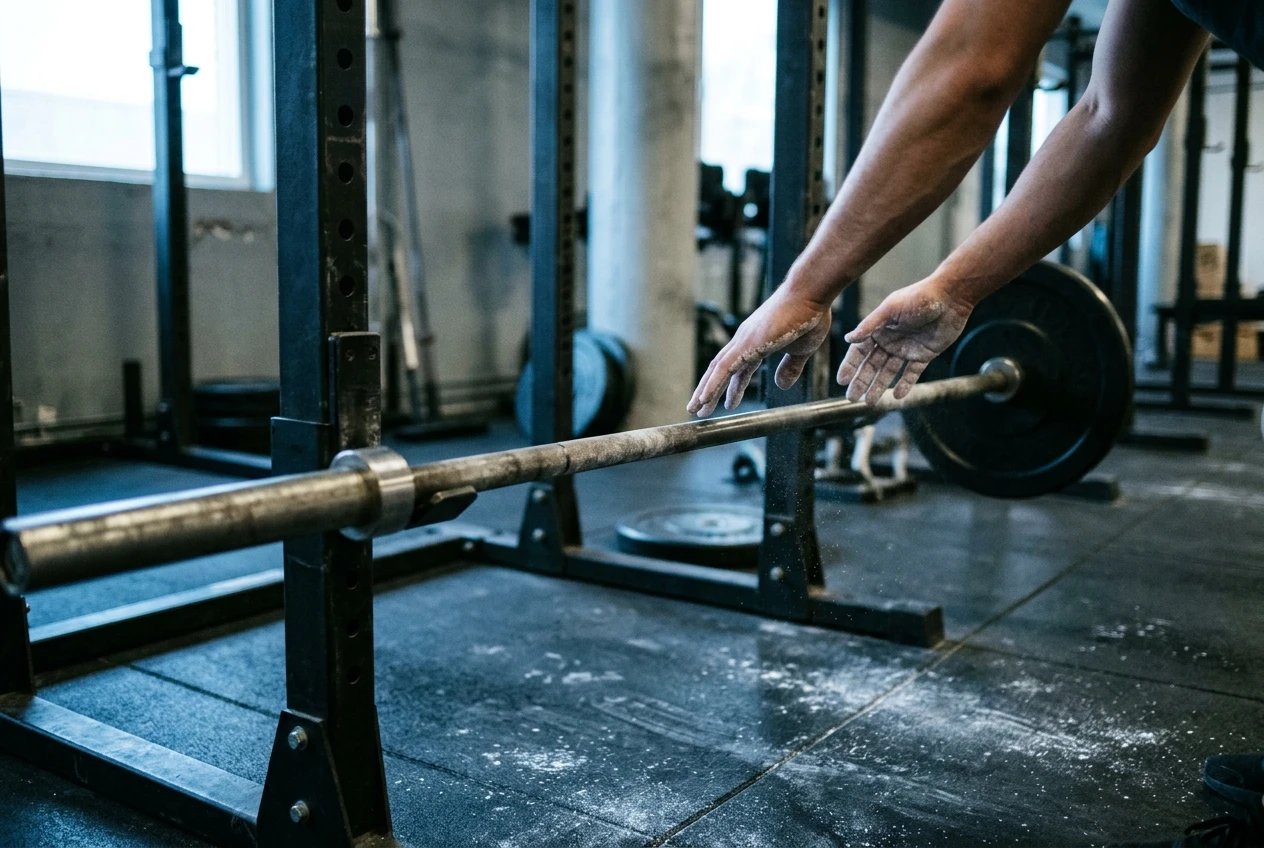
An empty barbell loaded with a single light plate on each side, resting in a squat rack in the early morning, a pair of lifting chalk-dusted hands about to grip the bar, cool blue-white light and a chalk-smudged floor.
Turn Down One of Three Flow Dials Before You Cut Your Lifting 16

Before you add or change flow, pay attention to how those first sets feel for a couple of weeks. Weigh the empty bar or the first light set, note how it moves, and how your hips, back and grip feel. That is your baseline. Then, once flow is in the week, compare against it.

Look for these on the first warm-up sets:

  • The bar feels heavier or slower than the baseline at the same weight.
  • Your hips or lower back feel stiff or tight where they are usually loose by the second set.
  • Your grip feels tired before any real load is on the bar.
  • You need more warm-up sets than usual before the first working weight feels normal.

One flat day does not mean much. Sleep, food and a stressful week all show up here. Two heavy days in a row where the warm-ups feel worse than baseline, after flow sessions in between, is a pattern worth acting on. If you want a warm-up that is tied to the day’s lift, a 10-minute kettlebell warm-up built around today’s lift gives you a consistent routine, which also makes the check easier to read.

Which dial to turn down first, and why the barbell stays untouched

When the check says flow is costing you, turn down one dial, and only one. Then run the next heavy day and check again. If you change bell, minutes and rest together, you fix the problem without learning which dial caused it, and you will repeat the mistake next cycle.

To choose the dial, look at where the tiredness shows up:

  • Breathing and general fatigue are the issue: lengthen the rest between rounds. You keep the same bell and the same minutes, and the session becomes easier to recover from.
  • Grip, hamstrings or lower back feel tired on heavy days: drop the bell weight. These are the areas a heavier bell loads most directly.
  • Everything is a little tired and no single area stands out: cut the minutes. Total volume is the likely culprit.

If nothing stands out, a reasonable default order is rest first, then minutes, then bell weight. Rest is the gentlest change and preserves the movement pattern you are practicing.

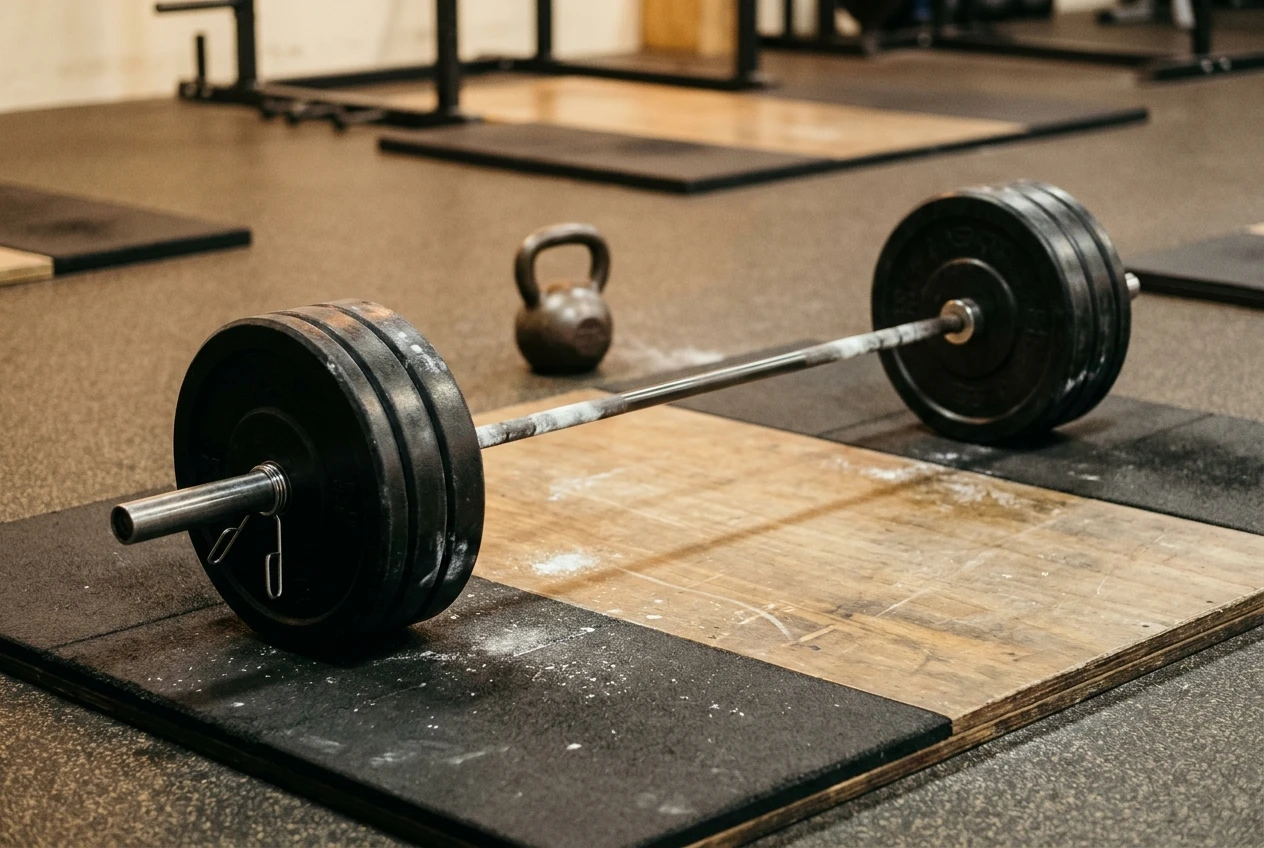
A heavy loaded barbell on the platform in the foreground, untouched and chalked, with a single kettlebell set aside a few steps behind it on the floor, warm overhead light with the barbell sharply in focus and the bell softly blurred.
Turn Down One of Three Flow Dials Before You Cut Your Lifting 17

The barbell stays where it is because the cycle is built around it. Your heavy days are the reason you are doing flow at all, and they are the measurement you are using. If you cut the lift first, you lose the training you care about and you also lose your ability to tell whether flow was the cause. Flow is the variable you added, so it is the one that gets adjusted. The only time the lift itself changes is when you have already turned all three dials down and the warm-ups still feel off, which points to something other than flow.

How to set flow in the build weeks, the peak weeks, and the deload

Your ceiling is not one number. It moves with the cycle, because your recovery budget moves with it.

Build weeks. Barbell volume is higher and loads are moderate, so recovery is working hard. Keep flow submaximal here: a bell you could comfortably use for more, a modest number of minutes, and generous rest. Flow in the build weeks is mostly for blood flow and movement quality. Which flow patterns suit which stage of a squat cycle is covered in which kettlebell complex belongs in which phase of your squat cycle.

Peak weeks. The barbell is heavy and the stakes are highest, so the barbell’s demand on recovery is at its peak. This is where you are most likely to hit your ceiling. Expect to turn at least one dial down, most often minutes or bell weight, and keep the rest generous. Flow in the peak weeks should leave you feeling better than before you started.

Deload. Barbell stress drops, so this is the week where you have room to use flow for conditioning if you want it. You can lengthen the minutes or shorten the rest, but the deload is meant to let you recover, so stay clear of anything that leaves you sore. A deload that ends with warm-ups feeling better than baseline has done its job.

Signs the flow is the problem and signs it is something else

Not every bad warm-up is flow’s fault. Before you cut anything, work out which it is.

Signs flow is the problem:

  • Warm-ups feel worse after flow days and better after days without it.
  • The tired area matches what flow loads: grip, hips, lower back.
  • The problem appeared or grew when you raised a dial.
  • Skipping one flow session improves the next heavy day.

Signs it is something else:

  • Poor sleep, low food intake or high stress over the same stretch.
  • The barbell programming itself jumped, such as a load increase or a new phase.
  • Accessory volume crept up. How much accessory work costs your next main lift is a good way to price that.
  • The problem is the same whether or not you did flow that week.

The cleanest test is to skip one flow session before a heavy day and compare the warm-ups. If they feel normal, flow is a plausible cause, and you can start turning dials. If they still feel off, leave the dials alone and look elsewhere.

A sample four-week cycle you can adjust to your own ceiling

This is a starting point, not a prescription. Replace the numbers with whatever your baseline and your warm-up check say. The structure is what matters: dials moving in a planned direction across the cycle, one at a time.

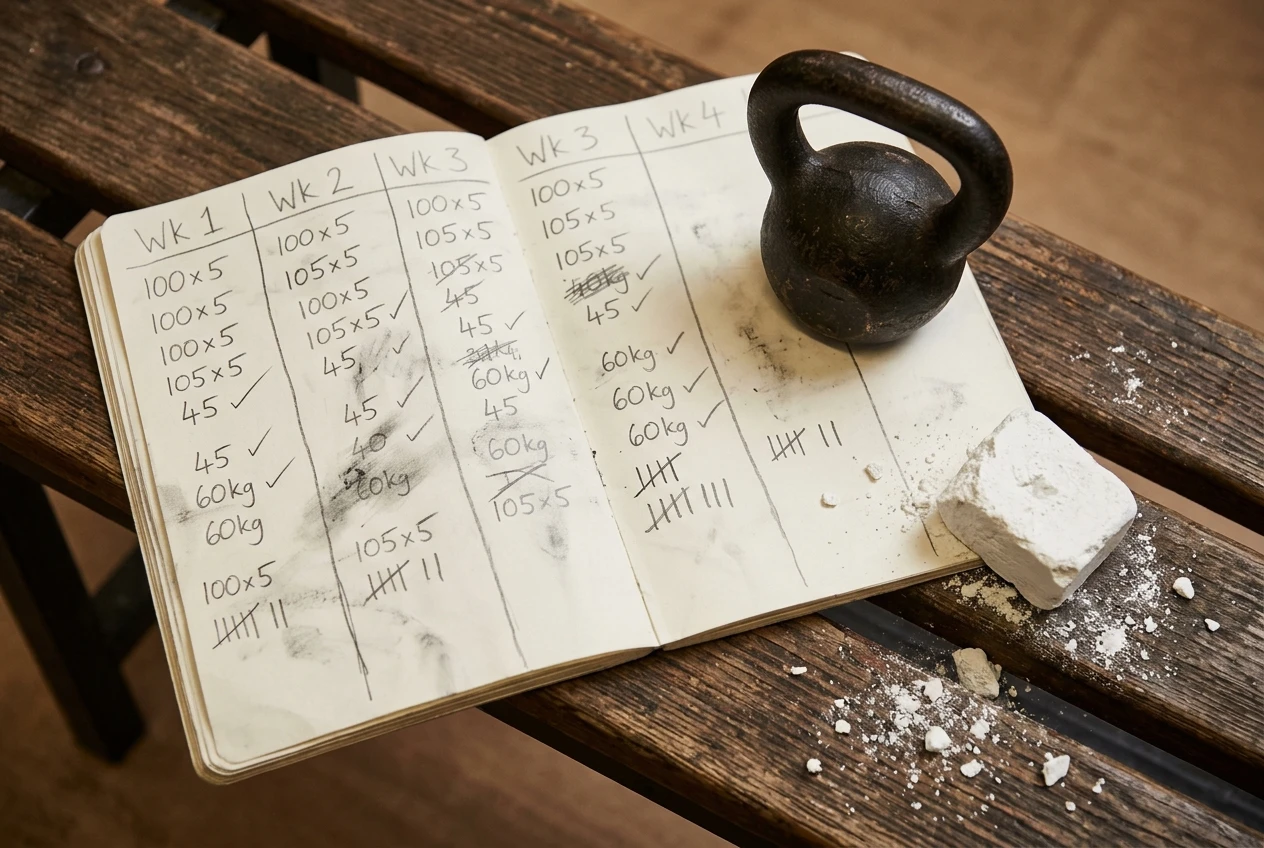
A handwritten training log open on a gym bench showing four weeks as columns of pencil marks, with a kettlebell on the page as a paperweight and a chalk block beside it, warm lamp light on wooden slats.
Turn Down One of Three Flow Dials Before You Cut Your Lifting 18

Week 1 (build). One bell you can handle easily. 10 minutes of flow, 60 seconds of rest between rounds. Two sessions, placed away from your heaviest lower-body day.

Week 2 (build). Same bell and rest. Raise minutes to 12. Check the warm-ups on your next heavy day. If they match baseline, keep it. If they are worse, return minutes to 10 before touching anything else.

Week 3 (peak). Hold the bell. Cut minutes back to 8 to 10, and give 75 to 90 seconds of rest between rounds. One session may be enough here. The goal is to arrive at your heaviest sets with warm-ups that feel normal.

Week 4 (deload). Optional extra minutes, with rest kept long. Use this week to see whether you can raise one dial slightly for next cycle: a few more minutes, or a bell one step heavier, never both.

At the end of the cycle, write down where your ceiling sat for each dial: the bell, the minutes and the rest at which warm-ups still matched baseline. That record is your personal ceiling, and next cycle you start from it instead of guessing.

Guided flow sessions without planning the dials

If you would rather follow guided flow sessions than set bell, minutes and rest yourself, kettlebell.monster offers kettlebell workouts you can follow along with (affiliate link: I may earn a commission if you purchase, at no extra cost to you). If you train in front of a TV, there is also a Samsung Tizen TV workout app (affiliate link, same disclosure). You can still use the next-day check from this article to decide how much of a guided session fits into a given week.

Count the Decisions Your Session Forces Mid-Workout, Then Pick a Training App or a Paper Program

Choosing between a subscription workout app and a paper workout program usually starts with a feature list: price, exercise library, progress charts.

Choosing between a subscription workout app and a paper workout program usually starts with a feature list: price, exercise library, progress charts. For a lifter who already knows the main lifts, those lists miss most of what matters. A session is a string of small decisions, and the format you pick determines who makes each one: you, the page, or the screen.

This article lists the five decisions a home session forces on you and shows how each format handles them. You then tally which ones you actually hit and let the count point to a format.

The five moments in a home session where a plan has to make a decision for you

Every session, whatever the program, produces some mix of these moments:

  1. A missed rep target. You planned 5 reps and got 3. The plan has to say whether you drop the weight, keep going, or end the exercise.
  2. A rest period that drifts. Nobody times rest accurately by feel. Two minutes becomes four while you check your phone or adjust a bell, and the session runs long or the next set suffers.
  3. A movement you can’t set up from memory. This is an unfamiliar variation, a stance you’ve forgotten, or a kettlebell sequence you haven’t run in weeks. You stop and look it up.
  4. A day that doesn’t match the plan. You’re short on time, a joint is irritated, or the bar is loaded for something else. The plan has to offer a substitution or a shorter version.
  5. The next-session load. After the last set, someone has to decide what goes on the bar or what bell you pick up next time, and that decision needs a record of what happened today.

Moments 1, 4 and 5 are judgment calls. Moments 2 and 3 are logistics: timing and information. That split matters later, because paper and apps handle the two groups very differently.

What a paper program handles well, and where it leaves you guessing mid-set

A printed or written program is strongest at fixed structure. The exercises, sets, reps and order are all visible at once, so you can see the whole session and plan your gym layout before you start. Nothing needs a login, a signal or a charged battery, and nothing changes underneath you between sessions.

Paper also handles moment 5 well if you write down the numbers. A notebook column next to each exercise gives you an exact record, and you read it yourself. Because you make the load decision, you can weigh things a generic rule can’t, such as a bad night’s sleep or a grip that gave out before your legs did.

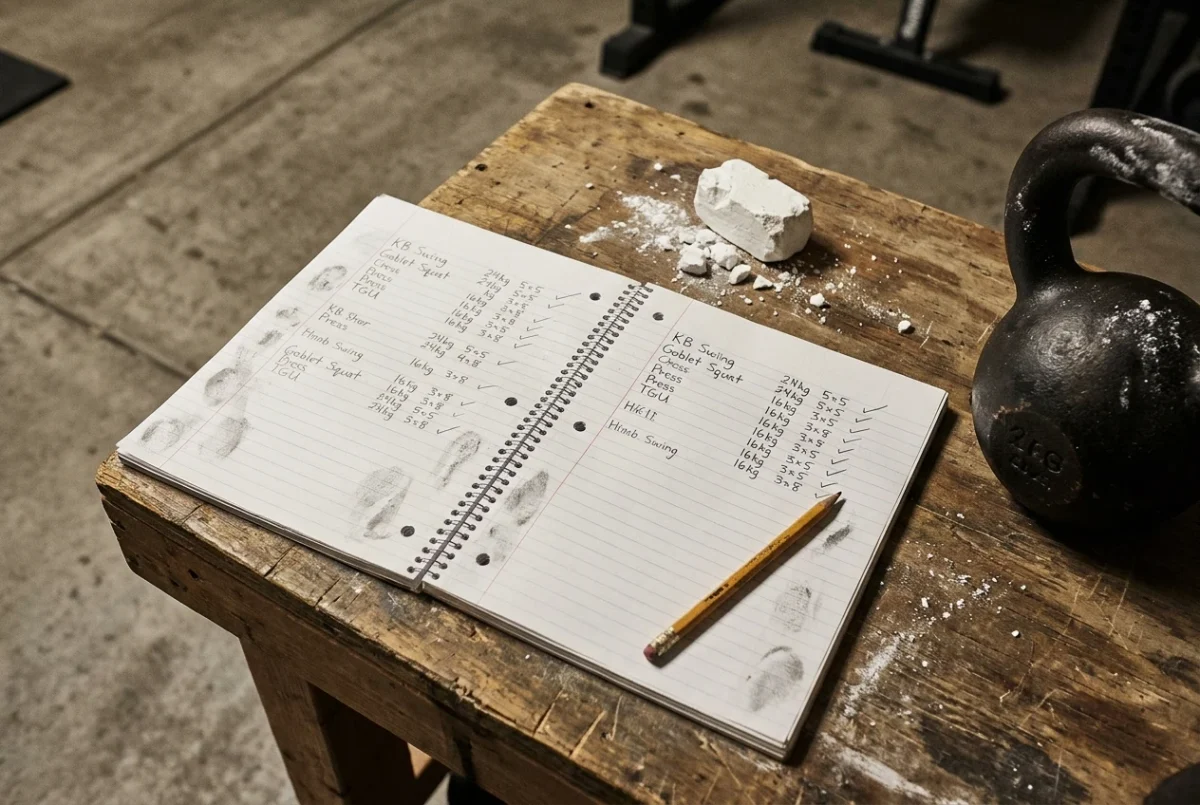
A spiral notebook open on a workbench beside a block of gym chalk, a pencil and a kettlebell. The page shows handwritten columns of weights next to each exercise, with chalky thumbprints on the margin. Warm overhead garage light, grey concrete floor behind.
Count the Decisions Your Session Forces Mid-Workout, Then Pick a Training App or a Paper Program 24

Where paper leaves you guessing:

  • Missed targets (moment 1). A page can only say what to do if it wrote the rule in advance. Many programs state a rule such as “if you miss reps, repeat the weight next week,” but plenty don’t, and then you improvise.
  • Rest timing (moment 2). The page can say “rest 90 seconds,” but it can’t count them. You need a separate clock, and you have to look at it between sets with chalky or sweaty hands.
  • Setup (moment 3). Paper holds a name and maybe a diagram. If the movement is new to you, a name doesn’t tell you where the feet go or how the bell should sit.
  • Off days (moment 4). A page doesn’t know your shoulder is cranky. Unless the author printed alternates, the substitution is on you.

Paper works well for a lifter who already knows the movements and wants the plan kept simple. It works poorly for anyone whose sessions include many unfamiliar exercises or who loses track of time between sets.

What a subscription app handles well, and the questions to ask before trusting its coaching

An app’s advantage is that it can be present during the session. It can run a rest timer, show a demonstration at the moment you need it, and store your logged sets without any extra effort from you. That covers moments 2 and 3 more completely than paper can.

Some apps also try moments 1, 4 and 5: adjusting weights after a missed target, offering a swap when you flag soreness, and suggesting next week’s load. This is where you should be careful, because the quality of those decisions varies and the marketing rarely shows how they’re made. Before paying, ask:

  • What rule sets the next load? A good answer is a stated progression, such as add weight after hitting all reps, or repeat after a miss. A vague answer such as “personalized to you” tells you nothing you can check.
  • Is the coaching from a person or generated by software? Both can be fine, but they fail differently. Find out which one you’re buying.
  • Does it know what equipment you own? A plan that assumes a full rack is no use in a garage with a barbell and two kettlebells.
  • Can you override it? If the app says to add weight and your last rep was a grind, you need to be able to decline without breaking the program.
  • What happens when you stop paying? Find out whether you keep the program, your logs, or neither. If your history lives only inside the subscription, canceling means starting your records over.
  • Does a missed session reshuffle the plan or leave it alone? Some apps push the whole schedule back, which may or may not suit you.

If an app can’t answer the first question clearly, treat it as a timer and a video library, and judge it on those two jobs alone.

Pacing and setup cues: why the screen in your home gym matters more than the plan

Moments 2 and 3 depend less on the quality of the plan than on where the information appears. A good timer you can’t see from the floor doesn’t pace anything, and a demonstration on a phone across the room doesn’t help you set up a movement.

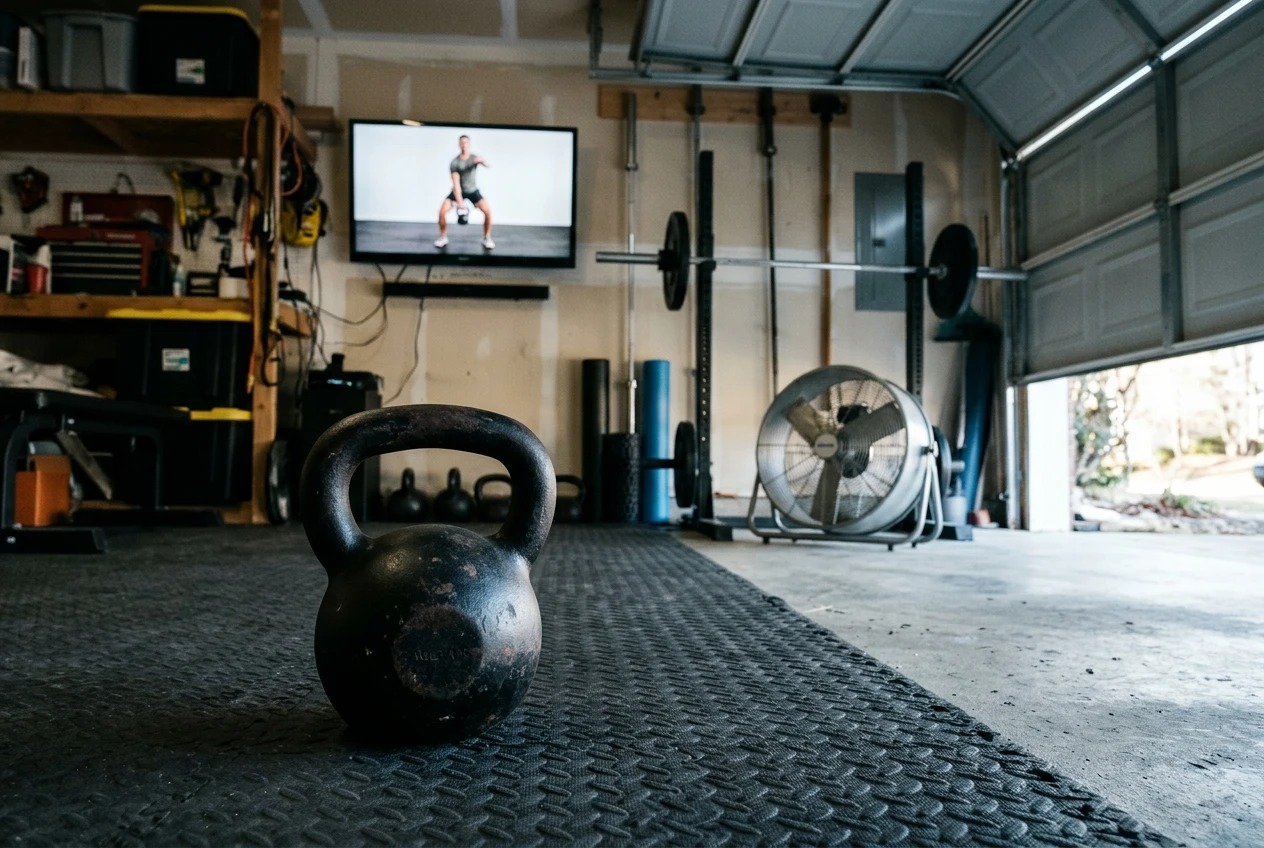
A garage home gym seen from the floor next to a kettlebell, with a wall-mounted TV across the room showing a paused kettlebell swing demonstration. A rubber mat, a barbell rack and a fan sit in the background, in cool daylight from a half-open roller door.
Count the Decisions Your Session Forces Mid-Workout, Then Pick a Training App or a Paper Program 25

Think about the physical layout of your space:

  • Sightline from the rest position. Wherever you stand or sit between sets, can you see the clock without moving? A TV on the wall can be read from across a garage; a phone on a shelf often can’t.
  • Sightline from the setup position. Demonstrations are useful only if you can glance at them while you’re getting into the starting stance, not after you’ve set the bell down.
  • Sound. If cues are spoken, check that you can hear them over a fan, music or the clang of plates.
  • Connection. A streaming app needs a reliable signal where you train. Garages and basements are often the weakest spots in a house.
  • Hands. With chalk or sweat on your hands, tapping a small touchscreen between sets is a nuisance. Check whether the app runs hands-free.

This is why a mediocre plan on a well-placed screen can pace a session better than an excellent plan on paper. The plan decides what you do; the screen decides whether you do it on time and in the right position.

How to total up your own tally in ten minutes

Take a notebook and think back over your last three sessions. For each of the five moments, write down how many of those sessions it occurred in (0 to 3) and what you did about it. Be literal: if you lost track of rest in two sessions and sat for what felt like six minutes once, that’s a 2 for moment 2.

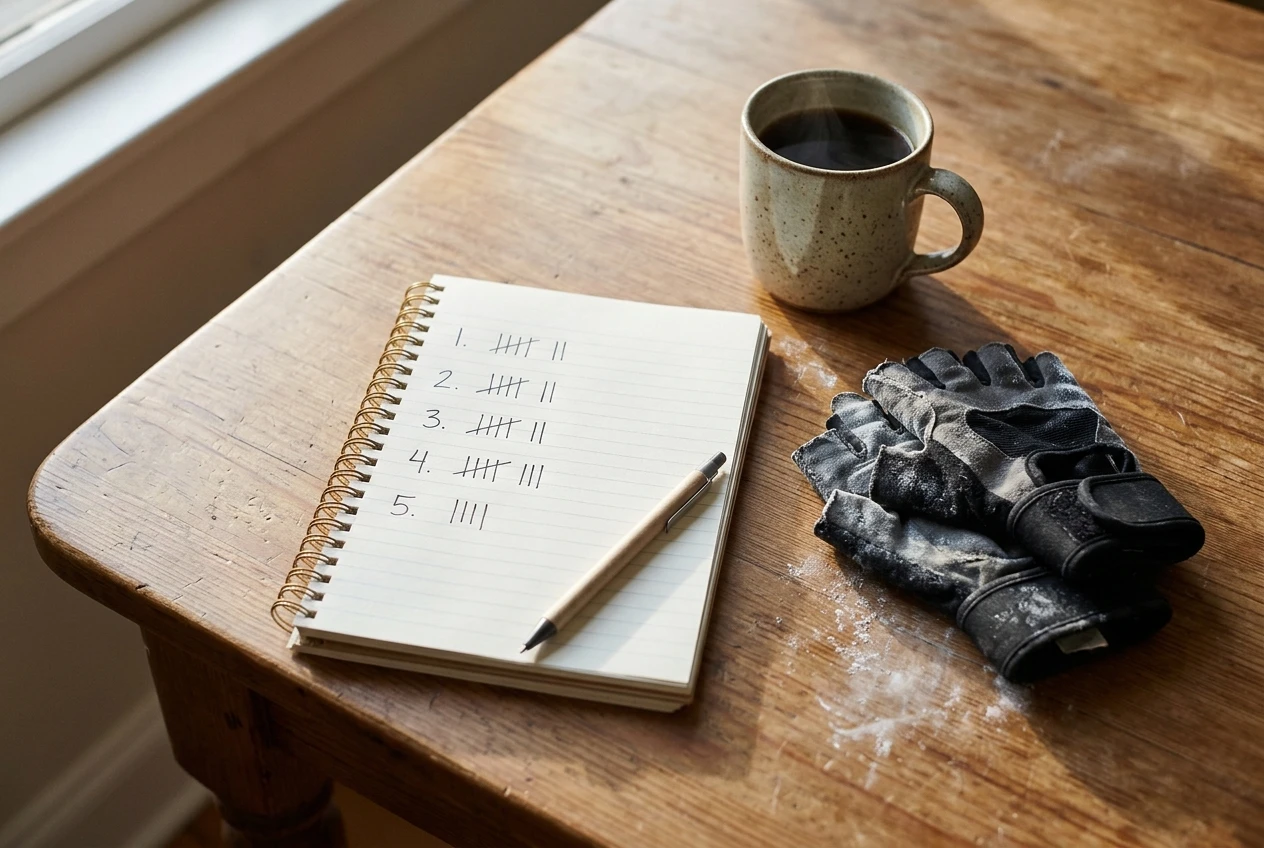
A kitchen table with an open notebook holding five hand-numbered rows with tally marks beside them, a pen, a mug of coffee and a pair of chalky gym gloves. Soft morning window light, wood grain table.
Count the Decisions Your Session Forces Mid-Workout, Then Pick a Training App or a Paper Program 26

Then add a second note beside each score: did you handle it quickly, or did it cost you time, focus or a bad set? A moment that happens often but costs nothing doesn’t need fixing.

Now read the result:

Where your high scores sit

What it suggests

Mostly moments 1, 4 and 5 (judgment)

Check how an app makes those calls before paying. A paper program with clear written rules may serve you equally well.

Mostly moments 2 and 3 (timing and setup)

A screen solves these directly. The plan can stay on paper if you like it.

High across all five

A screen-led app that also handles progression is worth a trial, provided it passes the questions above.

Low across all five

You are already running your sessions well. Keep the paper program and spend the money on gear.

One caution: score what actually happened, not what you think a disciplined lifter would have done. The tally is only useful if it describes your sessions.

A hybrid setup: paper for the plan, a screen for the clock and the demos

Many lifters find that the tally splits: judgment moments are fine on paper, while timing and setup keep causing trouble. In that case you don’t have to choose one format.

Keep the program on paper or in a notebook. You see the whole session, you log your own numbers, and you make the load decisions with full knowledge of how you feel. Then put a screen where you can see it from your training spot and use it for two jobs only: the rest clock and the movement demonstrations.

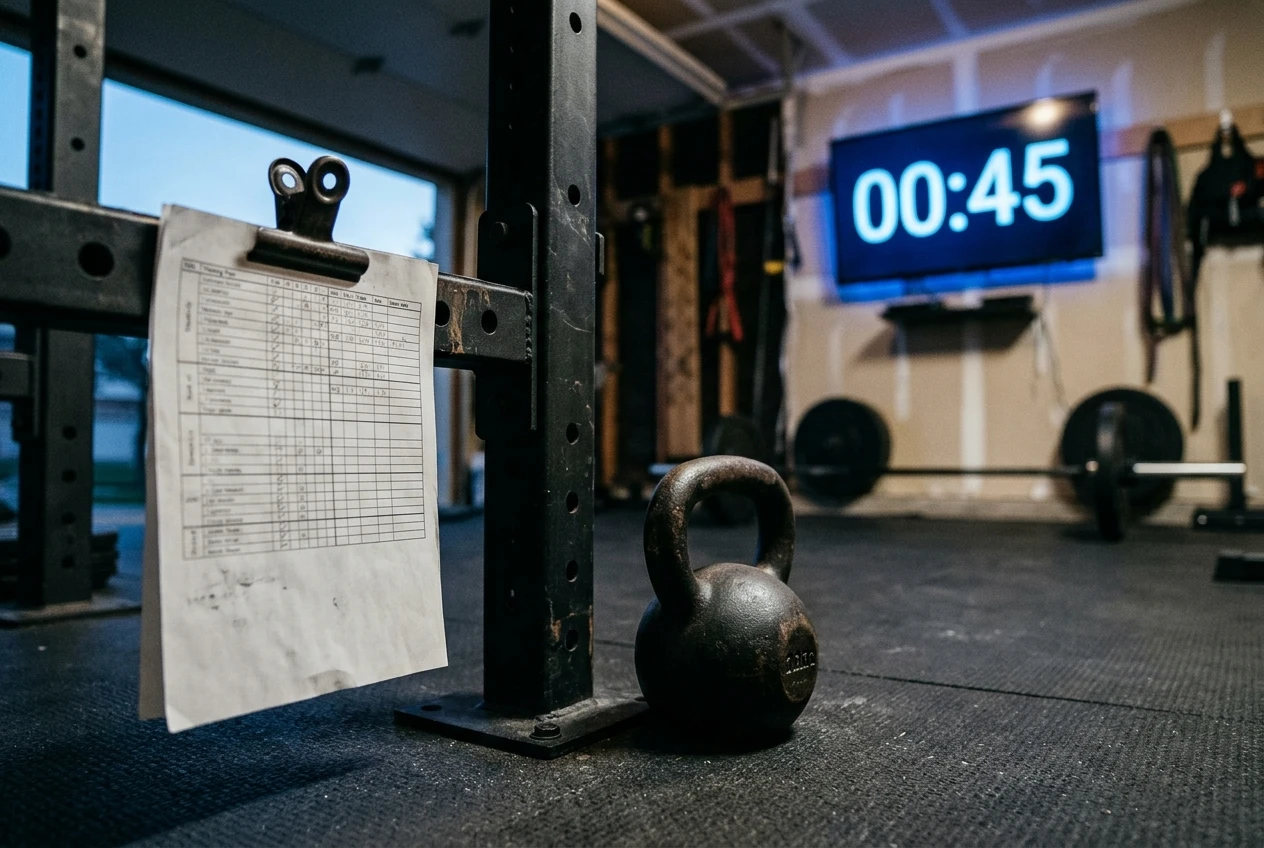
A printed training plan clipped to a rack upright beside a kettlebell on the floor, with a TV on the wall behind showing a large countdown rest clock glowing in blue. Evening garage light, black rubber flooring.
Count the Decisions Your Session Forces Mid-Workout, Then Pick a Training App or a Paper Program 27

This hybrid keeps your records under your control, so canceling a subscription never erases your history. It also limits what you pay for to the parts of a session that paper can’t do. If you later decide the app’s progression is worth trusting, you can hand that job over after comparing its suggestions against your own logs for a few weeks.

If you also run kettlebell work, the warm-up is one place where demonstrations pay off, since the positions need to be right before load goes on. The 10-minute kettlebell warm-up built around today’s lift is a written routine you can pair with a screen for the setup cues.

If your tally points to a screen

If your highest scores were on pacing and setup, and you have a Samsung TV where you train, the Kettlebell Monster Samsung TV app puts a kettlebell session on the TV. (Affiliate link: I earn a commission if you buy through it, at no extra cost to you.) Check the product page for what the app includes and apply the questions above before you pay. For a closer look at what it offers experienced lifters, read what an advanced lifter actually gets from the app.

For the wider range of programs and gear, see kettlebell.monster. (Affiliate link: I earn a commission on purchases made through it, at no extra cost to you.)

A Barbell Complex Never Lets You Re-Wrap, So Choose Your Straps by the Position Changes They Must Survive

If your hands open before your legs, back or shoulders tire in a barbell complex, straps are an obvious fix.

If your hands open before your legs, back or shoulders tire in a barbell complex, straps are an obvious fix. The catch is that most advice on lifting straps for barbell complexes is written for a deadlift, where the bar goes down between reps and you can reset your wrap at will. A complex gives you no such moment, so a strap that works in a deadlift can fail in a complex.

This article breaks a complex into its position changes, judges the common strap styles by which changes they survive, and ends with a test you can run on your own straps.

Why a complex is a different strap problem than a deadlift set

In a deadlift set, the strap has one job: keep the bar in your hand while you pull. You wrap, you pull, you set the bar down, and you can rewrap if anything slipped. The strap only has to be right in one position, and it gets a fresh start every rep or every set.

A complex strings several lifts together with the bar in your hands the whole time. Your hands go from a hanging pull grip to a rack catch, then to an overhead lockout, then to the bar resting on your back or shoulders. Each position loads the wrist differently and asks your fingers to do something different. The strap you wrapped for the first movement stays on for all the others.

So the question to ask is not “does this strap hold the bar?” but “what does this strap do to my hand in each position, and can I leave it alone for the whole round?” The rest of this article is built around that question.

Walk the complex position by position: where straps help and where they get in the way

Here is an example complex, which you should swap for your own: Romanian deadlift, bent-over row, hang clean, front squat, push press. Each movement puts the strap in a different situation.

  • Romanian deadlift and row. The bar hangs from your hands and your fingers are the only thing holding it. Grip is the limiter here, so this is where a strap helps most. The wrist stays mostly neutral, so the strap rarely interferes with anything.
  • Hang clean. You pull, then your hands rotate around the bar as it lands on your shoulders. This is the transition where a strap can bind, because the bar rotates in your hands while the strap is wound around it.
  • Front squat. The bar sits on your shoulders and fingers, with the elbows forward. Grip is rarely the limiter in this position, so the strap is carrying no useful load and can only cause problems.
  • Push press. The bar travels overhead from the rack position. Again your hands are guiding more than gripping, and anything bulky around the bar or wrist matters.
  • Back squat or good morning, if your complex has one. The bar rests on your back and your hands only steady it. Straps add nothing.

The pattern: grip is the limiter in the hanging positions (the pull, the row, the high pull), and it is a minor factor in the racked and overhead positions. A strap earns its place in the first group and risks costing you in the second. What you want is a setup that helps with the first group while staying out of the way for the second.

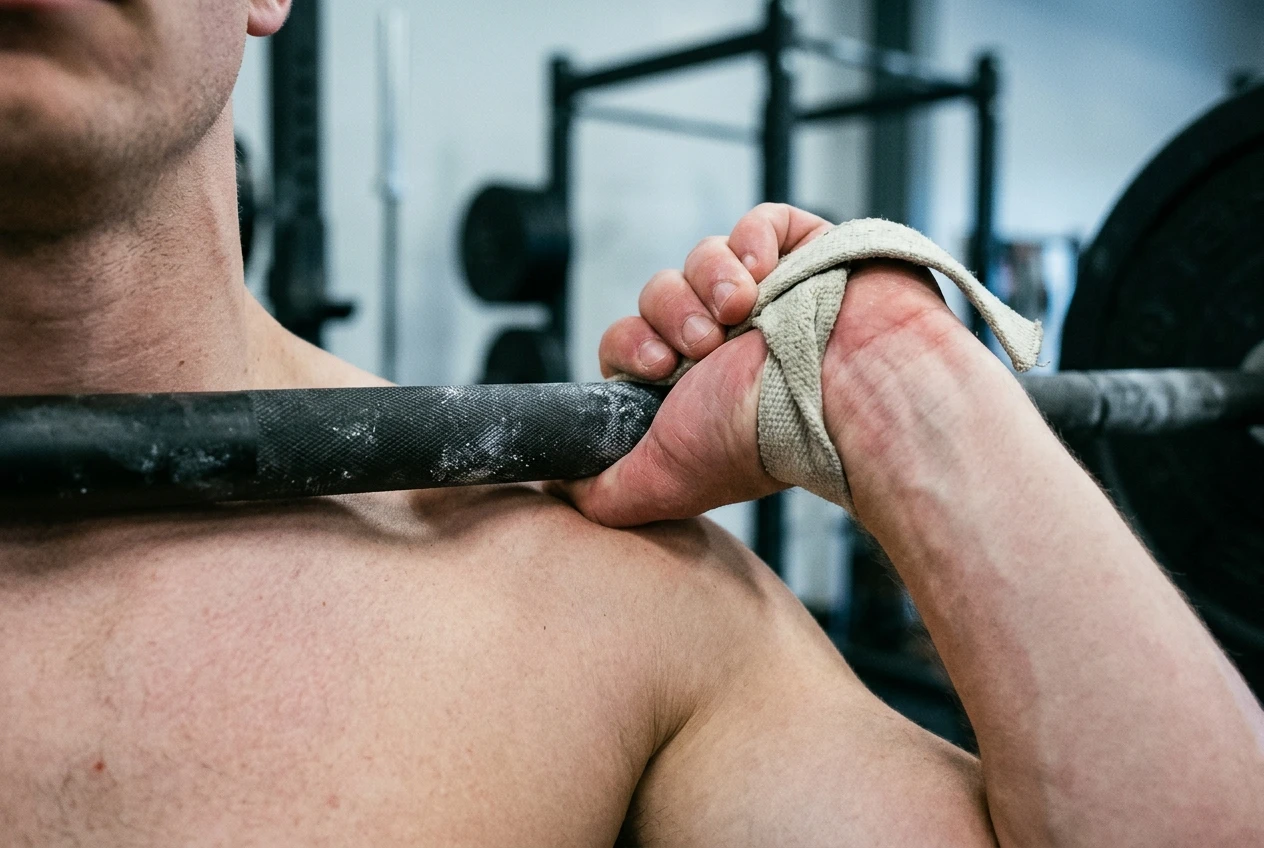
A lifter mid hang clean in a bare concrete-floored gym, the barbell rotating around his hands as it lands on his shoulders, with cotton lifting straps wound around the bar and hanging off his wrists, chalky hands, warm side light from a high window.
A Barbell Complex Never Lets You Re-Wrap, So Choose Your Straps by the Position Changes They Must Survive 33

The front rack and overhead problem: what a strap does to your catch

The rack catch is where most strap setups break down. To receive the bar on your shoulders, your wrists have to bend back and your elbows have to come up and forward quickly. Anything that adds thickness between your hand and the bar, or restricts how far your wrist can extend, changes that catch.

Close-up of a barbell resting in the front rack on a lifter's shoulders, wrists bent back and elbows high, a strap tail bunched between the bar and the palm and pressing into the skin, cool gym light, black bar and off-white strap.
A Barbell Complex Never Lets You Re-Wrap, So Choose Your Straps by the Position Changes They Must Survive 34

A wrapped strap puts extra material around the bar where your fingers want to sit. It can make the catch feel wider or lumpier, and if the tail of the strap ends up between the bar and your shoulder or palm, it will press into you under load. A strap that is tight on the wrist can also limit wrist extension, which is the position the front rack depends on.

Overhead raises a different issue: getting rid of the bar. If a push press goes wrong, you want to open your hands and let the bar go in a direction you chose. A strap that locks the bar to your hand makes that harder. Whether a particular strap does this depends on its style and how you wrapped it, which is why the style comparison below matters.

Treat the rack and overhead positions as where a strap has to prove it is safe, not as positions where you hope it will be fine.

Loop, lasso and figure-8 straps compared by how they behave when you can’t re-wrap

The three common styles differ mostly in how fixed the strap is to your wrist and how easily your hand can leave the bar.

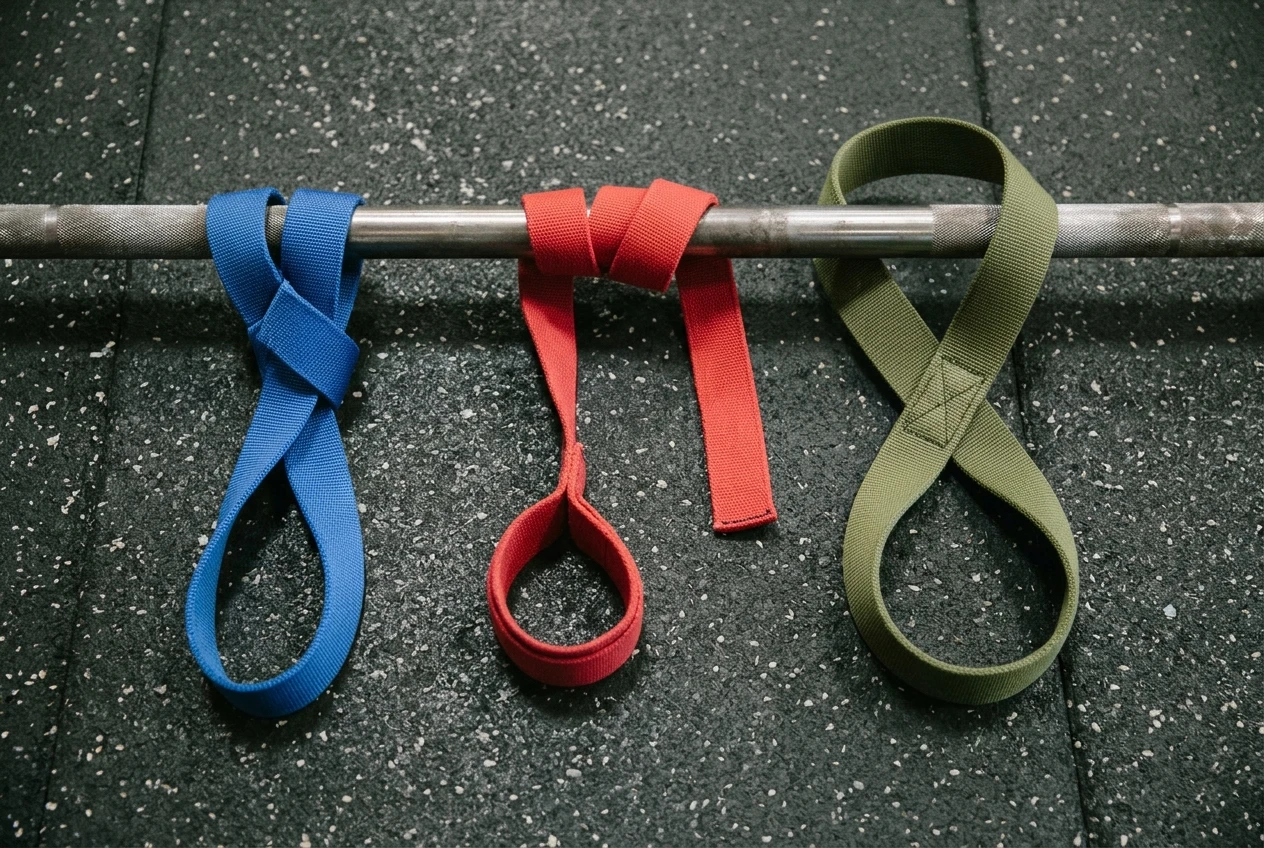
Three styles of lifting strap laid side by side on a dark rubber gym floor next to a steel barbell: a closed loop strap twisted around the bar, a lasso strap with its long tail wrapped around the bar, and a figure-8 strap threaded onto the bar, in different colors, overhead soft light.
A Barbell Complex Never Lets You Re-Wrap, So Choose Your Straps by the Position Changes They Must Survive 35

Loop straps are a closed loop. You put your hand through, twist the loop around the bar and hold the twisted section in your fist. They are quick to put on and the bar is fixed only as long as your hand is closed. When you open your hand, the bar is free. For a complex this is the most forgiving behavior, since opening your hand frees the bar and you can bail out of a bad catch. The tradeoff is that the twisted material sits in your palm and can bulk up the catch.

Lasso straps have a loop at one end that tightens around the wrist, with a long tail that you wrap around the bar. The wrist loop stays put through the whole round, which is convenient because you only set it up once. The tail is the issue: it lies around the bar and may unwind or jam as the bar rotates in the catch. Test how much of the tail stays on the bar after the hang clean, not after the first pull.

Figure-8 straps are one piece with two loops. Your wrist goes through both, and the bar sits in the bottom loop. They fix the bar to your hand more firmly than the other two, which is why they are favored for pure pulling. In a complex, that firmness is the cost. The bar is harder to release, and the way the strap runs around the wrist and bar can get in the way of the catch. Be cautious about using them anywhere the bar might need to leave your hands quickly.

None of these is the right answer in the abstract. Which one suits you depends on your complex and your hands, and the test in the next section tells you.

A round-by-round test to run on your own straps before trusting them in a heavy complex

Run this with a light bar and clear space around you. Do not try it first with your working weight.

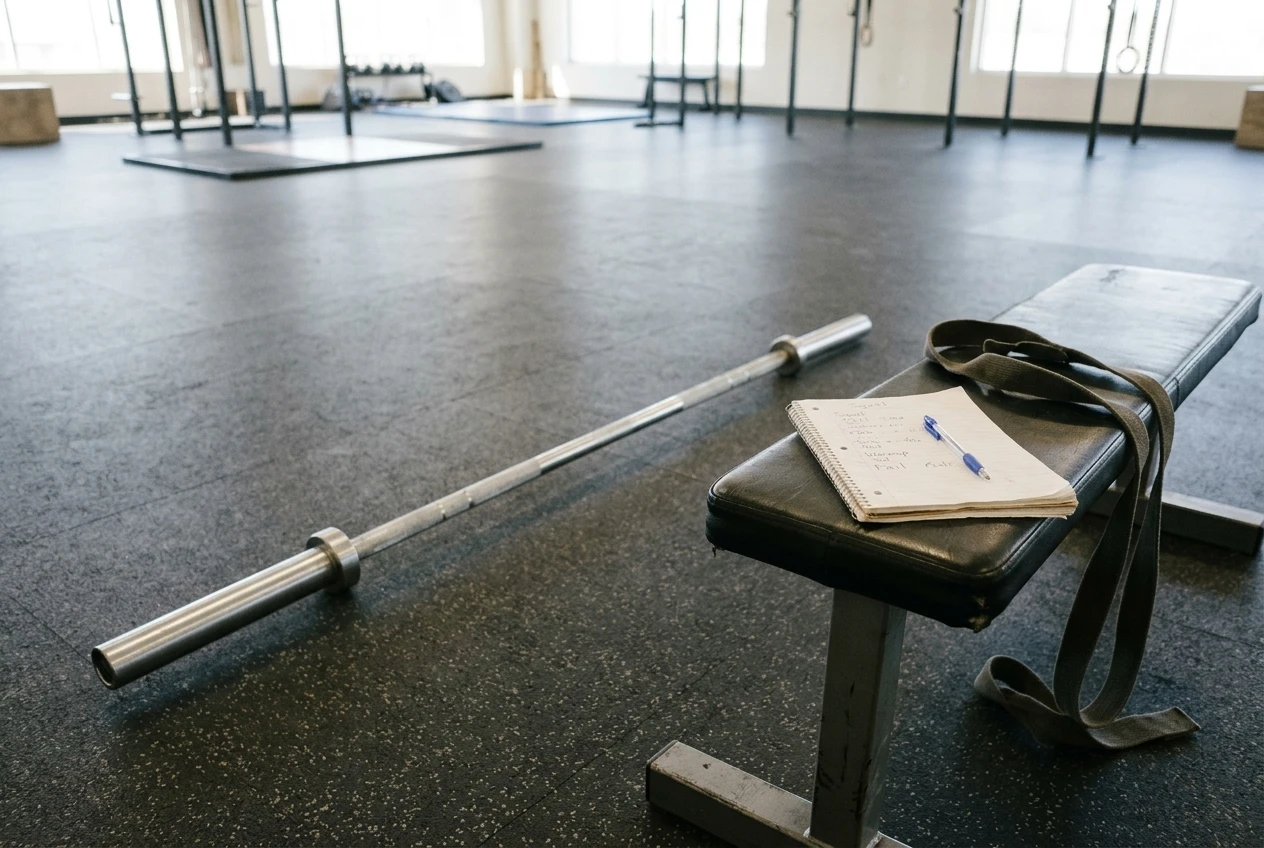
An empty barbell on the floor of a clear gym space with a notebook and pen on a bench beside it, the notebook showing scribbled one-word notes, a pair of straps draped over the bench, bright neutral light.
A Barbell Complex Never Lets You Re-Wrap, So Choose Your Straps by the Position Changes They Must Survive 36
  1. Round 1, empty bar. Strap up once and run the full complex without re-wrapping. After each movement, write down one word: slipped, bound, fine. Pay attention to what happens at the hang clean and the push press.
  2. Check the catch. In the front rack, look at where the strap sits. Is the tail under the bar? Is the strap pressing into your palm or against your shoulder? Can you get your elbows to the same height as without straps?
  3. Check the release. From the overhead position with the empty bar, open your hands and let the bar go where you have planned to drop it. Notice whether the strap holds the bar to your hands even briefly. If it does, that style or wrap is not safe for the overhead part of your complex.
  4. Round 2, light working weight. Run the full complex again, still without re-wrapping. Compare your notes with round 1. Straps often hold at light weight and slip once the bar is heavier, so the second round matters.
  5. Round 3, the weight you plan to use. Only continue if rounds 1 and 2 were clean. Run a full round and note whether any position changed. Then run enough rounds to reach the point in your complex where your grip usually gives out, because that is where a strap will be asked to work.

Pass criteria are simple: no slipping, no binding at the catch, no pressure that changes your rack position, and a clean release. If one position fails, that tells you whether to change the wrap, change the strap style, or take the strap off for that part of the complex.

Strap the pull, free the rest: setting up a complex so the strap only works where grip is the limiter

Because grip limits you in the hanging positions and not in the racked ones, the best setup is one where the strap acts only in the hanging positions. A few ways to get there:

  • Use a single, light wrap. A short wrap holds the bar for the pull and lets go as soon as your hand opens. A long, heavy wrap is what jams at the catch.
  • Order the complex so pulls come first in each round. If your grip-limited movements are grouped together at the start of the round, the strap does its work before the catch and the rest of the round does not depend on it.
  • Strap the late rounds only. If your grip holds for the first rounds and fails in the later ones, you do not need straps from round one. Add them when grip is about to limit you. The idea of removing straps by phase is covered in dropping the straps in phases, and the same logic applies inside a single complex.
  • Pick the strap style that lets your hand open. For most people running a complex, that points toward a loop or lasso style over a figure-8, though your own test results should decide.

Check each of these against the test above. A change that looks sensible can still bind at the catch, and the only way to know is to run the rounds.

When the straps aren’t the fix: grip work and complex choice

If you need straps in every round of every complex, the strap is covering a gap that training could close. Barbell sets are short compared with the time your grip needs to be loaded to adapt, which is why training your grip in minutes rather than reps is worth a look. Doing that work separately means the complex itself can be trained with fewer straps over time.

The complex choice matters too. If your grip fails in the first rounds, the complex may have too many hanging movements stacked together for your current level. Reordering, cutting a pulling movement or reducing the weight on the pulls are all legitimate changes, and none of them involves buying anything.

If you want a different kind of grip loading, kettlebell work is one option, and kettlebell.monster is the program I recommend for it. Affiliate disclosure: I earn a commission if you buy through that link, at no extra cost to you.

Straps are a tool for the positions where grip limits you. Choose them by what happens at the catch and the release, run the three-round test on your own gear, and keep them out of the positions where your hands are not the problem.

Price Each Accessory by the Reps It Costs Your Next Main Lift

How much accessory work is too much? The answer is not a set count from a book.

How much accessory work is too much? The answer is not a set count from a book. It is the number of top-set reps your accessories take from your next heavy session, and that number is different for every lifter and every exercise. A simple log makes it visible.

This article covers what to write down, how to turn it into a cost for each accessory, how to compare that cost with what the accessory is supposed to build, and how to decide what to keep, trim or swap. It prices volume. If you want to choose accessories by how your joints felt, the joint-feel cycle article covers that approach.

Why “I felt wrecked” is not a number you can plan with

After a long accessory day, “I felt wrecked” tells you something happened. It does not tell you which exercise did it, how much it cost, or whether the cost was worth paying. Soreness is also a poor stand-in for fatigue. Some accessories leave you sore and cost the next heavy session nothing, and others leave you feeling fine and quietly take reps off your squat.

A number lets you compare. If one accessory block costs your next top set a rep and another costs two, you can rank them, and you can weigh each against what it gives back. Without a number, the exercise you remember most vividly gets blamed, and that is often not the one doing the damage.

The method has a limit. Your next top set is also affected by sleep, food, stress and how the main-lift program itself is progressing. That is why the log works over weeks and not from one session, and why you change one accessory at a time.

The three things worth logging

Keep the log small enough that you will actually fill it in. Three entries per heavy session are enough.

  • Next-session top set. Write the load and the reps of your top set on the next heavy day for that lift. If you work to a fixed load, reps are the cleanest measure. If your program moves the load around, record the load you hit at the planned effort. Add a one-word note on bar speed (fast, normal, slow) if you want a third signal.
  • Reps left in reserve. At the end of that top set, write how many more clean reps you think you had. Honest reps in reserve catch the cases where the rep count held up but only because you ground it out.
  • Session effort. Rate the whole session from 1 to 10 once you have finished. This catches fatigue that does not show in the top set, such as back-off sets that went badly.

Beside these, record what you did in the days before: which accessories, how many sets, how many reps, and which day. Do this for the accessory days between your heavy sessions, and credit the cost to the heavy session that follows them.
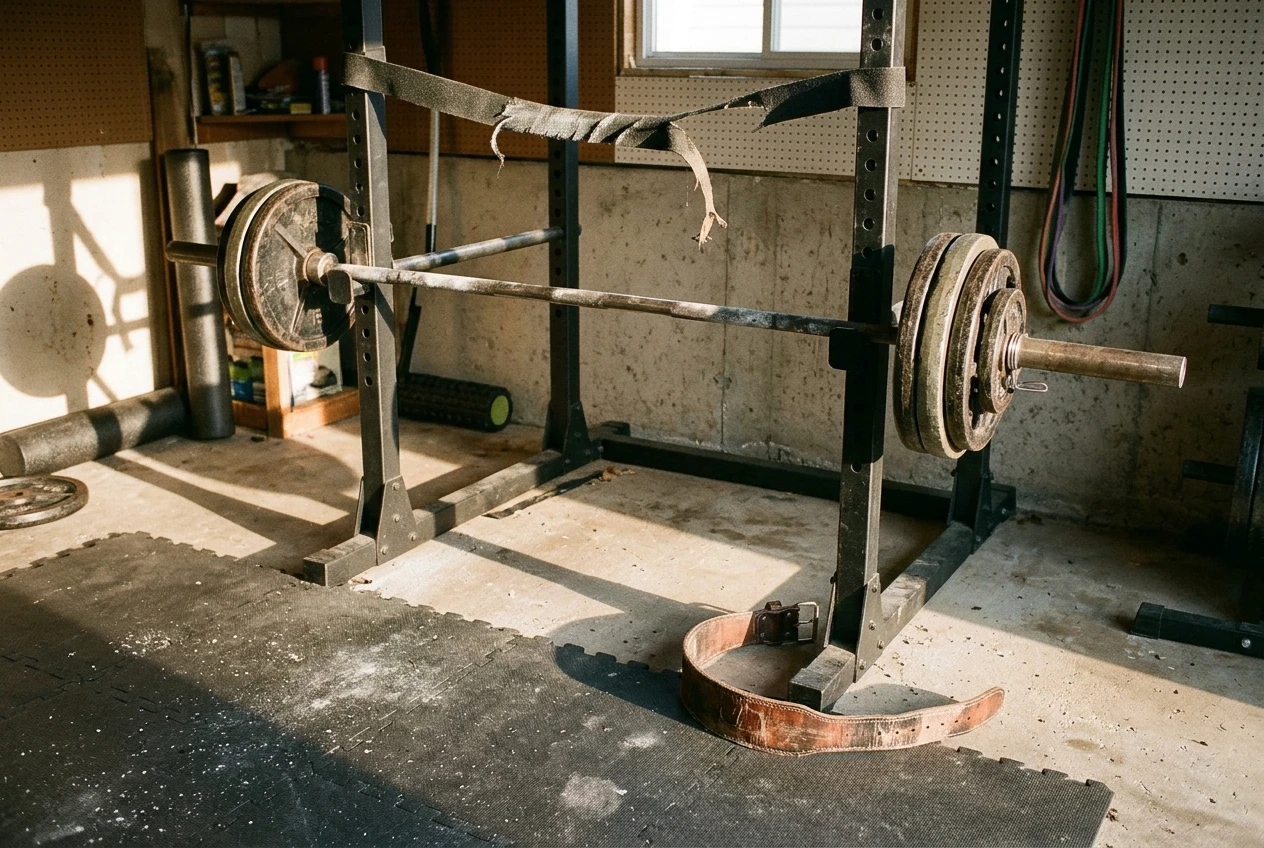
A worn paper training notebook lying open on a gym bench beside a loaded barbell, a pencil on the page, with handwritten rows of numbers and a single-word note in the margin, lit by warm overhead gym light.
Price Each Accessory by the Reps It Costs Your Next Main Lift 42

Build a fatigue cost for each accessory

The fatigue cost of an accessory is the reps it takes from your next main-lift top set. To work it out you need a baseline: your top-set reps at a given load after a week where that accessory was left out or cut to a minimal dose. Then:

Cost = baseline reps minus reps after the accessory block.

If your baseline is 5 reps and you got 4 after the accessory block, the cost is 1 rep. If you also finished the top set with zero reps in reserve where the baseline week had one or two, count that as extra cost even though the rep total looks the same.

Before you trust any single cost, find your normal variation. Look at your top sets across a few weeks where nothing changed. If your reps move by a rep between weeks for no obvious reason, then a cost of one rep is not yet a finding. Only costs bigger than your usual swing count.

Change one accessory at a time. If you add a new row variation, a new hinge and extra leg work in the same week and your squat drops, the log cannot tell you which one did it. Alternating two options across weeks, while keeping everything else the same, gives the cleanest comparison.

A related question is what is still tired on a given day, and that decides which kind of session to run. The article on choosing a kettlebell or barbell complex by what is still tired covers the symptom side. The cost log here covers the volume side.

Separate the cost from the payoff

A cost means nothing alone. An accessory that takes a rep off your next squat is fine if it fixes the thing that was holding your squat back, and a waste if it does nothing you can point to.

For each accessory, write one sentence stating what it is supposed to do before you start logging. Be specific about the target:

  • “Hold the bar position at the bottom of the squat without my upper back rounding.”
  • “Raise my pause bench off the chest.”
  • “Keep my grip from failing on deadlift back-off sets.”

Then pick one way to check whether it is working. That might be the accessory’s own progress (more reps at the same load, or the same reps at a higher load), a rating of a specific position from video, or a change in a weak point of the main lift. Check it at the same times you review the cost.

The payoff is often harder to see than the cost. That is the reason to define it beforehand. If you only look at the payoff afterwards, you will find some benefit for almost any accessory, because you were looking for one.

Worked example: two back accessories before a heavy squat day

The numbers below are made up to show the arithmetic. They are not data from any real lifter and not a target for yours.

A lifter squats heavy on Monday and does back accessories on Friday. The goal is a more stable upper back in the bottom of the squat. Two candidates are 4 sets of barbell rows and 4 sets of chest-supported rows. The baseline, from a week with no back accessories, is a Monday top set of 5 reps at the working load with 1 rep in reserve.
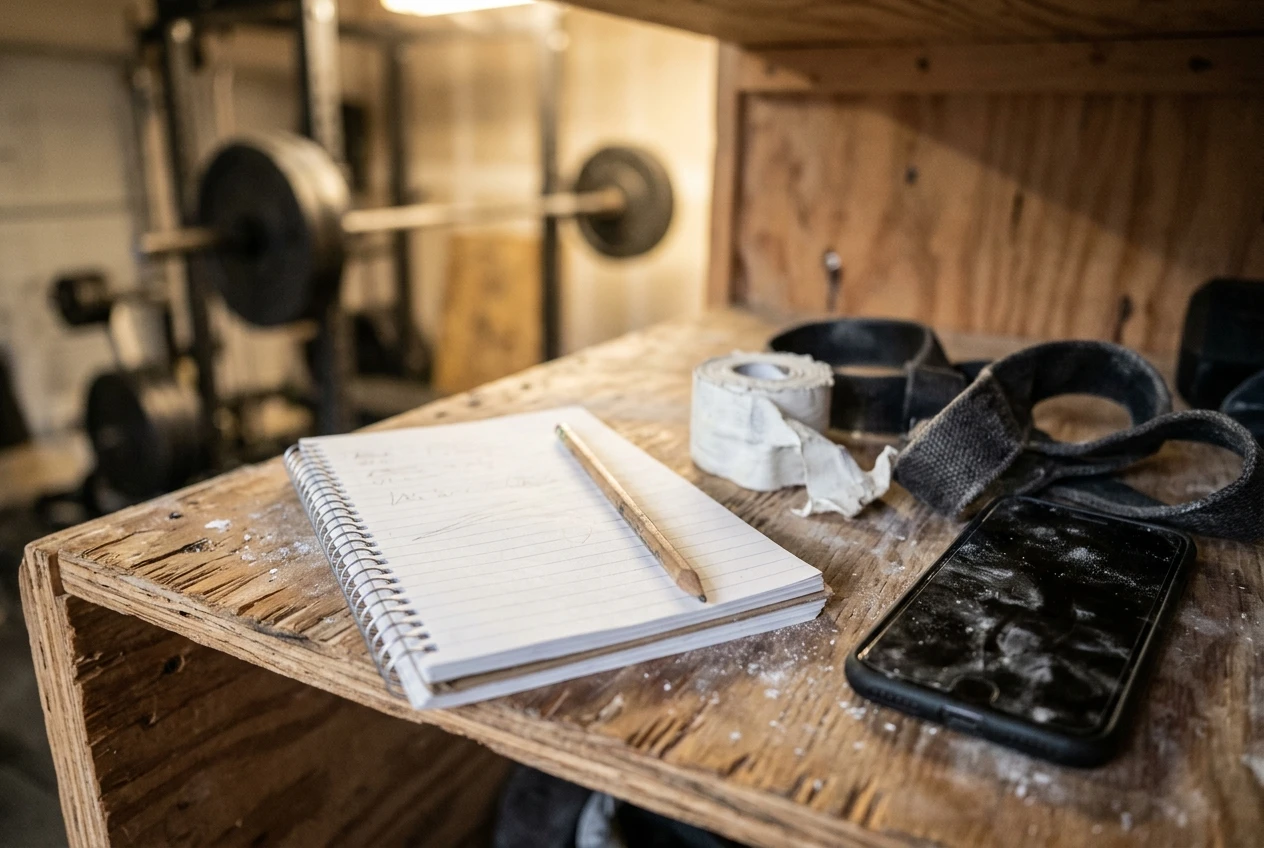
Two rowing stations side by side in a gym: a barbell loaded with plates resting on the floor ready for bent-over rows, and a chest-supported row bench with dumbbells, in cool morning light with black rubber flooring.
Price Each Accessory by the Reps It Costs Your Next Main Lift 43

The lifter alternates the two across four weeks, changing nothing else:

Week

Friday accessory

Monday top set

Reps in reserve

Session effort

1

Barbell rows

4 reps

0

9

2

Chest-supported rows

5 reps

1

7

3

Barbell rows

3 reps

0

9

4

Chest-supported rows

5 reps

1

7

Barbell rows averaged 3.5 reps, so the cost is 1.5 reps from the baseline of 5. Chest-supported rows matched the baseline, so the cost is about zero. Barbell row weeks also finished with no reps in reserve and a higher session effort, which supports the same reading.

Next, the payoff. The lifter rated upper-back position in the bottom of the squat on video, from 1 to 5, each week. The ratings were similar under both options, and row loads progressed at about the same rate. Barbell rows gave no extra payoff for their higher cost, so the lifter swaps them for chest-supported rows. This works because the same payoff came at a much lower cost.

The pattern in the example can also run the other way. If barbell rows had clearly improved the position rating and the cost had been the same, the decision would be to trim them, not drop them.
Keep, trim or swap: decision rules after four weeks

Four weeks gives you a few data points per accessory, which is thin but usable if you read it carefully. Set your thresholds before you look at the numbers, using your own normal variation as the line between a real cost and noise.

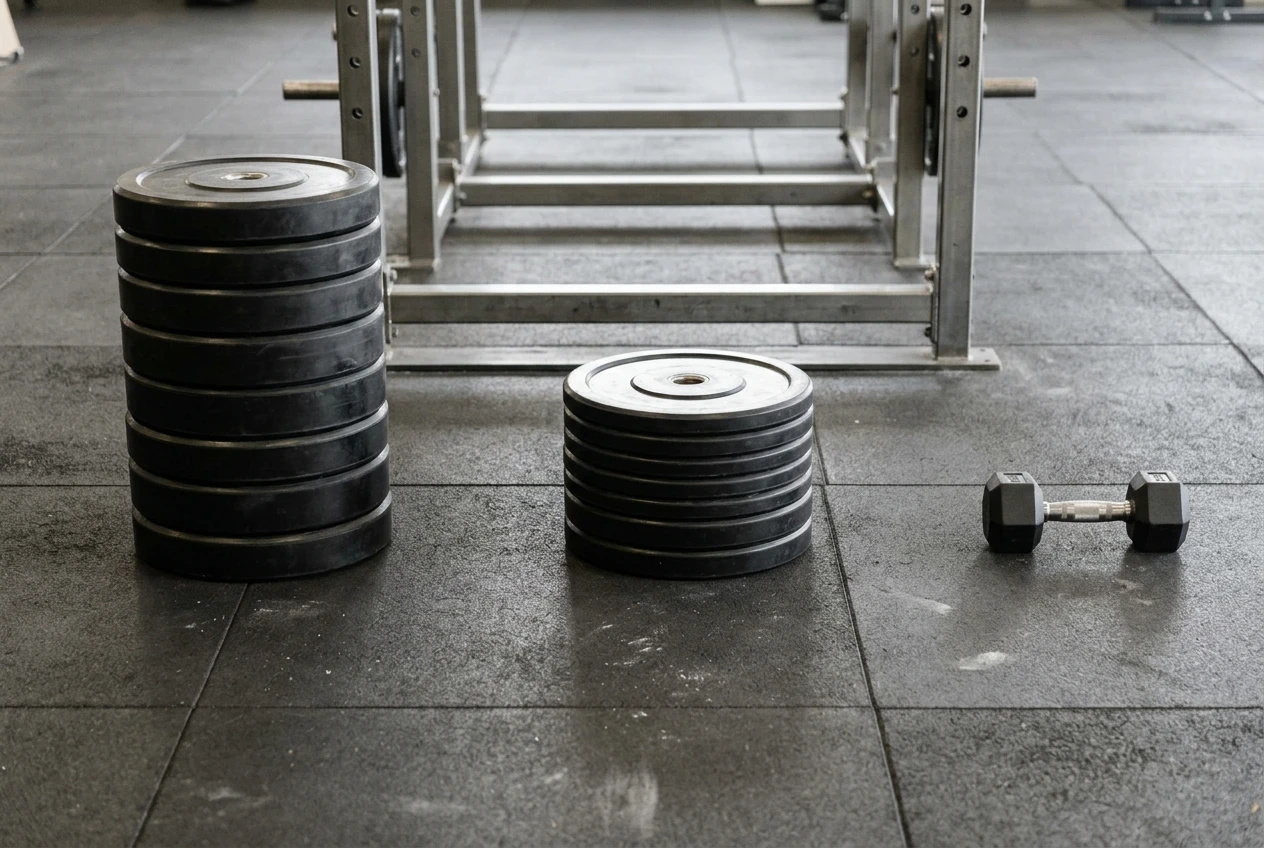
Three groups of gym equipment on a rack-front floor, separated by clear space: a full stack of plates, a half stack, and a lone dumbbell, suggesting keep, trim and swap choices, in neutral grey light.
Price Each Accessory by the Reps It Costs Your Next Main Lift 44

For each accessory, answer two questions: is the cost above your normal swing, and is the payoff visible?

  • Keep when the cost is within your normal variation and the payoff is visible. Leave it alone, and do not add sets just because it is cheap.
  • Trim when the cost is above your normal variation and the payoff is visible. The accessory is working but is priced too high at this volume. Cut the sets by a third to a half, or move it further from the heavy session, and log it again for another four weeks.
  • Swap when the cost is above your normal variation and the payoff is not visible, or when a cheaper exercise can do the same job. Replace it with an option aimed at the same target and start the log again for the new one.
  • Drop when the cost is within normal variation but there is no payoff. It is not hurting you, but it is using time and effort you could use elsewhere.

If the numbers are unclear, treat the result as a tie and gather four more weeks. Do not change two accessories at once to resolve it, as that rebuilds the problem the log is meant to remove.

There is also a ceiling, which answers the opening question for you personally. If the total cost across all your accessories is more than your top set can absorb, you have found your own limit. The fix is to trim the accessory with the worst cost-to-payoff ratio first, not to cut everything equally.

Where a low-cost kettlebell accessory block fits when your numbers say to trim

Trimming leaves a gap. If you cut four sets of a costly accessory to two, you may still want conditioning, grip work or some posterior-chain volume in the session. A kettlebell block is one way to fill that gap, and it goes into the log like any other accessory: write down what it is for, run it for four weeks, and price it by what it does to your next heavy day.

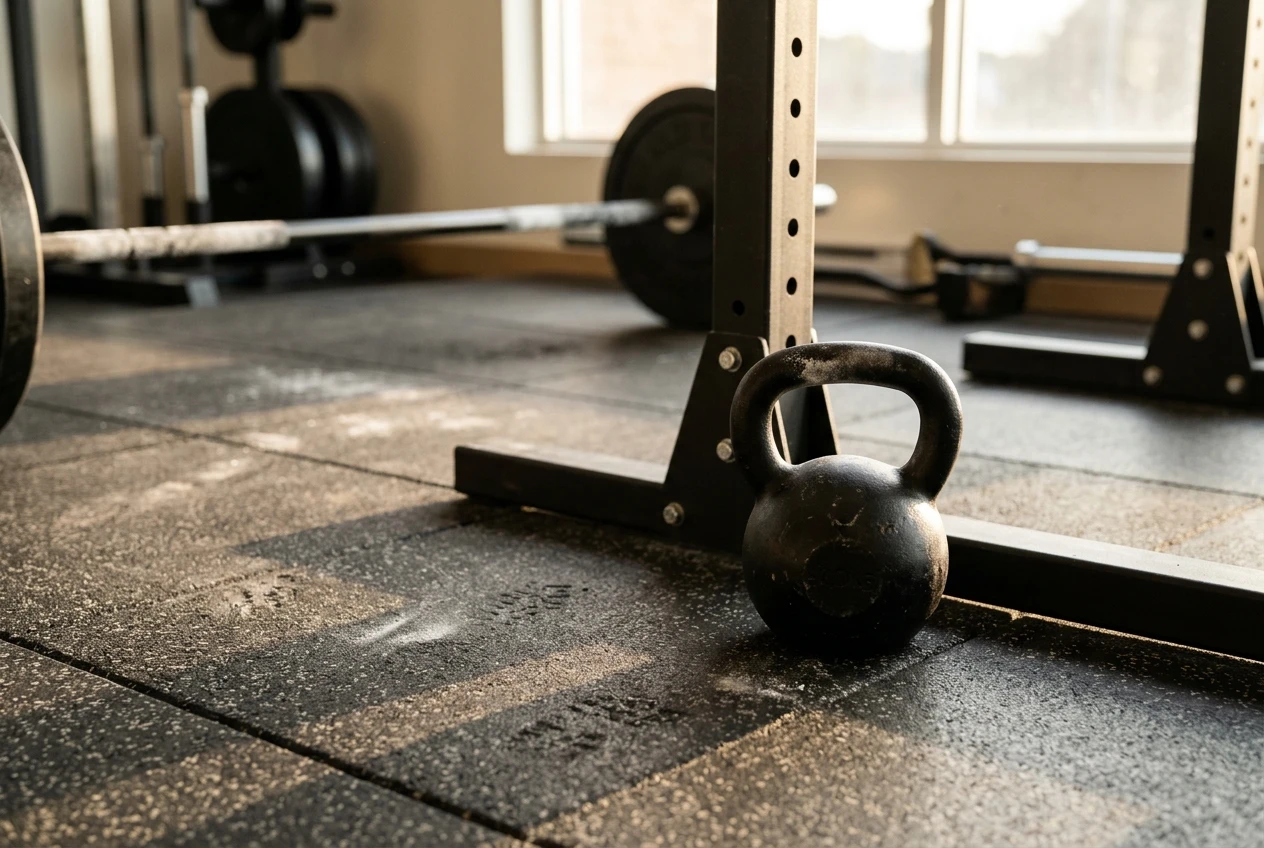
A single black kettlebell on a rubber gym floor near the edge of a squat rack, a chalk-dusted barbell in the soft background, with late-afternoon light coming through a window.
Price Each Accessory by the Reps It Costs Your Next Main Lift 45

Whether a kettlebell block is cheap for you is a question for your own numbers. It may cost you nothing at one volume and a rep at another. Place it after your trimmed accessories, keep it short, and keep its day separate from the heavy session so the cost stays attributable. The article on two jobs for a kettlebell flow in a powerlifting split shows where such a block can sit in a week.

If you want a kettlebell accessory option to test against your log, you can look at kettlebell.monster. Affiliate disclosure: this is a referral link, and I may earn a commission if you buy through it.

Your Overhead Press Stalls on the Days You Don’t Press: Audit What Your Shoulders Do Between Sessions

Most advice for a flat overhead press focuses on the day you press: warm-up, bar path, rep scheme.

Most advice for a flat overhead press focuses on the day you press: warm-up, bar path, rep scheme. Your overhead press may have stalled because of what happens in the 48 hours between sessions. Your shoulders get loaded, rested, fed and slept on during that time, and none of it shows up in a training log that only records the press itself.

This article gives you a three-day log for those rest days, then matches each thing the log shows to one change.

The press you can’t add weight to may be a recovery problem, not a technique problem

A press that has stopped moving while the bar path looks fine and the warm-ups feel normal often points to recovery. The signs are specific. Your first warm-up set feels heavier than it did last week. One shoulder is stiff or achy when you start. You hit the same number of reps you hit three weeks ago, with the same grind at the end.

If those sound familiar, the shoulder is probably arriving at the rack in a different state than the one your program assumed. The program assumes two or three days of recovery between press sessions. If those days include a hard bench session, a pull-up workout, a long carry and five hours of sleep, the recovery you planned is not the recovery you got.

You can’t fix that by guessing. You need a record of what those days contain, and most lifters have never written one down.

Log three rest days: what your shoulders did, how you slept, what you ate

Pick three days between press sessions. If you press every other day, there is only one rest day per gap, so log the rest day in three consecutive gaps instead. Use a notes app or the back of your training notebook. Every entry takes about two minutes.

A battered pocket training notebook lying open on a wooden bench beside a pencil and a smartphone, with handwritten columns of scribbled entries, in a small home gym with a barbell rack blurred behind, soft morning window light.
Your Overhead Press Stalls on the Days You Don't Press: Audit What Your Shoulders Do Between Sessions 50

For each day, record these four things:

  • Shoulder load. Every set or activity that put weight through your shoulders or made them work: bench, dips, push-ups, rows, pull-ups, hangs, farmer carries, overhead dumbbell work, and anything outside the gym such as moving furniture, painting a ceiling, or working at a desk with your shoulders hunched.
  • Shoulder state. A score from 0 to 10 for stiffness or ache when you wake up, and another before bed. Note which shoulder if it differs.
  • Sleep. Bedtime, wake time, how many times you woke, and a plain rating of how rested you felt. Record the night before your next press session as well, since that is the night that matters most.
  • Food. Roughly what you ate at each meal, whether you ate more or less than you do on a training day, and how much protein-containing food was in each meal. You do not need exact grams. You need to see the pattern.

On the next press day, add two more lines: how the first warm-up set felt, and your top set result. That connects the rest days to the outcome.

Write what happened, not what you meant to happen. A log you tidy up afterwards will not show you anything.

The “rest day” that quietly loads your shoulders

When lifters read back their first log, the shoulder load line usually surprises them. Rest days in a real week are rarely empty.

A man on a stepladder reaching overhead to hang a heavy wooden shelf on a living room wall, arms fully extended with a drill and a level in his hands, a kettlebell and gym bag visible on the floor below, warm afternoon light.
Your Overhead Press Stalls on the Days You Don't Press: Audit What Your Shoulders Do Between Sessions 51

These are the common sources of hidden shoulder work:

  • Bench volume the day before pressing. A heavy bench session loads the front delts and triceps, the same muscles that drive your press. If bench sits on the day before overhead press, the press starts from a tired position.
  • Pull-ups and chin-ups. They are pulling work, but they load the shoulder joint hard at the bottom of the rep, and high-rep sets leave the shoulders sore.
  • Carries. Heavy farmer carries and suitcase carries keep the shoulder girdle working for the whole walk. Count them.
  • Overhead work you forgot to count. Landmine presses, dumbbell lateral raises, push press as a “warm-up”, handstand practice, and kettlebell work in the rack position all count. If your hands finished above your head, it goes in the log.
  • Life outside the gym. Hanging shelves, lifting a toddler or luggage overhead, swimming, or a physical job.

None of these is bad. The point is that each one adds fatigue to a shoulder you intend to press heavy within a day or two. If your log shows meaningful shoulder work on all three days, the rest day is a training day under another name.

Too little movement is also a problem: when a full rest day hurts your next press

The opposite pattern also shows up. Some lifters take a rest day literally: no movement, long hours seated, shoulders rolled forward over a keyboard. Then they walk to the rack and the first warm-up set feels stiff and sticky.

You can spot this in the log. The evening shoulder score is fine, the morning score on press day is worse, and your sitting hours are high. The shoulders were not tired, they were idle, and the joint and the muscles around it started the session cold and stiff.

A fully sedentary day is not automatically a recovery day. Recovery from hard training goes better with light circulation and easy range of motion than with hours of stillness. Whether it does for you is exactly what the log can show: compare press days that followed a still rest day with press days that followed a day of easy movement.

How to read your log: matching each pattern to one change

Resist the urge to fix everything at once. If you change sleep, food, bench volume and your program in one week, you will not know which one mattered. Find the strongest pattern in the log and make one change.

What the log shows

The one change

Shoulder work on all three rest days, especially bench, pull-ups or carries within a day of pressing

Move or cut the heaviest of those sessions so that at least one full day before your press has no hard shoulder work. Trim sets before you remove an exercise.

Hidden overhead work, such as lateral raises or push press, that you had not counted

Remove it from the days next to your press for four weeks, or move it to the day after your press.

Evening shoulders fine, but morning press-day stiffness is high and the rest day was mostly sitting

Add a short, low-effort movement session to the rest day (described below).

Short or broken sleep on the night before the press

Fix that night first: set a fixed bedtime for the night before pressing and keep screens and caffeine out of the last stretch of it. Change nothing else yet.

You ate noticeably less on rest days than on training days

Bring rest-day food close to your training-day food. Keep protein-containing meals in the day, not just the dinner.

Everything looks reasonable: moderate load, steady sleep, regular meals, easy movement

Recovery is probably not the limit. Move on to testing range and control.

If your log lands in that last row, the stall most likely sits in how the shoulder moves under load rather than in how it recovers. Our guide to a stalled overhead press and whether it is a range problem or a control problem gives you the tests to run next, before you spend anything on mobility gear.

A recovery-day session that keeps shoulders moving without adding fatigue

The aim of this session is circulation and range, with no new fatigue. Keep effort at about 4 out of 10 or lower throughout. If you feel a pump or burn building, the weight or the reps are too high for a recovery day.

A light kettlebell fits well here because you can hold the bell close to your body and control the load. Choose a bell much lighter than anything you train with. A weight you could hold for a long time is the right one.

A lifter in a garage gym holding a light kettlebell by the horns at chest height, mid-halo, calm and relaxed posture, a steel barbell rack and rubber floor behind, cool early light with muted grey and black tones.
Your Overhead Press Stalls on the Days You Don't Press: Audit What Your Shoulders Do Between Sessions 52

Run this as a circuit, resting only as long as you need:

  1. Halos: 2 sets of 8 slow circles in each direction, bell held at chest height, ribs stacked over hips.
  2. Goblet squat: 2 sets of 8, slow, pausing at the bottom to open the hips and let the upper back stay tall.
  3. Light two-hand swings: 4 sets of 10, to hip height only, crisp and easy. Stop each set while it still feels too light.
  4. Wall slides or floor angels, bodyweight: 2 sets of 10, moving only through the range you can control without arching your lower back.
  5. Easy hang or supported stretch: 2 holds of 20 to 30 seconds, hanging from a bar with your feet on the floor or a box so the arms take little load, or a doorway chest stretch if hanging bothers you.

The session should take 15 to 20 minutes. You should finish it feeling looser than you started, with your morning shoulder score unchanged or better the next day. If the score gets worse, cut the swings or the hang first.

For where a session like this belongs in a heavier week, the guide to kettlebell flow as recovery between heavy days covers placement in a powerlifting split.

If you want a structured, low-load session to use on recovery days, take a look at kettlebell.monster. Affiliate disclosure: I earn a commission if you buy through this link.

Run a four-week check: what to track and when to change your plan

One log tells you where to start. Four weeks tells you whether the change worked. Give the change at least four weeks, which covers several press sessions, before you judge it.

Track these four items after every press session:

  • Top set weight and reps.
  • How the first warm-up set felt, on a simple scale of 1 to 5.
  • Your morning shoulder score on press day.
  • Sleep on the night before the press.

Keep a one-line note on what your rest days contained each week, so you can see whether you kept to the change you chose.

Then read the result at the end of week four:

  • Top set or reps have gone up, or the same weight moves more easily. The change is working. Keep it, and add the smallest weight jump you can. Wait to make a second change until that jump holds.
  • Warm-ups and morning shoulder scores improved, but the top set has not moved. Recovery is better and you are likely closer to the limit. Give it another two weeks, then reassess the program itself.
  • Nothing changed at all. Repeat the three-day log. If it is still clean, recovery is not what is holding you back, and the range and control tests are your next step.
  • Things got worse. Undo the change and pick the second-strongest pattern from your first log.

Your rest days are part of your training, and the log lets you manage them with the same attention you give your sets and reps. Run it for three days, make one change, and let four weeks of press sessions show you what it did.

Every Home Gym Upgrade Should Give Your Old Gear a New Job

A home gym that grows with you is one where each purchase answers a specific limit in your training, and the piece it replaces keeps working in a…

A home gym that grows with you is one where each purchase answers a specific limit in your training, and the piece it replaces keeps working in a different role. Most home gyms grow another way. Gear arrives when money is free or a sale appears, and the older pieces drift into a corner. This article treats the gym as a set of jobs that need doing, with equipment assigned to each one.

Why a home gym that only adds gear turns into a pile, not a system

A pile is a collection of equipment where nobody could say when each piece was last used or what it is for. A system is a collection where every piece has a named job in a named lift or session. The difference shows up in floor space first, then in money, because a gym with overlapping pieces has paid for the same capability twice.

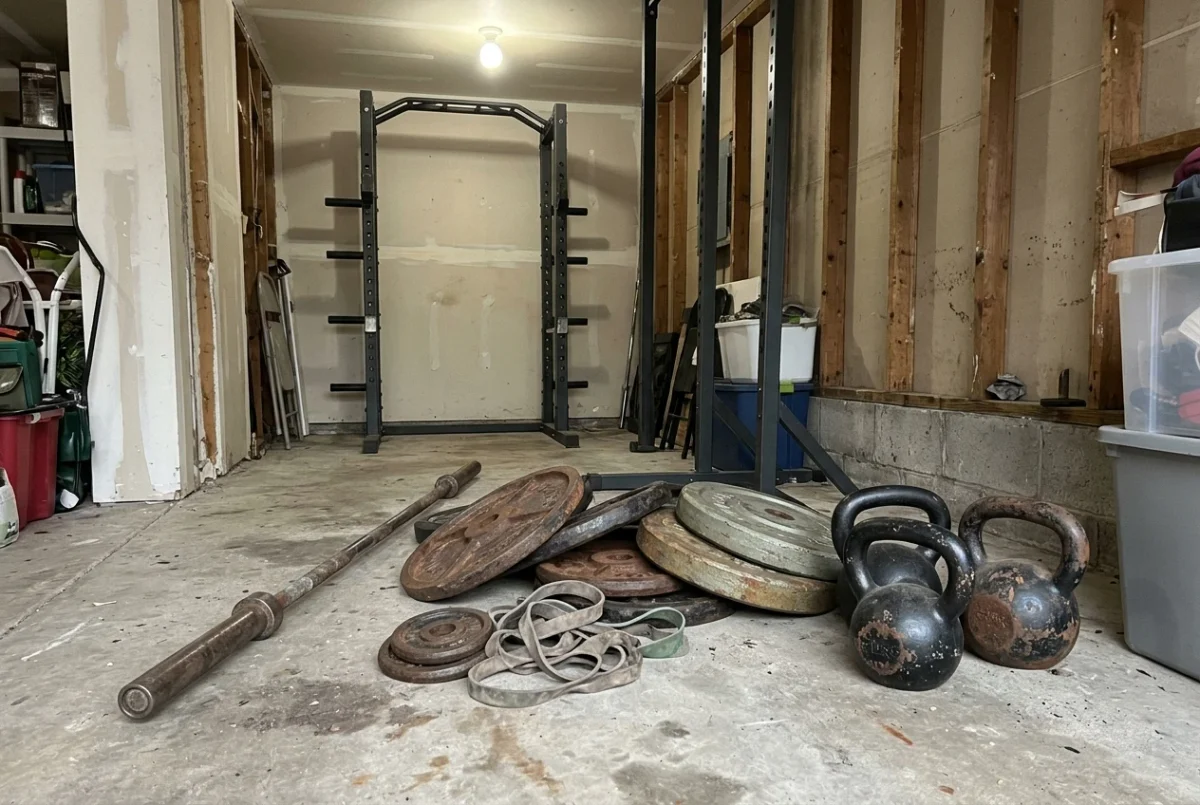
A cramped corner of a garage gym where a bent-sleeved old barbell, mismatched plates, a tangled band and three kettlebells of different sizes lie heaped on bare concrete, lit by a single flat overhead bulb, with a clean squat rack standing unused-looking behind them.
Every Home Gym Upgrade Should Give Your Old Gear a New Job 58

Buying without a trigger causes most of the overlap. If the reason for a purchase is “I might need it” or “it was discounted,” nothing in your training tells you whether the piece fits. If the reason is “my squat top set now needs more than my current setup can safely hold,” the purchase is already defined: it has to fix that problem, and anything that doesn’t is the wrong item.

A schedule of what to buy and when is a separate question, and the five-year home gym plan covers it. This piece covers what comes before each purchase (a written trigger) and what comes after it (a new job for the piece you replaced).

Write down the ceiling for each lift before you shop

A ceiling is the point where progress on a lift stops, and the first task is to find out whether your equipment or your training caused it. Only equipment ceilings justify spending money. Training ceilings are fixed with programming, technique work or recovery, and those cost nothing.

For each main lift you do at home, write three lines:

  • The last working weight and rep range you can complete with good form.
  • What ended the set. Was it muscle fatigue, a technique breakdown, a grip failure, a safety concern, or the equipment itself running out of room or range?
  • What would have changed the outcome. If the answer is a different programming choice, the ceiling is a training ceiling. If the answer is a piece of gear that does not exist in your gym yet, it is an equipment ceiling.

Here are some examples of what real equipment ceilings look like. The plates you own no longer fit on the bar sleeve for the load you need. The uprights on your squat stand are too low or too wobbly for the weight you are racking. The heaviest kettlebell you own has become too light for the swing or press rep range you are training. In each case you can point to a physical limit that stops the lift, and that limit names the item to shop for.

Heavy sets that end because your grip gave out are more ambiguous. A grip that fails first might call for straps, or for dedicated grip work, or for a change in how you set up the pull. Write down which one by checking whether the grip fails early in the set or only on the last reps. Until you know, you do not have a trigger.

Write the ceilings somewhere you will see them when you open a shopping tab. The list also tells you what you do not need. If no lift is currently stopped by equipment, nothing needs buying.

Give every piece a main job now and a second job later

Before you buy the replacement, decide what the old piece will do afterward. This is the step that stops a gym from becoming a pile, because a piece with a second job does not need to be sold at a loss, and nothing is bought twice for the same purpose.

A main job is what the piece does in your heaviest or most important work. A second job is a lower-intensity role the piece can take once something stronger or more suitable takes over the main job. Some patterns work well because the lighter or older piece is better suited to the lighter task:

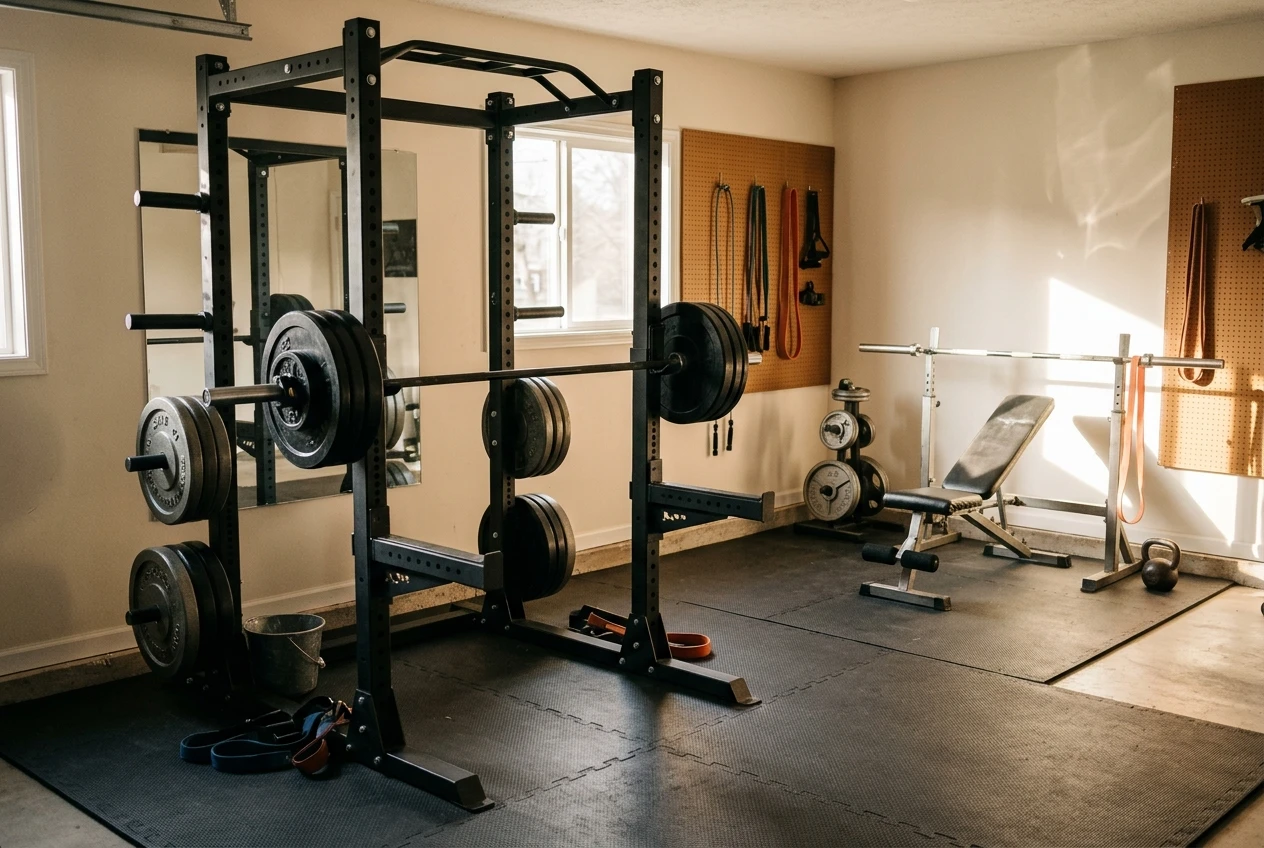
A tidy home gym split into two zones in warm morning light: a heavy squat rack with a loaded barbell in the foreground, and an older lighter bench and stand in a side corner holding a small stack of plates, a light band and a lighter kettlebell ready for accessory work.
Every Home Gym Upgrade Should Give Your Old Gear a New Job 59
  • A lighter kettlebell that stops being your pressing or swinging bell can move to warm-ups, goblet squats, halos and get-up practice.
  • Smaller plates that no longer matter for your top sets stay useful for warm-up ramps and small jumps between heavy attempts.
  • A lighter resistance band that no longer challenges your pull-aparts can prepare your shoulders before pressing.
  • An older bench or stand can serve as a station for accessory work, so your main rack stays free during heavy sessions.

Not every piece has a sensible second job. If you cannot name one, that is useful information: either sell it before it takes up space, or reconsider whether the replacement is worth the price difference.

Warm-ups are the easiest second job to assign. A kettlebell warm-up built around today’s lift uses bells that are far lighter than your working loads, which means the bells you outgrew for training are the right weight for it.

The kettlebell layer: how your bells stay useful as barbell numbers climb

Kettlebells are the clearest case of a piece that changes role instead of retiring. A bell that was your working weight for swings or presses becomes a warm-up tool when you buy a heavier one, and the heavier bell becomes the main tool while the older one takes on the finisher or the lighter practice work.

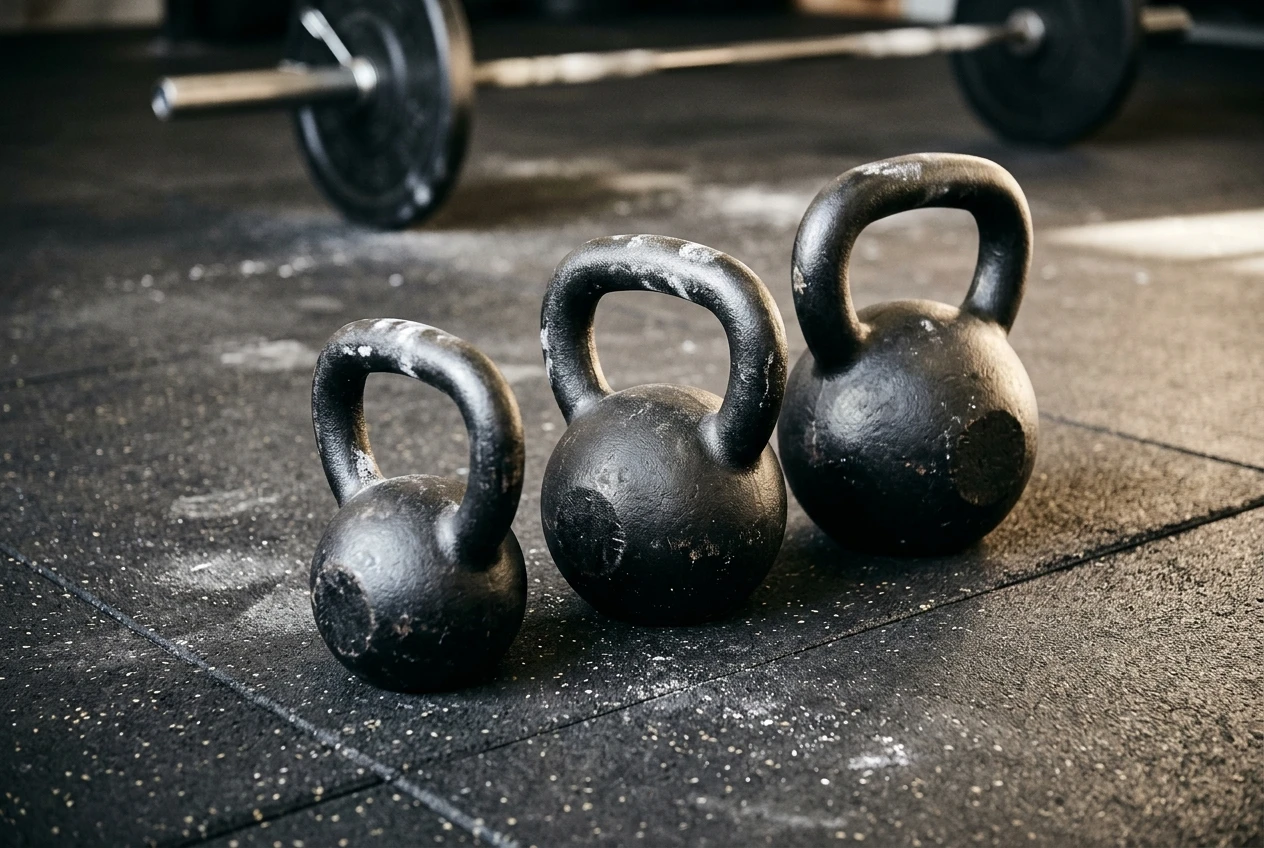
Three black cast-iron kettlebells of clearly stepped sizes lined up on a rubber gym floor from lightest to heaviest, with a chalk-dusted barbell loaded with plates blurred in the background, side light picking out the handles.
Every Home Gym Upgrade Should Give Your Old Gear a New Job 60

Because barbell strength tends to climb faster than what a single kettlebell can challenge, the bells you own end up spread across several roles. A rough way to lay it out:

  1. Heaviest bell: the main job is the heavy swing, clean or carry work that needs real load. It gets used when you are fresh.
  2. Middle bell: the main job is higher-volume work, such as swing density sets or presses. As you buy a heavier bell, this one becomes the accessory and finisher weight.
  3. Lightest bell: warm-ups, mobility drills, technique rehearsal and the early rounds of a flow.

When you buy the next bell, it is worth checking that it fills a gap in this layout. A bell only slightly heavier than your current one may not change what you can do, while one that creates a clear step in weight gives each lighter bell a distinct role.

Kettlebell work also fits around barbell training without displacing it. A kettlebell flow can serve two jobs in a powerlifting split: a finisher after accessories and a lower-intensity session between heavy days. Your lighter bells are well suited to the second of those, since the point is to move without adding fatigue to your next heavy session.

Check that the new piece fits what you already own before you buy it

A purchase that solves the trigger can still fail on fit. Before you pay, check the new piece against the rest of the gym on five points:

  • Space. Measure the area it will occupy and the area you need around it to use it. A bar needs clear room on both sides for loading and for a failed rep.
  • Compatibility. Check that plates fit the sleeve diameter, collars fit the bar, and attachments fit the rack’s hole size and spacing. Specifications differ between makers, so read the product page rather than assuming.
  • Load path. If the piece raises the weight you can lift, check that everything it touches, including the floor, bench and rack, is rated or built for that load.
  • Overlap. Ask which piece it makes redundant, and what that piece’s second job will be. If the answer is “nothing,” the purchase may be duplicating something you have.
  • Surface. Heavier loads and more dropped weights increase the wear on your floor. The home gym flooring piece shows how to work out what that wear costs you.

Price matters at this stage too, but in terms of how long the piece will do its job. A cheaper item that you will replace soon creates a second purchase for the same trigger. Weighing the minutes cheap gear costs you against the price of better gear is a more reliable way to compare than looking at the sticker price alone.

Keep an upgrade log that ties each purchase to a lift trigger

A log makes the system visible. After a few purchases you can see whether each one solved what it was bought for, and you have a record of what every piece is now doing. A simple log needs only a handful of fields per entry:

A worn paper notebook open on a workbench in a home gym, filled with handwritten lines, next to a tape measure, a pen, a chalk-stained loading pin and a new rack upright bolt, in warm desk-lamp light.
Every Home Gym Upgrade Should Give Your Old Gear a New Job 61
  • Date and item bought.
  • The lift and the ceiling that triggered it. Copy the wording from your ceiling notes.
  • The piece it replaced and that piece’s new job.
  • A review date, a few weeks after purchase, when you check whether the ceiling moved.
  • Outcome. Did the lift progress? If not, was the cause something other than the equipment?

An example entry, using a made-up case: “Squat top set: safeties on the old stand bent under a missed rep and I stopped trusting them. Bought a sturdier rack. Old stand moves to the accessory corner for split squats and pin work. Review in four weeks.”

The review column is the one that saves the most money. If the lift did not improve after the purchase, the ceiling was probably not about equipment, and that is worth knowing before you spend on the next item. The log also lets you catch a pattern: if several entries end with “no change,” your shopping decisions may be coming from impatience rather than from your training.

When the right upgrade is no purchase at all

Sometimes the ceiling you wrote down turns out not to be a gear problem. Checking this first is the cheapest upgrade available, and it protects the budget for the times gear really is the limit.

Common cases where nothing needs buying:

  • A stalled press that may be a range or control problem. Testing for each before you buy mobility gear is covered in the guide to a stalled overhead press. The test costs a few minutes and may point to a drill instead of a product.
  • A top set that fails at the same rep each week. Adjusting the rep scheme, adding a back-off set or taking an extra rest day may move it.
  • A kettlebell that feels too light. Slowing the tempo, adding pauses, changing to single-arm work or extending the set time all increase the difficulty with the bell you already own.
  • A cramped gym. Reorganizing so that the second-job pieces sit away from the main lifting area often fixes the problem without a larger room or a new storage unit.

When you do decide that nothing needs buying, write that decision in the log with the date. It builds a record that supports the next time your gut says a purchase is due, and shows how many of the past urges turned out to be programming problems.

A gym built this way ends up with fewer pieces than one built by impulse, and each of them has a role you can state. The next purchase waits for a ceiling you have written down, and the piece it replaces goes on to do lighter work.

If kettlebells are part of your gym, see the kettlebell.monster programs for ways to keep the bells you own working as your barbell strength grows. Affiliate link: I may earn a commission if you buy through it, at no extra cost to you.

Pick Your Next Accessory Cycle by How Your Joints Felt Last Cycle, Not by Your Top Set Alone

Most lifters pick accessory exercises by what they feel like doing, or by whatever fixes the weakest-looking top set.

Most lifters pick accessory exercises by what they feel like doing, or by whatever fixes the weakest-looking top set. Both ignore the other half of the question: how your joints held up while you trained. How to choose accessory exercises for joint health and strength comes down to scoring the cycle you just finished on two numbers, then letting those numbers pick one of three accessory cycles.

This is general training guidance for people who already squat, press and deadlift. It is not medical advice, and the last section covers when to stop picking exercises and have a joint assessed.

Score Your Last Cycle on Two Numbers: Joint Comfort and Main Lift Progress

Give the cycle you just finished a score from 0 to 2 on each of two questions. Do it from your training log or your memory of the last few weeks, before you look at any exercise list.

Joint comfort

  • 2: No joint complaints beyond normal warm-up stiffness.
  • 1: Occasional aches in the knees, hips, shoulders, elbows or wrists that cleared within a day.
  • 0: Aches that lingered, showed up in warm-ups, or changed how you performed a lift.

Main lift progress

  • 2: Your squat, press and deadlift mostly moved: a heavier top set, or more reps at the same weight.
  • 1: Some lifts moved and others stayed flat.
  • 0: Most main lifts stayed flat or went down.

Now read the pair:

  • Comfort 2, progress 0 or 1: run a load-building cycle.
  • Comfort 0 or 1, progress 2: run a tolerance cycle.
  • Both 1, or different lifts or joints telling opposite stories: run a split.
  • Both 0: run a tolerance cycle, because irritated joints get fixed before they get loaded harder. If the aches persist, read the last section.
  • Both 2: the accessory work is doing its job. Repeat it with small changes.

A single number is the trap. A top set that went up tells you nothing about the elbow that has hurt since week three, and a cycle with perfectly happy joints and no progress tells you the accessories were too easy to matter.

If Joints Were Fine and Lifts Stalled: A Load-Building Accessory Cycle

When comfort scored 2 and progress did not, your joints have room to take more work. The accessories should now get heavier and closer to the main lifts’ weak points.

Start by naming where each stalled lift slows down. A deadlift that stalls off the floor and one that stalls at lockout need different help. A press that dies just off the chest differs from one that dies overhead. If you can’t say where the bar slows, film a heavy set from the side and watch it.

A heavy barbell sits on the floor of a home gym, just off the ground at the start of a deadlift. A lifter's hands in chalk grip the knurling, and a tablet propped on a rack nearby shows a side-on view of the setup. Cool grey light falls across black plates and a rubber mat.
Pick Your Next Accessory Cycle by How Your Joints Felt Last Cycle, Not by Your Top Set Alone 67

Then pick two or three accessories that train that position with real load:

  • Squat stalls out of the hole: front squats, pause squats with a lighter bar, or leg press.
  • Deadlift stalls off the floor: deficit deadlifts or heavy barbell rows.
  • Deadlift stalls at lockout: Romanian deadlifts, hip thrusts, or rack pulls.
  • Press stalls off the chest: close-grip bench press or dumbbell press.
  • Press stalls overhead: push press holds, heavy triceps work, or upper-back rows.

Work these in a moderate rep range, roughly 6 to 10 reps, and add weight or a rep whenever you complete all your sets with clean form. Stop each set a rep or two before failure. Accessories taken to failure leave you too tired for the main lift that is supposed to benefit from them.

Keep your joint comfort scoring going during this cycle. A load cycle is only appropriate while the comfort score stays at 2. If it drops to 1 for two weeks in a row, treat that as a cue to move to the next cycle’s approach early.

If Lifts Moved but Joints Complained: A Tolerance Cycle With Tempo, Range and Single-Side Work

Strength went up and something hurts. The main lifts probably earned their progress, so leave them alone. Change the accessories so that the tissue around the complaining joint gets more practice at lower loads.

Three tools do most of the work.

Tempo. Lower the weight for three seconds, pause briefly at the bottom, then lift. Slow lowering makes you control the joint through positions where you would normally let momentum carry you. Because tempo reps are harder, the load needs to be lighter than your usual accessory weight.

Range. Use the full range you can control, and train the end positions deliberately. A split squat with a slight pause at the bottom, or a dumbbell press lowered until your upper arm is level with the bench and no further than you can hold, builds strength where the joint is actually used. If a range hurts, shorten it to the pain-free part and widen it over the cycle.

A lifter holds the bottom of a slow split squat with a single kettlebell in the goblet position. The front knee tracks over the toes, and a small pause is visible in the still, controlled posture. The setting is a bright garage gym with warm side light and a wooden floor.
Pick Your Next Accessory Cycle by How Your Joints Felt Last Cycle, Not by Your Top Set Alone 68

Single-side work. Split squats, single-leg Romanian deadlifts, single-arm rows and single-arm presses show you the difference between sides. If your left knee drifts inward and your right does not, a two-legged squat hides that behind the stronger side. Work the weaker side first and match its reps on the other side.

Keep the loads modest and the reps controlled, around 8 to 12 per side for most movements. Pain during a set is information: lower the load or shorten the range until the movement is comfortable, rather than pushing through.

If the complaint is in your lower back, two of the pieces on this site go deeper into the cause: your lower back quitting before your legs on heavy squats and matching a swing fault to the accessory that trains it.

If Both Are Mixed: Run Joint Work and Load Work in Separate Blocks

A mixed score means one answer will not fit everything. Maybe your squat moved and your knees feel fine, while your press stalled and your shoulder has been irritated. Treating all of it with one cycle shortchanges one of those lifts.

Split the cycle into two blocks and give each block one job.

  1. Joint block. Pick the lift or joint that complained and apply tolerance work to it: tempo, controlled range, single-side movements. Keep the load light enough that the joint feels fine during and after.
  2. Load block. Pick the lift that stalled with healthy joints and apply load-building accessories to it.

You can arrange the blocks two ways. One is by time: the first half of the cycle is the joint block for everything, the second half is the load block. The other is by lift: for the whole cycle, the lift that complained gets tolerance accessories while the stalled lift gets load accessories. By lift is simpler to follow when the two problems sit in different parts of the body. By time is simpler when the same joint is involved in everything, such as shoulders that bother both pressing and deadlift lockout.

Whichever you pick, do not put heavy accessory loading and tolerance work on the same joint in the same block. That blurs the cause when a score changes.

What to Change Between Cycles and What to Keep So You Can Tell What Worked

You can only learn from a cycle if most of it stays the same. Change the accessory selection, and keep the rest:

Keep the same

A open paper training notebook lies on a gym bench beside a pencil and a chalk-dusted kettlebell. Short handwritten lines, one per session, fill the page. Morning window light comes in from the side, with a barbell rack blurred in the background.
Pick Your Next Accessory Cycle by How Your Joints Felt Last Cycle, Not by Your Top Set Alone 69
  • Main lift programming: the rep scheme, the weekly frequency and the progression rule.
  • The order of the session: main lift first, accessories after.
  • Your scoring method: the same 0 to 2 questions, answered the same way.
  • Warm-up routine, so a change in comfort doesn’t trace back to a different warm-up.

Change

  • The two or three accessories that match your cycle type.
  • Their rep ranges and loads, according to the cycle.
  • At most one new element at a time within a block, such as adding tempo to one movement before adding it to all of them.

Write one line after each session: the joint comfort score for that day and whether the main lift felt better or worse than the last session. Over four to eight weeks those lines show a pattern that memory will not. If a cycle ends and you can’t say why the scores moved, too much changed at once.

Where Kettlebell Accessory Work Fits in Each Cycle

A kettlebell is a light, adjustable-by-choice tool that loads positions differently from a barbell, which makes it useful in all three cycles.

Three kettlebells of different sizes stand in a row on a gym floor, with a barbell loaded with plates behind them. The kettlebells are matte black, red and grey. Soft overhead light creates gentle shadows on the concrete floor.
Pick Your Next Accessory Cycle by How Your Joints Felt Last Cycle, Not by Your Top Set Alone 70
  • Load cycle: use heavier kettlebell work as a supplement to the barbell accessories: heavy swings for hip drive, heavy goblet squats, or suitcase carries for trunk and grip strength. Keep the volume modest so it does not eat into recovery for your main lifts. The piece on where kettlebell sessions go in a powerlifting week covers placement.
  • Tolerance cycle: this is where a kettlebell is most useful. Single-arm presses, single-arm rows, goblet squats with a pause, and slow kettlebell Romanian deadlifts give you tempo and single-side work with weights that are easy to scale down.
  • Split cycle: use the kettlebell in the joint block for the lift that complained, and keep barbell accessories for the load block.

Before you add load to any kettlebell position, check that you can get into it comfortably with an empty hand. Five mobility checks to pass first lists what to test.

Warning Signs That Mean Stop Choosing Accessories and Get the Joint Assessed

An accessory cycle can manage ordinary training soreness and the mild aches that come with lifting. It cannot diagnose or treat an injury. See a qualified clinician, such as a physician or a physical therapist, if you notice any of the following:

  • Pain that persists or worsens over several weeks even after you reduce load and change exercises.
  • Pain at night or at rest, or pain that wakes you.
  • Numbness, tingling or weakness in an arm or leg.
  • Swelling, warmth or visible change around a joint.
  • A joint that catches, locks, gives way or feels unstable.
  • Sharp pain at one specific point in a movement every time you reach it.
  • Pain that began after a fall, a collision or a single bad rep.

If a joint scores 0 on comfort two cycles in a row, treat it as persistent. At that point the next step is an assessment, not a different set of accessories. Tell the clinician what you lift and how the pain behaves, and ask what you can keep training while it is looked at.

Follow Along on Screen

If you want kettlebell accessory work you can follow on screen during a tolerance or split cycle, take a look at kettlebell.monster (affiliate link: the site may earn a commission if you buy through it), including the Samsung Tizen TV workout app (affiliate link: the site may earn a commission if you buy through it).

Add Up the Minutes Your Cheap Gear Steals, Then Weigh Them Against the Price of Replacing It

Is quality home gym equipment worth it? The price tag cannot answer that by itself, because worn or cheap gear charges you in minutes: re-taping a grip…

Is quality home gym equipment worth it? The price tag cannot answer that by itself, because worn or cheap gear charges you in minutes: re-taping a grip, re-cinching a belt, shoving a rack back into position, redoing a set that stopped for a reason that had nothing to do with your legs. Most lifters never add those minutes up, so the patching never gets weighed against the cost of replacing anything.

This article gives you a two-week log that does the adding. You turn it into minutes per year and a cost per lost minute, then rank your replacements by how many minutes each one gives back.

A failed set costs more than the rep you missed

If you want the price of one failed top set, the cheap lifting straps piece works through it. A single piece of gear is only part of the picture, though. The same worn grip tape, stretched belt or wobbling rack interrupts your training in small ways on most days, and none of those interruptions feels large enough to count.

Each interruption costs more than the seconds it takes to fix. You stop, fix the problem, and then your rest period runs long, your focus drops, and the next set starts colder than planned. When the interruption ends a set early, you also lose the training stimulus that set was supposed to give you. That second cost does not fit into minutes, so keep it in mind as a tie-breaker later.

A home gym corner in late afternoon light: a power rack with one upright visibly shifted off its rubber floor mat, a chalk-dusted barbell loaded with plates resting in the J-hooks, a peeling strip of black grip tape on the pull-up bar, and a worn leather belt lying on the floor beside it.
Add Up the Minutes Your Cheap Gear Steals, Then Weigh Them Against the Price of Replacing It 76

Because the interruptions are small and scattered across different pieces of gear, they are hard to judge from memory. Writing them down for two weeks gives you real numbers to work with.

Log every gear interruption for two weeks, and what to write down each time

Two weeks covers enough sessions to catch the problems that only show up on certain lifts or certain days. Keep a note on your phone or a sheet of paper in the gym and write an entry every time the gear interrupts you, however minor.

A small spiral notebook open on a plywood shelf in a garage gym, with a pencil lying across it, beside a roll of white athletic tape, a pair of cotton lifting straps and a chalk-smudged phone; barbell plates blurred in the background under warm overhead light.
Add Up the Minutes Your Cheap Gear Steals, Then Weigh Them Against the Price of Replacing It 77

Record these six things for each entry:

  • The item. Name the specific piece: the chalk-stained grip tape on the pull-up bar, the belt, the left upright of the rack, the bench, the straps, the shoes.
  • What happened. Use plain words: grip tape peeled, belt loosened mid-set, rack walked across the floor, bar collar slipped.
  • The lift and load. A wobble at 60 percent of your working weight tells you something different from the same wobble at a top set.
  • Minutes lost. Count the repair time plus any rest you added because of it. A tape job done during a normal rest period costs nothing in time. A tape job that stretches a two-minute rest to four costs two minutes.
  • What happened to the set. Finished as planned, finished with lower load or fewer reps, or aborted.
  • The patch. Write what you did to get going again, such as retaped, tightened, shimmed, switched equipment, or nothing.

Do not edit the log as you go. If a missed rep looks like your fault rather than the gear’s, write it down anyway and sort it later. Deciding in the moment which entries count will bias the numbers toward whatever you already believe about your equipment.

Turn the log into minutes per year and a cost per lost minute

At the end of the two weeks, total the minutes lost for each item. Then multiply each total by 26 to get minutes per year, since a year holds 26 two-week blocks.

Here is an example with made-up numbers. Replace them with yours.

  • Grip re-taping: 6 times at 2 minutes each, 12 minutes per fortnight, 312 minutes per year
  • Belt re-cinching: 9 times at 1 minute each, 9 minutes, 234 per year
  • Rack re-positioning: 3 times at 4 minutes each, 12 minutes, 312 per year
  • Aborted sets: 2 sets at 10 minutes each (extra warm-up and rest to redo them), 20 minutes, 520 per year

That adds up to 53 minutes per fortnight and 1,378 minutes per year, a little under 23 hours.

Next, put a value on a minute. Pick whichever of these fits your situation:

  1. Your hourly earnings divided by 60, if your training time competes with paid work.
  2. Your monthly gym membership, or what the same training would cost you elsewhere, divided by the minutes you train in a month.
  3. A figure you choose yourself, if neither of those fits. Use the same one every time you run this, so the comparison stays honest.

At a value of $20 an hour, a minute is worth about 33 cents, and the example’s 1,378 lost minutes come to roughly $459 a year. That figure is the yearly cost of keeping the current gear, and it is the number to hold against any replacement price.

The aborted sets need one more step. A set that ended early has a cause, and the cause is usually one of your other items: the grip tape, the belt, the rack. Reassign those minutes in your log to the item that ended the set. If the cause is unclear, hold them in their own line for the next section.

Sort the failures: gear problem or technique and programming problem

Not every entry in the log belongs to the equipment. Some of them are you, and buying better gear for a technique problem takes your money and leaves the interruption in place. Run each entry through three questions.

Does it repeat on light loads? A grip that fails at a top set but holds through every warm-up is probably fatigue. A grip that slips on the empty bar is a worn surface or loose tape. If you are unsure which one you have on deadlifts, this set-by-set test for grip failure separates the two.

A close-up of worn gear laid out on a rubber gym floor for inspection: a belt with frayed stitching, a flattened strap with a cracked edge, and a barbell with smooth, worn knurling, each placed in its own patch of side light, next to a pair of intact new collars for contrast.
Add Up the Minutes Your Cheap Gear Steals, Then Weigh Them Against the Price of Replacing It 78

Does it follow the item or the lift? If one belt loosens on squats, deadlifts and presses, the belt is the likely cause. If it only loosens on one lift, look at your bracing and positioning on that lift first.

Is the wear visible? Frayed stitching, a flattened strap, a cracked handle, a rack upright that rocks when you push it: those are gear failures you can see and point at. If the item looks intact and the problem only shows up under certain conditions, treat it as unproven.

Sort every entry into one of three groups: gear, technique or programming, and unclear. Total each group’s minutes. Only the gear group goes into the replacement ranking. The technique group needs coaching, a deload, or a change to how you structure your sessions. The unclear group gets another log week after you change one variable, such as new tape on the bar while everything else stays the same.

A caution on the unclear group: it will be tempting to file everything there so you can avoid the sorting. If most of your minutes land in it, that is a sign to run the log again with more careful entries rather than to buy anything.

Replace in order of minutes recovered, not by price tag

With the gear group totaled, rank items by minutes per year, highest first. That order is your replacement list. The most expensive item and the most annoying item often turn out to be different from the one losing you the most time.

For each item, look up the price of a replacement that fixes the specific failure you logged. Then divide the price by the minutes you expect to get back in a year. In the example, a belt costing $40 that ends all 234 belt minutes comes to about 17 cents per recovered minute in the first year. A $300 rack upgrade that recovers 312 minutes comes to about 96 cents per minute in the first year, though it should last well past one year, so divide again by the years you expect to use it if that is what you want to compare.

Use the figures like this:

Three items lined up on a gym bench from left to right: a new thick leather lever belt, a box of folded rack hardware with a steel base plate, and a roll of fresh grip tape, set against a plain concrete wall in cool daylight.
Add Up the Minutes Your Cheap Gear Steals, Then Weigh Them Against the Price of Replacing It 79
  • Rank first by minutes recovered per year.
  • If two items are close, buy the one with the lower price per recovered minute.
  • Compare each price per minute against your own value per minute from the previous section. If the replacement costs less per recovered minute than a minute is worth to you, it pays for itself in time. If it costs more, the log is telling you to wait.
  • For ties that remain, take the item that causes aborted sets. An aborted set loses training stimulus as well as time, and the minutes figure does not capture that.

Buy one thing, then run the log for another two weeks. The numbers will shift, because a wobbling rack can hide a belt problem and a fixed grip can expose a bracing problem. If you plan a longer sequence of purchases, a five-year home gym plan where every upgrade has to be earned fits well with this approach, since the log supplies the evidence each upgrade needs.

When the cheap option is still the right call

The log does not always point toward spending. Several results mean keeping what you have.

The item costs you almost nothing. If your cheap collars slipped once in two weeks and fixing it took ten seconds, a replacement would have to cost very little to be worth it. The yearly minutes will tell you.

The failure is cosmetic. A scuffed bench pad, faded paint, or a peeling logo does not interrupt a set. Leave them alone.

A better item would not fix the cause. If the problem is technique, programming or fatigue, a premium version of the same gear will fail the same way. This is why the sorting step comes before the ranking.

A cheap fix works. Fresh tape on a bar, a shim under a rack foot, or a new set of inexpensive collars might remove most of an item’s lost minutes. If the repair is cheaper than a replacement and the log shows the problem staying fixed over the next two weeks, it was the right call.

The numbers are too small to rank. If your total for the fortnight is only a few minutes, your gear is not the thing limiting your training, and you can spend the budget on something else.

So, is quality home gym equipment worth it? For the specific items where your log shows large, repeated, gear-caused losses and a replacement costs less per recovered minute than a minute is worth to you, yes. For the rest, the log gives you a reason to keep what you have.

Run the log before your next purchase

Before you buy anything for your home gym, keep the log for two weeks, total it, sort it, and rank it. The ranking will often be different from the list you had in mind, and in some cases it will show that you do not need to buy anything yet.

If the log shows that the gap is a kettlebell or a guided session, for example you have no good option for finishers or conditioning work and your sessions keep stalling for that reason, take a look at kettlebell.monster. The offer includes kettlebell training programs and a workout app for Samsung Tizen TVs. Affiliate disclosure: if you buy through this link, I may earn a commission.

Your Swing Grip Can Fail in Three Different Places, and Each One Needs a Different Block

Most lifters who swing for time describe the same moment: the hips and legs could keep going, but the hands start to open.

Most lifters who swing for time describe the same moment: the hips and legs could keep going, but the hands start to open. That one complaint covers at least three different problems. Kettlebell swing grip fatigue can come from tired forearm muscles, from skin that has had enough of the handle, or from a hand that cannot hold the handle steady as the bell changes direction. They feel alike in the moment and respond to different training.

If you have already decided to give grip its own block, the how-to is in this guide to giving your kettlebell grip its own block. This piece helps you choose what goes in that block.

What Your Hand Is Actually Doing Through a Long Swing Set

A swing asks the hand to do something different at each point of the arc. The load on the handle is not constant, and the hand is not simply squeezing for the whole set.

In most swings the bell pulls hardest on the hand as it falls and passes back between your legs. The hand has to hold the handle against the bell’s weight plus its momentum. At the top the bell is moving slowest and is close to weightless, so the demand changes from pulling force to control: the hand has to keep the handle from rolling or shifting as the bell turns over and starts to drop.

Three things are working in the hand at once:

  • The muscles in the forearm that close the fingers produce the squeeze.
  • The skin of the palm and fingers takes friction and pressure from the handle on every rep.
  • The hand’s overall hold keeps the handle in place under sudden changes in the direction of pull.

Any of the three can end your set first. A hanging routine only addresses the first, which is why it helps some lifters and does little for others.

Failure Point One: The Forearm Muscles That Close Your Fingers

The muscles that close your fingers sit in the forearm, and a long swing set loads them for minutes at a time. This is endurance work. The muscles are not hitting a maximum, but they are being asked to hold a moderate contraction repeatedly with little rest, and eventually they tire.

The signs are fairly clear. The forearms feel tight or full and the fingers start to uncurl on the backswing. The handle sits lower in the hand because you can no longer keep the grip closed. Your palms feel fine, and the handle has not shifted or slipped. The muscles just stopped producing the squeeze.

Close-up of a forearm and hand gripping a black kettlebell handle at the side of the body, fingers beginning to uncurl, tendons and forearm muscles tense, in a dim gym with cool side light.
Your Swing Grip Can Fail in Three Different Places, and Each One Needs a Different Block 85

Because the limit is time under tension rather than peak force, the training that fits it is also measured in time. Our piece on grip endurance training for lifters makes the case for working in minutes rather than reps, and that logic applies directly here. A swing set lasts minutes, so the grip work that transfers to it should too.

Work that fits this failure point:

  • Timed holds of a kettlebell by the handle at your side, in several rounds with short rests.
  • Farmer-style carries with a kettlebell in each hand or one hand at a time.
  • Dead hangs from a bar, if you have one, for repeated timed rounds.

The common feature is a closed hand under steady load for long enough to tire the finger flexors. Rest intervals should be short enough that the forearms never fully recover between rounds.

Failure Point Two: The Skin and the Handle, and Why Sore Hands Aren’t Weak Hands

Sometimes the hand quits because it hurts, not because it is out of strength. Swings drag the handle across the skin on every rep. The friction builds heat, and the pressure lands on the same spots each time, usually the pads at the base of the fingers and the creases where the fingers meet the palm.

A hand that ends a set because of a hot spot, a blister, or a torn callus is limited by skin, and forearm work will not fix that. A lifter with strong forearms and tender palms will still put the bell down early. The reverse also happens: tough hands with tired forearms will keep gripping until the muscles give out.

An open palm held up beside a kettlebell handle, showing reddened pads at the base of the fingers and a raised callus edge, with a small metal callus file and a chalk block on a worn wooden bench in warm light.
Your Swing Grip Can Fail in Three Different Places, and Each One Needs a Different Block 86

The signs of a skin limit:

  • A burning or hot feeling in the palm that builds over the set.
  • Pain in specific spots rather than a general forearm burn.
  • Your grip still feels strong when you stop, but you do not want the handle in your hand.
  • Visible redness, raised callus edges, or torn skin afterward.

Skin responds to different management than muscle does:

  • Keep calluses smooth and low. A thick, raised callus catches and tears, so file or trim it rather than leaving it to build up.
  • Use chalk if your hands get damp, since moisture changes how the handle moves against the skin. Some lifters prefer a dry hand and others find a bit of chalk helps. Which suits you is your own call.
  • Check the handle itself. A rough or poorly finished handle will wear skin faster than a smooth one, and a bell with a thicker handle loads the skin differently.
  • Raise your swing volume gradually. Skin adapts over weeks of repeated exposure, and a sudden jump to long sets will outrun it.

The block for this failure point is mostly volume management and hand care. A skin problem is a reason to adjust how quickly you add swing time, not a sign that your grip is weak.

Failure Point Three: Holding On at the Top of the Swing Versus Holding On at the Bottom

The third limit is the hand’s ability to hold the handle in place against the changing pull of the bell. Lifters often mistake it for forearm fatigue, though it can show up while the forearms still have plenty left.

The bottom of the swing is where the bell’s pull on the hand is highest. If the hand is the limit here, you feel the handle trying to drag out of your fingers as the bell drops back between your legs. You may regrip, open the hand slightly to recover, or notice the bell swinging out of line because the grip is giving way under load.

The top is a different kind of demand. The bell is almost weightless, so the hand has to keep control as the bell turns over and begins to fall. If the handle shifts in your hand here, you have to re-catch it on the way down, and that wastes energy and makes the backswing worse. A hand that opens too much at the top then has to clamp down hard at the bottom, which accelerates fatigue.

So the question is where the handle moves. It might slip at the bottom under heavy pull, or it might shift at the top because you let the hand go slack. The first points to a hand that cannot resist peak load. The second points to control, meaning how you hold the handle through the weightless moment.

A lifter mid-swing at the top of the arc, one hand loosely holding a kettlebell that hovers weightless at chest height, with a faint blur showing the arc behind it, in a bare garage gym with muted grey and orange tones.
Your Swing Grip Can Fail in Three Different Places, and Each One Needs a Different Block 87

Work that fits this failure point:

  • Heavier holds and carries than your swing bell, in short rounds, to train your hand against a pull greater than the one your swing produces.
  • Heavy swings in shorter sets, so the hand meets peak pull while still fresh.
  • One-handed swings with a deliberate, even grip through the whole arc, which makes a slack hand obvious.

A Quick Test to Find Which Limit You Hit First

You can sort out your limit across two or three swing sessions with no equipment beyond your usual bell. Swing until your hands force you to stop, and then answer a few questions straight away, while the sensation is fresh.

  1. Where did it hurt or fail? If the forearms burned and the fingers uncurled, suspect the finger-closing muscles. If one patch of palm burned or stung, suspect skin.
  2. Did the handle move? If it slid at the bottom of the swing, the problem is resisting peak pull. If it shifted at the top, the problem is control.
  3. Could you still hold the bell? Pick it up and hold it at your side right after you stop. If you can hold it for a good while longer, finger endurance is probably not the limit, and skin or handle control is the more likely cause. If it drops almost immediately, the forearm muscles are spent.

Repeat the check across a few sessions. One bad day, such as a hot room or damp hands, can mislead you. A pattern across several sessions is more reliable.

If you also deadlift and find your grip fails there, our article on grip fatigue during heavy deadlifts gives a set-by-set way to separate technique from fatigue. The same logic applies here.

Matching the Block to the Limit: What to Train, How Long, and Where It Sits in Your Week

Once you know your limit, the block can be built around it. These are starting points to adjust, not fixed prescriptions.

Three kettlebells of different sizes lined up on a gym floor beside a pull-up bar and a pair of farmer carry handles, with a handwritten weekly planner notebook open nearby, in soft morning light.
Your Swing Grip Can Fail in Three Different Places, and Each One Needs a Different Block 88

If your forearms are the limit

Train timed holds or carries for several rounds with short rests, aiming to accumulate total hold time that gradually exceeds the length of your swing sets. Two sessions per week is a reasonable place to begin. Put them after your swing work or on a separate day, so your forearms are not already tired when the swings begin. Increase total time before you increase load.

If your skin is the limit

Skip extra hanging and spend the effort on hand care and volume progression. Keep calluses filed, decide on a consistent chalk habit, and add swing minutes in small steps. Allow a day or two between long swing sessions so the skin can recover. If a tear or blister opens, rest the hand until it has healed. Training through broken skin only extends the problem.

If your hand cannot resist the pull

Use heavier loads for shorter times. Short rounds of holds or carries with a bell heavier than your swing bell train the hand against a stronger pull. Add some sets of heavy swings, performed while you are fresh, so the hand meets peak pull early in the session. If the shifting happens at the top, include one-handed work and focus on keeping the same grip all the way through the arc.

Where it sits in your week

Place grip work where it will not wreck the session it supports. Heavy hand work right before a long swing session leaves you with tired hands for the main event. Putting it after swings, or on a day when swings are light, keeps the quality of your main work intact. Start with one or two short grip sessions a week and keep what you add small enough that you can still swing well the next day.

Reassess every few weeks by repeating the test above. The limit you hit first can change as one weakness improves, and the block should change with it.

If you want a timed swing session to run your grip block alongside, look at kettlebell.monster. Affiliate link: I may earn a commission if you buy, at no extra cost to you.